Sharp DM-2000 (serv.man5) Service Manual ▷ View online
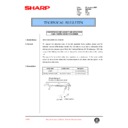
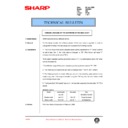
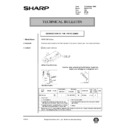
4) Loosen the set screw of the scanner drive pulley which is not in
contact with No. 2/3 mirror base unit positioning plate.
5) Without moving the scanner drive pulley shaft, manually turn the
scanner drive pulley until the positioning plate is brought into con-
tact with No. 2/3 mirror base unit, then fix the scanner drive pulley.
tact with No. 2/3 mirror base unit, then fix the scanner drive pulley.
6) Put No. 2/3 mirror base unit on the positioning plate again, push
the projections on the front frame side and the rear frame side of
the copy lamp unit to the corner frame, and tighten the wire fixing
screw.
the copy lamp unit to the corner frame, and tighten the wire fixing
screw.
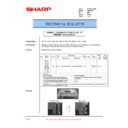
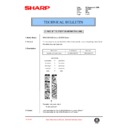
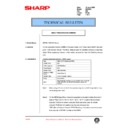
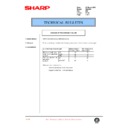
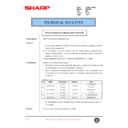
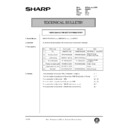
(3) Main scanning direction (FR direction) distortion adjustment
This adjustment must be performed in the following cases:
● When the mirror base drive wire is replaced.
This adjustment must be performed in the following cases:
● When the mirror base drive wire is replaced.
● When the lamp unit, or No. 2/3 mirror holder is replaced.
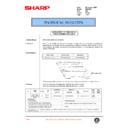
● When a copy as shown is made.
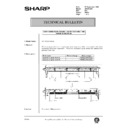
1) Set A3 (11"
× 17") white paper on the original table as shown
below.
2) Open the original cover and make a normal (100%) copy.
3) Measure the width of the black background at the lead edge and
3) Measure the width of the black background at the lead edge and
at the rear edge.
If the width (La) of the black background at the lead edge is equal
that (Lb) at the rear edge, there is no need to execute the follow-
ing procedures of 4)
that (Lb) at the rear edge, there is no need to execute the follow-
ing procedures of 4)
∼ 7).
4) Loosen the mirror base drive pulley fixing screw on the front frame
side or on the rear frame side.
● When La < Lb
Turn the mirror base drive pulley on the front frame side in the
arrow direction A. (Do not move the mirror base drive pulley
shaft.)
arrow direction A. (Do not move the mirror base drive pulley
shaft.)
● When La > Lb
Turn the mirror base drive pulley on the front frame side in the
arrow direction A. (Do not move the mirror base drive pulley
shaft.)
arrow direction A. (Do not move the mirror base drive pulley
shaft.)
5) Tighten the mirror base drive pulley fixing screw.
Lb
La
Original
Copy
Paper exit
direction
direction
Fit the paper edge and
the glass holding plate edge.
the glass holding plate edge.
A3 (11" x 17") white paper
Glass holding plate
Allow a little space.
Paper exit direction
La: Lead edge black background width
Lb: Rear edge black background width
Lb: Rear edge black background width
A
B
Rear side
Front side
DM-2000
6 – 5
<Adjustment specification>
La = Lb
La = Lb
6) Execute the main scanning direction (FR) distartion balance ad-
justment previously described in 2) again.
(4) Sub scanning direction
(scanning direction) distortion adjustment
When there is no skew copy in the mirror base scanning direction and
there is no horizontal error (right angle to the scanning direction), the
adjustment can be made by adjusting the No. 2/3 mirror base unit rail
height.
Before performing this adjustment, be sure to perform the horizontal
image distortion adjustment in the laser scanner section.
This adjustment must be performed in the following cases:
● When the mirror base wire is replaced.
● When the copy lamp unit or No. 2/3 mirror unit is replaced.
● When the mirror unit rail is replaced or moved.
● When a following copy is made.
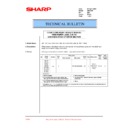
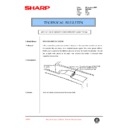
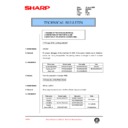
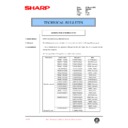
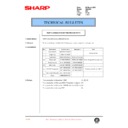
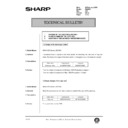
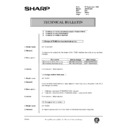
1) Making of a test sheet
Make test sheet by drawing parallel lines at 10 mm from the both
ends of A3 (11"
ends of A3 (11"
× 17") white paper as shown below. (These lines
must be correctly parallel to each other.)
2) Make a normal (100%) copy of the test sheet on A3 (11"
× 17")
paper. (Fit the paper edge with the glass holding plate edge.)
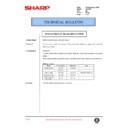
3) Measure the distances (La, Lb, Lc, Ld) at the four corners as
shown below.
When La = Lb and Lc = Ld, no need to perform the procedures
4) and 5).
4) and 5).
4) Move the mirror base B rail position up and down (in the arrow
direction) to adjust.
● When La Lb
Shift the mirror base B rail upward by the half of the difference
of La – Lb.
of La – Lb.
● When La Lb
Shift the mirror base B rail downward by the half of the difference
of Lb – La.
of Lb – La.
Example:
When La = 12 mm and Lb = 9 mm, shift the
mirror base B rail upward by 1.5 mm.
mirror base B rail upward by 1.5 mm.
● When Lc Ld
Shift the mirror base B rail downward by the half of the difference
of Lc – Ld.
of Lc – Ld.
● When Lc Ld
Shift the mirror base B rail downward by the half of the difference
of Ld – Lc.
of Ld – Lc.
∗ When moving the mirror base rail, hold the mirror base rail with
your hand.
<Adjustment specification>
La = Lb, Lc = Ld
La = Lb, Lc = Ld
5) After completion of adjustment, manually turn the mirror base
drive pulley, scan the mirror base A and mirror base B fully, and
check that the mirror bases are not in contact with each other.
∗ If the mirror base rail is moved extremely, the mirror base may
check that the mirror bases are not in contact with each other.
∗ If the mirror base rail is moved extremely, the mirror base may
be in contact with the frame or the original glass. Be careful to
avoid this.
avoid this.
(5) Main scanning direction (FR direction) magnification ratio ad-
justment (SIM 48-1)
Note: Before performing this adjustment, be sure to check that the
CCD unit is properly installed.
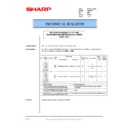
1) Put a scale on the original table as shown below.
2) Execute SIM 48-1.
3) After warmup, shading is performed and the current set value of
3) After warmup, shading is performed and the current set value of
the main scanning direction magnification ratio is displayed on the
display section in 2 digits.
display section in 2 digits.
4) Select the mode and press the start key again.
Original
Copy A
Copy B
10mm
10mm
10mm
10mm
Parallel line
White paper
Parallel line
La
Lb
Ld
Lc
Paper exit
direction
direction
DM-2000
6 – 6
5) Auto correction mode (AE lamp ON)
The mirror unit moves to the shading position, and the reference
width of the reference white plate is scanned, and the correction
value is automatically calculated from that scanned value.
The correction value is displayed and a copy is made.
width of the reference white plate is scanned, and the correction
value is automatically calculated from that scanned value.
The correction value is displayed and a copy is made.
6) Compare the scale image and the actual scale.
If a fine adjustment is required, switch to the manual correction
mode with the magnification ratio display key and perform fine ad-
justment.
mode with the magnification ratio display key and perform fine ad-
justment.
7) Manual correction mode (TEXT lamp ON)
Enter the set value and press the start key.
The set value is stored and a copy is made.
The set value is stored and a copy is made.
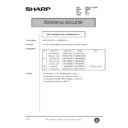
<Adjustment specification>
Note: A judgement must be made with 200mm width, and must not be
Note: A judgement must be made with 200mm width, and must not be
made with 100mm width.
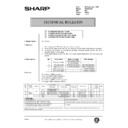
Mode
Specification
SIM
Set value
Set range
Main
scanning
direction
magnification
ratio
scanning
direction
magnification
ratio
At normal:
±1.0%
SIM
48-1
Add 1:
0.1% increase
Reduce 1:
0.1% decrease
0.1% increase
Reduce 1:
0.1% decrease
1
∼ 99
● Error in the auto correction mode
Display
Content
Major cause
Copy
quantity
display “– –”
quantity
display “– –”
The correction
value
calculated is
over 5%.
value
calculated is
over 5%.
Improper position of reference
width line of the reference
white plate
width line of the reference
white plate
Improper installation of CCD
unit
unit
Paper jam
lamp ON
lamp ON
Reference line
scanning error
scanning error
Defective CCD
No reference white plate
∗ When SIM 48-01 (AE) is executed, the main scanning direction mag-
nification ratio is automatically set. Therefore, the main scanning
direction magnification ratio adjustment previously described in 5)
must be made again.
direction magnification ratio adjustment previously described in 5)
must be made again.
(6) Sub scanning direction (scanning direction) magnification
ratio adjustment (SIM 48-2, SIM 48-5)
a. OC mode in copying
Note:
Note:
● Before performing this adjustment, be sure to check that the
CCD unit is properly installed.
1) Put a scale on the original table as shown below, and make a nor-
mal (100%) copy.
2) Compare the scale image and the actual image. If necessary, per-
form the following adjustment procedures.
3) Execute SIM 48-2.
4) After warmup, shading is performed and the current set value of
4) After warmup, shading is performed and the current set value of
the sub scanning direction magnification ratio is displayed on the
display section in 2 digits.
display section in 2 digits.
5) Enter the set value and press the start key.
The set value is stored and a copy is made.
<Adjustment specification>
Mode
Specification
SIM
Set value
Set range
Sub scanning
direction
magnification
ratio
(OC mode)
direction
magnification
ratio
(OC mode)
Normal
±1.0%
SIM
48-2
Add 1:
0.1% increase
Reduce 1:
0.1% decrease
0.1% increase
Reduce 1:
0.1% decrease
1
∼ 99
b. SPF mode in copying
Note:
Note:
● Before performing this adjustment, be sure to check that the
CCD unit is properly installed.
● Before performing this adjustment, the OC mode adjustment
in copying must be completed.
1) Put a scale on the original table as shown below, and make a nor-
mal (100%) copy to make a test chart.
Note: Since the printed copy is used as a test chart, put the scale in
parallel with the edge lines.
2) Set the test chart on the SPF and make a normal (100%) copy.
3) Compare the scale image and the actual image. If necessary, per-
3) Compare the scale image and the actual image. If necessary, per-
form the following adjustment procedures.
4) Execute SIM 48-5.
5) After warmup, shading is performed and the current set value of
5) After warmup, shading is performed and the current set value of
the sub scanning direction magnification ratio is displayed on the
display section in 2 digits.
display section in 2 digits.
6) Enter the set value and press the start key.
The set value is stored and a copy is made.
<Adjustment specification>
Mode
Specification
SIM
Set value
Set range
Sub scanning
direction
magnification
ratio
(SPF mode)
direction
magnification
ratio
(SPF mode)
Normal
±1.0%
SIM
48-5
Add 1:
0.1% increase
Reduce 1:
0.1% decrease
0.1% increase
Reduce 1:
0.1% decrease
1
∼ 99
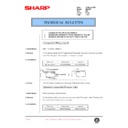
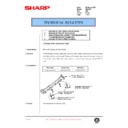
(7) Off center adjustment (SIM 50-13, SIM 50-16)
a. OC mode
Note:
a. OC mode
Note:
● The operation of SIM 50-13 is the same as that of SIM 48-01
(Photo LED ON)
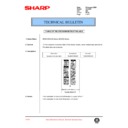
1) Make a test chart as shown below and set it so that its center line
is fit with the original guide center mark.
∗ To make a test chart, draw a line on A3 or 11" × 17" paper at
∗ To make a test chart, draw a line on A3 or 11" × 17" paper at
the center in the paper transport direction.
2) Make a normal copy from the manual paper feed tray, and com-
pare the copy and the test chart.
If necessary, perform the following adjustment procedures.
If necessary, perform the following adjustment procedures.
3) Execute SIM 50-13.
4) After warmup, shading is performed and the current set value of
4) After warmup, shading is performed and the current set value of
the off center adjustment is displayed on the display section in 2
digits.
digits.
5) Enter the set value and press the start key.
The set value is stored and a copy is made.
Center
Original guide
Copy paper
(A3 or 17" x 11")
(A3 or 17" x 11")
DM-2000
6 – 7
<Adjustment specification>
Mode
Specification
SIM
Set value
Set range
Original off
center mode
(OC mode)
center mode
(OC mode)
Single:
Center
Center
±
2.0 mm
SIM
50-13
Add 1:
0.1 mm shift
to R side
Reduce 1:
0.1 mm shift
to L side
0.1 mm shift
to R side
Reduce 1:
0.1 mm shift
to L side
1
∼ 99
Duplex:
Center
Center
±2.5
mm
b. SPF mode
Note:
Note:
● Before performing this adjustment, be sure to check that the
paper off center is properly adjusted.
1) Make a test chart for the center position adjustment and set it on
the SPF.
<Adjustment specification>
Draw a line on a paper in the scanning direction.
Draw a line on a paper in the scanning direction.
2) Make a normal copy from the manual paper feed tray, and com-
pare the copy and the original test chart.
If necessary, perform the following adjustment procedures.
If necessary, perform the following adjustment procedures.
3) Execute SIM 50-16.
4) After warmup, shading is performed and the current set value of
4) After warmup, shading is performed and the current set value of
the off center adjustment at each paper feed port is displayed on
the display section in 2 digits.
the display section in 2 digits.
5) Enter the set value and press the start key.
<Adjustment specification>
Mode
Specification
SIM
Set value
Set range
Original off
center mode
(SPF mode)
center mode
(SPF mode)
Single:
Center
Center
±
3.0 mm
SIM
50-16
Add 1:
0.1 mm shift
to R side
Reduce 1:
0.1 mm shift
to L side
0.1 mm shift
to R side
Reduce 1:
0.1 mm shift
to L side
1
∼ 99
Duplex:
Center
Center
±3.5
mm
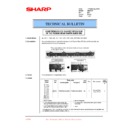
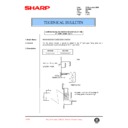
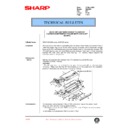
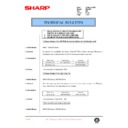
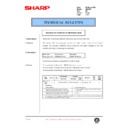
(8) OC (SPF) open/close detection position adjustment
1) Set A4 or 8 1/2"
× 11" paper on the OC table.
Check that the document size display on the operation panel in-
dicates the correct size of the set paper.
dicates the correct size of the set paper.
2) Close the OC (SPF) with a small clearance for insertion of your
hand left, and remove the paper from the OC table.
The document size display does not change from the display in 1).
The document size display does not change from the display in 1).
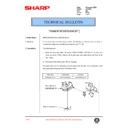
3) Open the OC (SPF) slowly until the display on the operation panel
changes (all the document size display lamps are turned off), and
measure dimension A shown below under that state.
measure dimension A shown below under that state.
<Spec value>
OC (SPF) open/close position A: 207
OC (SPF) open/close position A: 207
∼ 302mm
4) If the OC (SPF) open/close position A is not 207
∼ 302mm, adjust
the open/close sensor mounting plate position as shown below.
(9) Original sensor adjustment (SIM 43-3)
1) Execute SIM 41-2.
2) Set A3 (11"
2) Set A3 (11"
× 17") paper on the OC table.
3) Press the start key again.
4) The sensor level of the original sensor is automatically checked
4) The sensor level of the original sensor is automatically checked
and the value with an original - 40 is made as the threshold value
for scanning. (Automatic setting)
for scanning. (Automatic setting)
5) Execute SIM 43-3.
6) The light reception level of the original sensor is displayed.
6) The light reception level of the original sensor is displayed.
The first digit of the copy quantity display shows “A”: Light recep-
tion level display
The first digit of the copy quantity display shows “b”: Original
judgement level display
(The mode selection is made with the magnification ratio display
key.)
tion level display
The first digit of the copy quantity display shows “b”: Original
judgement level display
(The mode selection is made with the magnification ratio display
key.)
7) By changing the paper set on the original table, the original size
LED sensed by the sensor is lighted.
C. Image density adjustment
(1) Copy mode (SIM 46-1)
1) Set a test chart (UKOG-0162FCZZ) on the OC table as shown
below.
2) Put several sheets of A3 or 11"
× 17" white paper on the test
chart.
3) Execute SIM 46-1.
4) After warmup, shading is performed and the current set value of
4) After warmup, shading is performed and the current set value of
the density level is displayed on the display section in 2 digits.
For mode selection, use the density select key.
For mode selection, use the density select key.
5) Change the set value with the 10-key to adjust the copy image
density.
6) Make a copy and check that the specification below is satisfied.
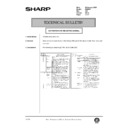
<Adjustment specification>
Den-
sity
mode
Dis-
play
play
lamp
Ex-
posure
level
Sharp Gray
Chart output
Set value
Set
range
Auto
Auto
—
“3” is slightly
copied.
copied.
The greater
the set value
is, the
greater the
density is.
The smaller
the set value
is, the
smaller the
density is.
the set value
is, the
greater the
density is.
The smaller
the set value
is, the
smaller the
density is.
1
∼
99
Manual
Manual
3
“3” is slightly
copied.
copied.
Photo
Photo
3
“3” is slightly
copied.
copied.
Toner
save
Manual
/
Photo
3
“3” is slightly
copied.
copied.
Open
A
Distance A = Table glass top - OC (SPF) knob 117"
Check the position where the display checked in
procedure 1) is changed.
procedure 1) is changed.
(A)
(B)
Open/close sensor mounting plate
Factory setting : second from the top
DM-2000
6 – 8


