Sharp MX-M950 / MX-MM1100 (serv.man37) Service Manual ▷ View online
MX-M1100 ADJUSTMENTS 6 – 81
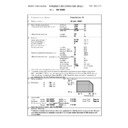
21-C
Automatic sub scanning direction scan
image magnification ratio adjustment
(Document table mode)
(Corresponding to ADJ7B)
image magnification ratio adjustment
(Document table mode)
(Corresponding to ADJ7B)
Automatic scan image off-center
adjustment (Document table mode)
(Corresponding to ADJ8A)
adjustment (Document table mode)
(Corresponding to ADJ8A)
Automatic scan image lead edge reference
position adjustment (Document table)
(Corresponding to Sim.50-1 RRC-A)
position adjustment (Document table)
(Corresponding to Sim.50-1 RRC-A)
1)
Enter the Sim. 50-28 mode.
2)
Press [OC ADJ] button to select [OC ADJ] mode.
3)
Select the paper feed tray with A4/11
✕ 8.5 paper in it with the
paper feed tray button. (A4/11
✕ 8.5)
4)
Press [EXECUTE] key.
The adjustment pattern is printed.
The adjustment pattern is printed.
5)
Set the adjustment pattern on the document table. (No need to
take care of the setting direction.)
Note: Set the adjustment pattern so that it fits precisely with
the document guide.
take care of the setting direction.)
Note: Set the adjustment pattern so that it fits precisely with
the document guide.
6)
Press [EXECUTE] key.
The automatic adjustment is executed.
The automatic adjustment is executed.
7)
Press [OK] button.
The adjustment result becomes valid.
The adjustment result becomes valid.
21-D
Automatic sub scanning direction scan
image magnification ratio adjustment
(DSFP mode) (Corresponding to ADJ7E)
image magnification ratio adjustment
(DSFP mode) (Corresponding to ADJ7E)
Automatic scan image off-center
adjustment (DSPF mode) (Corresponding to
ADJ8B/ADJ8C)
adjustment (DSPF mode) (Corresponding to
ADJ8B/ADJ8C)
Automatic scan image lead edge reference
position adjustment (DSPF mode)
(Corresponding to ADJ9C)
position adjustment (DSPF mode)
(Corresponding to ADJ9C)
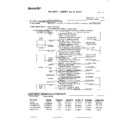
1)
Enter the Sim. 50-28 mode.
SIMULATION NO.50-28
TEST
AUTO IMAGE POSITION ADJUSTMENT : SERVICE
OC ADJ
BK-MAG ADJ
SPF ADJ
SETUP/PRINT ADJ
RESULT
DATA
1/1
CLOSE
0
SIMULATION NO.50̆28
TEST
AUTO IMAGE POSITION ADJUSTMENT㧦SERVICE
EXECUTE
1/1
MFT
CS1
CS2
CS3
CLOSE
CS4
ADU
LCC1
LCC2
LCC3
SIMULATION NO.50-28
TEST
AUTO IMAGE POSITION ADJUSTMENT SERVICE
CLOSE
OC
: LEAD: ** (**)
OFFSET: **(**)
SUB**: (**)
RESCAN
REPRINT
OK
RETRY
DATA
SIMULATION NO.50-28
TEST
AUTO IMAGE POSITION ADJUSTMENT : SERVICE
OC ADJ
BK-MAG ADJ
SPF ADJ
SETUP/PRINT ADJ
RESULT
DATA
1/1
CLOSE
MX-M1100 ADJUSTMENTS 6 – 82
2)
Press [SPF ADJ] button to select [SPF ADJ] mode.
3)
Select an item (front, rear, both) to be adjusted.
4)
Select the paper feed tray with A4/11
✕ 8.5 paper in it with the
paper feed tray button. (A4/11
✕ 8.5)
5)
Press [EXECUTE] key.
The adjustment pattern is printed.
The adjustment pattern is printed.
6)
Set the adjustment pattern on the DSPF tray in either direction.
(Placing the adjustment pattern)
Placing manner of the adjustment pattern differs depending on
the adjustment mode. Refer to the description below and set
the adjustment pattern properly.
(Placing the adjustment pattern)
Placing manner of the adjustment pattern differs depending on
the adjustment mode. Refer to the description below and set
the adjustment pattern properly.
7)
Press [EXECUTE] key.
The automatic adjustment selected in the procedure 3) is exe-
cuted.
If [ALL] mode is selected in the procedure 3), perform the pro-
cedures 6 and 7 again.
The automatic adjustment selected in the procedure 3) is exe-
cuted.
If [ALL] mode is selected in the procedure 3), perform the pro-
cedures 6 and 7 again.
8)
Press [OK] button.
The adjustment result becomes valid.
The adjustment result becomes valid.
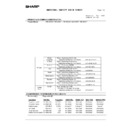
Item
Content
SIDE1
SPF adjustment front surface
SIDE2
SPF adjustment back surface
ALL
SPF adjustment front/rear surfaces
Adjustment mode
Placing the adjustment pattern
SIDE1 or first time of ALL
(Front surface mode adjustment)
(Front surface mode adjustment)
Place with the adjustment pattern print
surface facing up.
surface facing up.
SIDE2 or second time of ALL
(Back surface mode adjustment)
(Back surface mode adjustment)
Place with the adjustment pattern print
surface facing down.
surface facing down.
SIMULATION NO.50-28
TEST
AUTO IMAGE POSITION ADJUSTMENT : SERVICE
SIDE1
SIDE2
ALL
1/1
CLOSE
0
SIMULATION NO.50̆28
TEST
AUTO IMAGE POSITION ADJUSTMENT㧦SERVICE
EXECUTE
1/1
MFT
CS1
CS2
CS3
CLOSE
CS4
ADU
LCC1
LCC2
LCC3
SIMULATION NO.50-28
TEST
AUTO IMAGE POSITION ADJUSTMENT㧦SERVICE
CLOSE
SPF (SIDE1)
LEAD** (**) OFFSET: ** (**) SUB: ** (**)
SPF (SIDE2)
㧦
LEAD** (**) OFFSET: ** (**) SUB: ** (**)
RETRY
RESCAN
REPRINT
OK
DATA

