Sharp MX-1800N (serv.man28) Service Manual ▷ View online
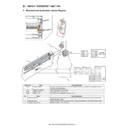
MX-1800N LSU SECTION H – 1
MX-1800N
Service Manual
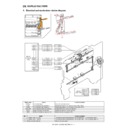
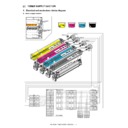
[H] LSU SECTION
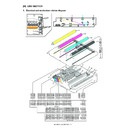
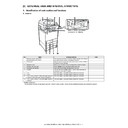
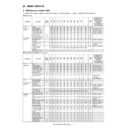
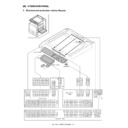
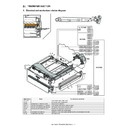
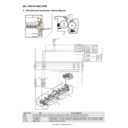
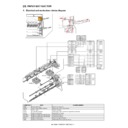
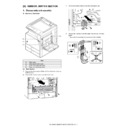
1. Electrical and mechanism relation diagram
CN11
B7P-PH-K-S
CN8
CN21
B4P-PH-K-R
S6B-XA
B6B-XA
CN2
B12B-PHDSS-B
CN7
CN13
CN1
B34B-PHDSS-B
S20B-PHDSS-B
B20B-PHDSS-B
CN9
CN14
S22B-PHDSS-B
B22B-PHDSS-B
CN4
B6P-PH-K-S
PS
M
2
P
R
CN10
B5P-PH-K-S
1
4
/LSUSS_B
24V3
2
19
20
21
22
12
4
V
3
1
2
D-GND
ECLK_LSU_P
ECLK_LSU_N
17
/LSUSS_B
21
22
20
15
17
18
19
4
10
5
16
11
12
13
14
15
16
VSYNC_Y_N
1
20
3
CH0_N
CH0_P
D-GND
19
1
2
14
13
D-GND
CH0_N
D-GND
D-GND
CLCLK_P
CH2_P
CH3_P
CH3_N
D-GND
ECLK_LSU_P
ECLK_LSU_N
D-GND
D-GND
HSYNC_LSU_P
HSYNC_LSU_N
D-GND
VSYNC_K_P
VSYNC_K_N
VSYNC_C_P
VSYNC_C_N
6
D-GND
3.3V
D-GND
5VN
24V1
P-GND
1
2
3
4
24V1
5
5
P-GND
6
D-GND
3
5VN
4
D-GND
1
3.3V
2
12
9
2
3
4
LSU PWB
10
11
D-GND
CLCLK_N
CH2_N
20
19
CH1_N
CH1_P
9
5
6
7
8
6
7
8
CLCLK_P
CH3_N
CH3_P
D-GND
CH2_P
D-GND
D-GND
CLCLK_N
D-GND
CH1_N
CH1_P
CH2_N
CH0_P
16
17
18
1
VSYNC_M_N
VSYNC_Y_P
VSYNC_M_P
VSYNC_Y_N
15
16
17
18
11
12
13
14
VSYNC_M_N
VSYNC_M_P
VSYNC_Y_P
2
3
4
5
6
7
8
VSYNC_K_N
VSYNC_K_P
VSYNC_C_P
VSYNC_C_N
n
TRANS_DATA
D-GND
LSUASIC_RST
n
RSV_DAT
JOBEND_INT
LSUTH1
LSUTH2
8
9
10
11
n
TRANS_RST
9
10
4
13
14
15
12
5
6
7
LSUTH2
n
RSV_DAT
n
TRANS_RST
JOBEND_INT
LSUTH1
n
SCK_LSU
n
TRANS_DATA
D-GND
LSUASIC_RST
INT5V
D-GND
D-GND
D-GND
1
2
3
D-GND
n
SCK_LSU
INT5V
D-GND
6
5
11
12
LSUTH1
D-GND
LSUTH2
1
6
/START
P-GND
24V1
/BREAK
LDCHK_Y
n
LDERR_Y
4
2
/START
P-GND
5
3
POLYCLK
/LOCK
D-GND
Vref_Y
24V1
/BREAK
6
1
POLYCLK
/LOCK
2
3
4
5
3
4
LSUTH1
D-GND
/SH_Y
/ENB_Y
DT_Y-
DT_Y+
LDCHK_M
n
LDERR_M
D-GND
INT5V
DT_M-
DT_M+
D-GND
Vref_M
D-GND
INT5V
/SH_M
/ENB_M
D-GND
Vref_C
LDCHK_C
n
LDERR_C
/SH_C
/ENB_C
DT_C-
DT_C+
26
32
34
33
29
31
30
28
22
21
27
25
18
16
14
20
15
13
17
19
2
8
10
9
5
7
6
4
4
3
2
1
8
7
6
5
D-GND
Vref_Y
LDCHK_Y
n
L
DERR_Y
/SH_Y
/ENB_Y
DT_Y-
DT_Y+
10
9
LDCHK_M
n
L
DERR_M
2
1
D-GND
INT5V
10
9
8
7
6
5
4
3
DT_M-
DT_M+
D-GND
Vref_M
D-GND
INT5V
/SH_M
/ENB_M
4
3
2
1
8
7
6
5
D-GND
Vref_C
LDCHK_C
n
L
DERR_C
/SH_C
/ENB_C
DT_C-
DT_C+
SK_K
n
LDERR_K
D-GND
INT5V
10
9
3
1
D-GND
INT5V
1
0
9
D-GND
INT5V
/SH_K
/ENB_K
DT_K-
DT_K+
D-GND
Vref_K
2
1
3
1
5
7
6
4
2
8
SK_K
n
L
DERR_K
10
9
8
7
6
5
4
3
DT_K-
DT_K+
D-GND
Vref_K
D-GND
INT5V
/SH_K
/ENB_K
5VN
D-GND
nB
D
D-GND
4
3
2
1
1
2
3
4
5VN
D-GND
nB
D
D-GND
MOTHER PWB
PCU
P
WB
D-GND
18
HSYNC_LSU_N
HSYNC_LSU_P
D-GND
PGM
1
LSUSS
2
3
4
6 7
5
14
8
9
11
13
12
9
10
10
10
10
9
MX-1800N LSU SECTION H – 2
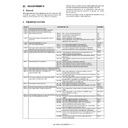
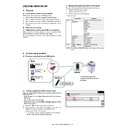
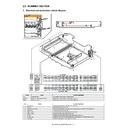
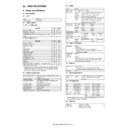
2. Operational descriptions
A. LSU section
(1) Outline
Image data sent from the image process circuit through the mother
are converted into laser beams to be radiated onto the OPC drum
surface. The LSU unit is composed of the primary system including
optical elements such as lasers and the polygon mirror and the mir-
ror which assures the optical path and the scan system which
includes the optical elements including the polygon mirror and the
mirror which assures the optical path.
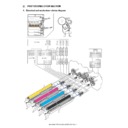
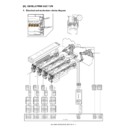
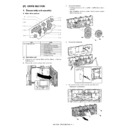
(2) Composition
(Primary system)
(Scan system)
(On the polygon mirror)
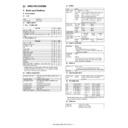
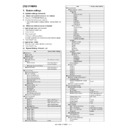
(3) Outline of LSU specifications
Signal name
Name
Function/Operation
PGM
Polygon motor
Laser beam is reflected at the constant speed rotation.
No.
Name
Function/Operation
1
LD PWB (K)
Controls laser beam flashing and the output value.
2
LD PWB (C)
3
LD PWB (M)
4
LD PWB (Y)
5
Cylindrical lens
Converges laser beams and focus.
6
f
θ lens 1
Laser beams are refracted so that the laser scan speed on the OPC drum is even in both ends and at the center.
7
f
θ lens 2
8
Reflection mirror
Secures the path for laser beams.
9
Cylindrical lens
Converges laser beams, and focus on the OPC drum.
10
OPC drum
Forms electrostatic latent images according to laser beams.
11
Convergence lens for BD
Converges laser beams to the BD PWB.
12
BD PWB
Detects the timing for starting laser scanning.
13
LSU CNT PWB
Laser beams are controlled and the polygon motor control signal is generated according to the PCU PWB control
signal and image data.
signal and image data.
14
LSU therminstor
Measures the temperature in LSU.
Model
Number of
mirror
surfaces
Rotating
speed
Bearing
Remark
MX-1800N
7 surfaces
25106rpm
OIL
Effective scan width:
307mm
Resolution:
600dpi
Beam diameter:
Main scan = 50 to 65µm, Sub scan = 60 to 75µm
Laser power:
Max. 0.65mW
LD wavelength:
770 to 795nm
MX-1800N LSU SECTION H – 3
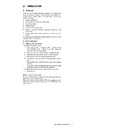
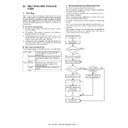
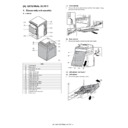
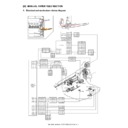
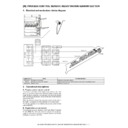
3. Disassembly and assembly
A. LSU section
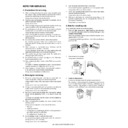
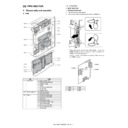
(1) LSU
1) Remove the left cabinet rear lower and the left cabinet. (Refer
to Left Cabinet Rear Lower and Left Cabinet in External Outfit
Section.)
Section.)
2) Remove the waste toner box.
3) Remove the LSU left plate PA.
4)
Remove the LSU slant adjustment plate screw (A), and loosen
the screw (B).
Remove the LSU shaft fixing plate. Remove the screws.
the screw (B).
Remove the LSU shaft fixing plate. Remove the screws.
5)
Shift the front side of the LSU shaft from (A) to (B), and remove
the LSU shaft.
the LSU shaft.
6)
Disconnect the connector, and remove the LSU.
a. Dust-proof glass
1)
1)
Remove the waste toner box.
2)
Remove the LSU cleaning stick from the front cover.
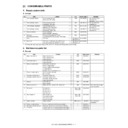
Unit
Parts
Maintenance
(1)
LSU
a
Dust-proof glass
{
b
Polygon motor
(2)
Others
a
LSU shutter solenoid
b
Cleaning base
(1)
(1)-b
(2)-a
(2)-b
(1)-a
1
2
1
2
1
2
A
B
B
A
2
3
1
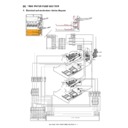
MX-1800N LSU SECTION H – 4
3) Insert the LSU cleaning rod and slide it back and forth a few
times to clean the dust-proof glass.
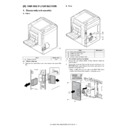
b. Polygon motor
1) Remove the LSU.
2) Remove the screws, and remove the LSU CNT PWB cover R.
1) Remove the LSU.
2) Remove the screws, and remove the LSU CNT PWB cover R.
3) Remove the screws, then lift up the LSU CNT PWB cover F
(A).
Remove the screws, and lift up the polygon motor unit (B).
Remove the screws, and lift up the polygon motor unit (B).
4) Remove the connector and the screws, then remove the poly-
gon motor.
* When installing, do not touch the moving section of the poly-
* When installing, do not touch the moving section of the poly-
gon mirror and the mirror surface.
(2) Others
a. LSU shutter solenoid 1
1)
1)
Remove the LSU.
2)
Remove the connector and the screws, then remove the LSU
shutter solenoid unit.
* When installing, the shutter U-groove is engaged with the
shutter solenoid unit.
* When installing, the shutter U-groove is engaged with the
shutter lever arm shaft section (A).
3)
Remove the screws, and remove the LSU shutter solenoid 1.
* When installing, engage the solenoid pin with the shutter
* When installing, engage the solenoid pin with the shutter
lever arm.
b. Cleaning base
1)
1)
Remove the waste toner box.
2)
Remove the LSU cleaning stick from the front cover.
3)
Remove the cleaning base from the LSU cleaning rod.
A
B
1
2
A
Display

