Sharp MX-1800N (serv.man20) Service Manual ▷ View online
MX-1800N OTHERS 12 – 1
MX-1800N
Service Manual
[12] OTHERS
1. System settings
A. System settings (General)
(1) When User Authentication is not Enabled
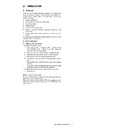
1) Press the [SYSTEM SETTINGS] key.
2) Configure the desired system settings.
2) Configure the desired system settings.
• User authentication is initially disabled (factory default set-
ting).
(2) When User Authentication is Enabled
a. Login by login name and password
1) Touch the [Login Name] key.
2) Select the user.
3) Enter a password.
1) Touch the [Login Name] key.
2) Select the user.
3) Enter a password.
(1) Touch the [Password] key.
(2) Enter a password on the text entry screen that will appear.
(2) Enter a password on the text entry screen that will appear.
4) Touch the [OK] key.
b. Login by user number
1) Enter your user number with the numeric keys.
2) Touch the [OK] key.
1) Enter your user number with the numeric keys.
2) Touch the [OK] key.
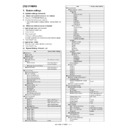
(3) System Settings (General) List
Item
Factory default setting
Total Count
Job Count
-
Device Count
-
Default Settings
Display Contrast
(Set to the centre value)
Clock
Date Format
Varies depending on
country and region
country and region
Daylight Saving Time Setting
Keyboard Select
Varies depending on
country and region
country and region
List Print (User)
All Custom Setting List
-
Printer Test Page
PCL Symbol Set List
-
PCL Internal Font List
-
PCL Extended Font List
-
PS Font List*1
-
PS Extended Font List*1
-
NIC Page
-
Sending Address List
Individual List
-
Group List
-
Program List
-
Memory Box List
-
All Sending Address List
-
Document Filing Folder List
-
Paper Tray Settings
Tray Settings
Tray 1
Plain, A4 (8-1/2" x 11")
Tray 2
Plain, A3 (11" x 17")
Tray 3
Varies depending on the
machine configuration
machine configuration
Tray 4
Bypass Tray
Bypass Tray
Plain, Auto-AB (Auto-Inch)
Paper Type Registration
User Type 1
-
User Type 2
-
User Type 3
-
User Type 4
-
User Type 5
-
User Type 6
-
User Type 7
-
Auto Tray Switching
Enable
Address Control
Direct Address / Program
Individual
E-mail
• Search Number
-
• Name
-
• Initial
-
• Index
-
• Address
-
• Key Name
-
• File Format
-
Internet Fax*2
• Search Number
-
• Name
-
• Initial
-
• Index
-
• Address
-
• Key Name
-
• Compression
-
• Internet Fax Report
-
Group
Search Number
-
Group Name
-
Initial
-
Index
-
Address
-
Key Name
-
Program
Program Name
-
Settings
• Address
-
• Resolution
-
• Exposure
-
• Special Modes
-
Amend/Delete
-
Custom Index
User 1
-
User 2
-
User 3
-
User 4
-
User 5
-
User 6
-
Fax Data Receive/Forward
Internet Fax Manual Reception*2
Reception Start
-
Manual Reception Key in Initial
Screen
Enable
Internet Fax Data Forward*2
-
Printer Condition Settings
Printer Default Settings
Copies
1
Orientation
Portrait
Default Paper Size
A4 (8-1/2" x 11")
Default Output Tray*3
Varies depending on the
machine configuration
machine configuration
Default Paper Type
Plain Paper
Line Thickness
5
2-Sided Print
1-Sided
Colour Mode
Colour
N-Up Print
1-Up
PCL Settings
PCL Symbol Set Setting
3. PC-8
PCL Font Setting
Internal Font, 0. Courier
PCL Line Feed Code
0. CR=CR:LF=LF:FF=FF
Wide A4
Disable
Postscript Settings*1
Print PS Errors
Disable
Document Filing Control
Custom Folder Registration
Folder Name
-
Initial
-
Item
Factory default setting
MX-1800N OTHERS 12 – 2
*1: When the PS3 expansion kit is installed.
*2: When the Internet fax expansion kit is installed.
*3: When a right tray is installed.
*4: When user authentication is enabled and a user without the
authority to configure the system settings (administrator) has
logged in. (Excluding factory stored users.)
*5: When the facsimile expansion kit is installed.
*6: When a finisher is installed.
B. System settings (Administrator)
(1) When User Authentication is not Enabled
1) Press the [SYSTEM SETTINGS] key.
2) Touch the [Admin Password] key.
3) Log in.
2) Touch the [Admin Password] key.
3) Log in.
(1) Touch the [Password] key and enter the administrator pass-
word.
(2) Touch the[OK] key.
word.
(2) Touch the[OK] key.
4) Configure the desired system settings.
(2) Login by login name and password (and e-mail
address*)
1) Touch the [Login Name] key.
* If login name / password / e-mail address is selected for the
login method, [E-mail Address] will appear under the [Login
Name] key.
Name] key.
2) Touch the [Admin Login] key.
3)
Touch the [Password] key and enter the administrator pass-
word.
word.
4)
Touch the [OK] key.
5)
Press the [SYSTEM SETTINGS] key.
* This step is not necessary if you are logging in after you
* This step is not necessary if you are logging in after you
pressed the [SYSTEM SETTINGS] key.
6)
Configure the desired system settings.
(3) Login by user number
1)
Touch the [Admin Login] key.
2)
Touch the [Password] key and enter the administrator pass-
word.
word.
3)
Touch the [OK] key.
4)
Press the [SYSTEM SETTINGS] key.
* This step is not necessary if you are logging in after you
* This step is not necessary if you are logging in after you
pressed the [SYSTEM SETTINGS] key.
5)
Configure the desired system settings.
Touch the items that you wish to configure and select the
desired settings.
Touch the items that you wish to configure and select the
desired settings.
(4) System Settings (Administrator) List
Password
-
User Name
-
Amend/Delete Custom Folder
-
USB-Device Check
-
User Control*4
Amend User Information
-
Item
Factory default setting
Address Control
Direct Address/Program
Individual
Fax*5
• Search Number
-
• Name
-
• Initial
-
• Index
-
• Fax No.
-
• Key Name
-
• Mode
-
F-Code Memory Box*5
Store
Polling Memory
• Box Name
-
• Sub Address
-
Confidential
• Box Name
-
• Sub Address
-
• Print PIN
-
Relay Broadcast
• Box Name
-
• Sub Address
-
• Recipients
-
Amend/Delete
Polling Memory
-
Confidential
-
Relay Broadcast
-
Fax Data Receive/Forward
Fax Receive Settings*5
Auto Reception
Multiple Set Print
Disable
Staple*6
Disable
Fax Data Forward*5
-
Item
Factory default setting
Item
Factory default setting
User Control
User Authentication Setting
User Authentication
Disable
Authentication Method Setting
Authenticate a User by
Login Name and
Password
Login Name and
Password
Device Account Mode Setting
Device Account Mode
Disable
User Selection
-
User Registration
Store
-
Amend/Delete
-
Delete All Users
-
Pages Limit Group Registration
-
Actions when the Limit of Pages for
Output Jobs
Job is Stopped when the
Limit of Pages is Reached
Limit of Pages is Reached
Authority Group Registration
-
Favourite Operation Group
Registration
-
User Count Display
-
User Count Reset
-
User Information Print
All User Information Print
-
User List
-
List of Number of Pages Used
-
Page Limit Group List
-
Authority Group List
-
Favourite Operation Group List
-
The Number of User Name Displayed
Setting
8
A Warning when Login Fails
Disable
Disable Printing by Invalid User
Disable
Default Network Authentication Server
Setting
-
Energy Save
Toner Save in Printer Mode
Disable
Toner Save in Copy Mode*1
Disable
Auto Power Shut-Off
Enable
Auto Power Shut-Off Timer
40 min.
Preheat Mode Setting
15 min.
Operation Settings
Keys Touch Sound
Keys Touch Sound
Middle
Keys Touch Sound at Initial Point
Disable
Auto Clear Setting
60 sec.
Cancel Timer
Disable
Message Time Setting
6 sec.
Display Language Setting
English
Disabling of Job Priority Operation
Disable
MX-1800N OTHERS 12 – 3
Disabling of Bypass Printing
Disable
Key Operation Setting
0.0 sec.
Disable Auto Key Repeat
Disable
Disabling of Clock Adjustment
Disable
Disabling of Covers/Inserts Mode
Disable
Customize Key Setting
Copy
Customize 1
Special Modes
Customize 2
File
Customize 3
Quick File
Scan
Customize 1
Special Modes
Customize 2
File
Customize 3
Quick File
Internet Fax*2
Customize 1
Special Modes
Customize 2
File
Customize 3
Quick File
Fax*3
Customize 1
Special Modes
Customize 2
File
Customize 3
Quick File
USB Memory Scan
Customize 1
Special Modes
Customize 2
Erase
Customize 3
Suppress BG
Data Entry
Customize 1
Special Modes
Customize 2
File
Customize 3
Quick File
Device Control
Original Size Detector Setting
Original Detection Size
Combination
Varies depending on
country and region
country and region
Cancel Detection at Document
Glass
Disable
Disabling of Document Feeder
Disable
Original Feeding Mode
All Disabled
Disabling of Duplex
Disable
Disabling of Optional Paper Drawer*4
Disable
Disabling of Tray Setting
Disable
Disabling of Finisher*5
Disable
Disabling of Offset
Disable
Disabling of Stapler*5
Disable
Disabling of Punch*6
Disable
Disabling of Colour Mode*7
Disable
Auto Paper Selection Setting
Plain Paper
Registration Adjustment
Auto Adjustment
-
Optimization of the Hard Disk
-
Tandem Connection Setting
IP Address of Slave Machine
0.0.0.0
Port Number
50001
Disabling of Master Machine Mode
Disable
Disabling of Slave Machine Mode
Disable
Clear All Job Log Data
-
Detect Standard in Auto Colour Mode
3
Copy Settings
Initial Status Settings
Colour Mode
Full Colour
Paper Tray
Varies depending on the
machine configuration
machine configuration
Exposure Type
Auto
Copy Ratio
100%
2-Sided Copy
1-Side to 1-Side
Output
-
Exposure Adjustment
Colour
Document Glass
5
Document Feeder
5
B/W
Item
Factory default setting
Document Glass
5
Document Feeder
5
Rotation Copy Setting
Enable
Add or Change Extra Preset Ratios
Reduction
-
Enlargement
-
Setting a Maximum Number of Copies
999
Initial Margin Shift Setting
Side-1
10 mm (1/2")
Side-2
Erase Width Adjustment
Edge
10 mm (1/2")
Centre
Card Shot Settings
Original Size
X: 86 mm (3-3/8")
Y: 54 mm (2-1/8")
Y: 54 mm (2-1/8")
Fit to Page
Disable
Initial Tab Copy Setting
10 mm (1/2")
Disabling Deletion of Job Programs
Disable
Disabling of Bypass-Tray in Duplex
Copy
Disable
Disabling of Auto Paper Selection
Disable
Auto Selection Setting of Tray that is
Supplied the Paper
Disable
Initial Colour Balance Setting
Factory Default State
Auto Colour Calibration
-
B/W 600dpi x 600dpi Scanning Mode
for Document Feeder
Disable
B/W Quick Scan from Document Glass
Enable
Network Settings
IP Address Setting
DHCP
Enable TCP/IP
Enable
Enable NetWare
Enable
Enable EtherTalk
Enable
Enable NetBEUI
Enable
Reset the NIC
-
Ping Command
-
Printer Settings
Default Settings
Prohibit Notice Page Printing
Enable
Prohibit Test Page Printing
Disable
A4/Letter Size Auto Change
Varies depending on
country and region.
country and region.
Print Density Level
Colour
3
B/W
3
Bypass Tray Settings
Enable Detected Paper Size in
Bypass Tray
Disable
Enable Selected Paper Type in
Bypass Tray
Enable
Exclude Bypass-Tray from Auto
Paper Select
Disable
Job Spool Queuing
Enable
Interface Settings
Hexadecimal Dump Mode
Disable
I/O Timeout
60 sec.
Enable USB Port
Enable
USB Port Emulation Switching
PCL (Auto*8)
Enable Network Port
Enable
Network Port Emulation Switching
PCL (Auto*8)
Port Switching Method
Switch at End of Job
Colour Adjustments
Auto Colour Calibration
-
Image Send Settings
Operation Settings
Default Display Setting
Mode
Scan (Fax*3)
Hold settings for a while after
scanning has been completed
Disable
Switch Automatically to Copy
Mode Screen
Disable
Item
Factory default setting
MX-1800N OTHERS 12 – 4
Initial Resolution Setting
Apply the Resolution Set when
Stored
Disable
Scan
200x200dpi
Internet Fax*2
200x100dpi
Fax*3
Standard
Default Exposure Settings
Exposure
Auto
Original Image Type
Text
Disable
Disable
Must Input Next Address Key at
Broadcast Setting
Disable
Scan Complete Sound Setting
Middle
The Number of File Name/Subject/
Body Keys Displayed Setting
6
The Number of Direct Address
Keys Displayed Setting
6
Disable Switching of Display Order
Disable
Hold Setting for Received Data Print
Received Data Hold
Disable
Password Setting
-
Settings to Disable the Registration of Destination
Disable Registering Destination from Operation Panel
• Group
Disable
• E-mail
Disable
• Internet Fax
Disable
• Fax
Disable
Disable Registering Destination on Web Page*9
• Group
Disable
• E-mail
Disable
• FTP
Disable
• Desktop
Disable
• Network Folder
Disable
• Internet Fax
Disable
• Fax
Disable
Disable Registration Using
Network Scanner Tools*9
Disable
Settings to Disable Transmission
Disable [Resend] on Fax/Image
Send Mode
Disable
Disable Selection from the Address Book
• E-mail
Disable
• FTP
Disable
• Desktop
Disable
• Network Folder
Disable
• Internet Fax
Disable
• Fax
Disable
Disable Direct Entry
• E-mail
Disable
• Internet Fax
Disable
• Fax
Disable
Disable PC-Internet Fax
Transmission*2
Disable
Disable PC-Fax Transmission*3
Disable
Scan Settings
Default Sender Set
-
Default Colour Mode Settings
Colour Mode
Auto, Greyscale
B/W Mode
Mono 2
Disable Change of B/W Setting
in Auto Mode
Disable
Initial File Format Setting
B/W
• File Type
PDF
• Compression Mode
MMR (G4)
• Specified Pages per File
Disable
Colour/Grey
• File Type
PDF
• Compression Ratio
Medium
• Specified Pages per File
Disable
Compression Mode at Broadcasting
Black & White
MH (G3)
Item
Factory default setting
Colour/Greyscale
Medium
Maximum Size of E-mail
Attachments (E-mail)
Unlimited
Maximum Size of Data Attachments
(FTP/Desktop/Network Folder)
Disable
Default Address Setting
Disable
Bcc Setting
Enable Bcc
Disable
Display Bcc Address on the Job
Status Screen
Disable
Disable Scan Function
PC Scan
Disable
USB Memory Scan
Disable
Pre-Setting Mail Signature
Disable
Internet Fax Settings*2
Internet Fax Default Settings
Internet Fax Own Name and
Address Set
-
Auto Wake Up Print
Enable
Internet Fax Speaker Volume Settings
• Receive Signal
Middle
• Communication Error Signal
Middle
Original Print on Transaction
Report
Print Out Error Report
Only
Only
Transaction Report Print Select Setting
• Single Sending
Print Out Error Report
Only
Only
• Broadcasting
Print Out All Report
• Receiving
No Printed Report
Activity Report Print Select Setting
• Auto Print at Memory Full
Disable
• Print Daily at Designated
Time
Time
Disable
Body Text Print Select Setting
Disable
Pre-Setting Mail Signature
Disable
Internet Fax Send Settings
Internet Fax Reception Report
On/Off Setting
Disable
Internet Fax Reception Report
Request Timeout Setting
1 hour
Number of Resend Times at
Reception Error
2
Maximum Size of E-mail
Attachments (E-mail)
Unlimited
Rotation Sending Setting
All Enable
Printing Page Number at
Receiver
Enable
Internet Fax Receive Settings
Auto Receive Reduce Setting
Enable
Duplex Reception Setting
Disable
Set Address for Data
Forwarding
-
Letter Size RX Reduce Print
Disable
POP3 Communication Timeout
Setting
60 sec.
Reception Check Interval
Setting
5 min.
Anti Junk Mail/Domain Name
Setting
All Invalid
Internet Fax Output Setting*10
Varies depending on the
machine configuration
machine configuration
Document Filing Settings
Default Mode Settings
Sharing Mode
Sort Method Setting
Date
Document Output Options
Print
Copy
Enable
Printer
Enable
Scan Send
Disable
Internet Fax Send (Incl. PC-
Internet Fax)
Disable
Fax Send (Incl. PC-Fax)
Disable
Scan to HDD
Enable
Item
Factory default setting
Display

