|
|
MX-1800N (serv.man6)
Installation Manual
Service Manual
|
88
|
21.98 MB
|
|
|
MX-1800N (serv.man7)
Circuit Diagram
Service Manual
|
127
|
17.88 MB
|
|
|
MX-1800N (serv.man8)
Front Back Covers
Service Manual
|
5
|
400.93 KB
|
|
|
MX-1800N (serv.man9)
Note for Servicing
Service Manual
|
2
|
226.95 KB
|
|
|
MX-1800N (serv.man10)
Section 1 - Product Outline
Service Manual
|
2
|
377.16 KB
|
|
|
MX-1800N (serv.man11)
Section 2 - Specifications
Service Manual
|
14
|
346.94 KB
|
|
|
MX-1800N (serv.man12)
Section 3 - Consumable Parts
Service Manual
|
2
|
207.25 KB
|
|
|
MX-1800N (serv.man13)
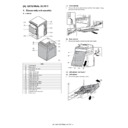
Section 5 - External View Internal Structure
Service Manual
|
17
|
1.47 MB
|
|
|
MX-1800N (serv.man14)
Section 6 - Adjustments
Service Manual
|
62
|
5.73 MB
|
|
|
MX-1800N (serv.man15)
Section 7 - Simulation
Service Manual
|
86
|
2.15 MB
|
|
|
MX-1800N (serv.man16)
Section 8 - Self Diagnostics Trouble Codes
Service Manual
|
24
|
553.93 KB
|
|
|
MX-1800N (serv.man17)
Section 9 - Maintenance
Service Manual
|
14
|
2.89 MB
|
|
|
MX-1800N (serv.man18)
Section 10 - Rom Version Up
Service Manual
|
3
|
551.22 KB
|
|
|
MX-1800N (serv.man19)
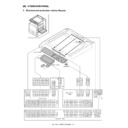
Section 11 - Electrical
Service Manual
|
32
|
546.84 KB
|
|
|
MX-1800N (serv.man20)
Section 12 - Others
Service Manual
|
7
|
570.47 KB
|
|
|
MX-1800N (serv.man21)
Details of each Section - A External Outfit Section.
Service Manual
|
3
|
1023.3 KB
|
|
|
MX-1800N (serv.man22)
Details of each Section - B Operation Panel Section.
Service Manual
|
3
|
577.88 KB
|
|
|
MX-1800N (serv.man23)
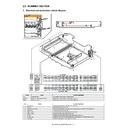
Details of each Section - C Scanner Section.
Service Manual
|
6
|
1.25 MB
|
|
|
MX-1800N (serv.man24)
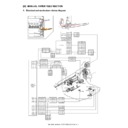
Details of each Section - D Manual Paper Feed Section.
Service Manual
|
6
|
1.78 MB
|
|
|
MX-1800N (serv.man26)
Details of each Section - F Paper Transport Section
Service Manual
|
4
|
1.08 MB
|
|
|
MX-1800N (serv.man27)
Details of each Section - G Duplex Section
Service Manual
|
5
|
2 MB
|
|
|
MX-1800N (serv.man28)
Details of each Section - H LSU Section
Service Manual
|
4
|
1.5 MB
|
|
|
MX-1800N (serv.man29)
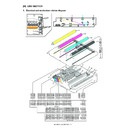
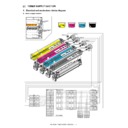
Details of each Section - i Photoconductor Section
Service Manual
|
5
|
2.49 MB
|
|
|
MX-1800N (serv.man30)
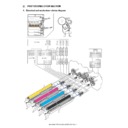
Details of each Section - J Toner Supply Section
Service Manual
|
2
|
636.29 KB
|
|
|
MX-1800N (serv.man31)
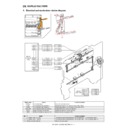
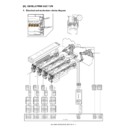
Details of each Section - K Developing Section
Service Manual
|
5
|
1.61 MB
|
|
|
MX-1800N (serv.man32)
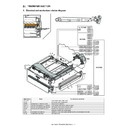
Details of each Section - L Transfer Section
Service Manual
|
9
|
8.24 MB
|
|
|
MX-1800N (serv.man33)
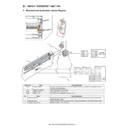
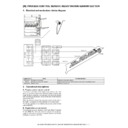
Details of each Section - M Process Control Sensor, Registration Sensor Section
Service Manual
|
2
|
545.41 KB
|
|
|
MX-1800N (serv.man34)
Details of each Section - N Fusing Section
Service Manual
|
6
|
2.73 MB
|
|
|
MX-1800N (serv.man35)
Details of each Section - O Paper Exit Section.
Service Manual
|
4
|
2.22 MB
|
|
|
MX-1800N (serv.man36)
Details of each Section - P Drive Section.
Service Manual
|
5
|
2.37 MB
|
|
|
MX-1800N (serv.man37)
Details of each Section - Q PWB Section.
Service Manual
|
6
|
1.65 MB
|
|
|
MX-1800N (serv.man38)
Details of each Section - R Fan and Filter Section.
Service Manual
|
2
|
687.11 KB
|
|
|
MX-1800N (serv.man39)
Details of each Section - S Sensor, Switch section.
Service Manual
|
2
|
472.23 KB
|
|
|
MX-1800N (serv.man40)
User's Guide (Supplied as pdf file on m c's Hard Disk Drive).
User Manual / Operation Manual
|
61
|
2.11 MB
|
|
|
MX-1800N (serv.man41)
System Settings Guide (Supplied as pdf file on m c's Hard Disk Drive).
User Manual / Operation Manual
|
127
|
2.61 MB
|
|
|
MX-1800N (serv.man42)
Scanner Guide (Supplied as pdf file on m c's Hard Disk Drive).
User Manual / Operation Manual
|
127
|
3.27 MB
|
|
|
MX-1800N (serv.man43)
Printer Guide (Supplied as pdf file on m c's Hard Disk Drive).
User Manual / Operation Manual
|
61
|
1.88 MB
|
|
|
MX-1800N (serv.man44)
Fax Guide (Supplied as pdf file on m c's Hard Disk Drive).
User Manual / Operation Manual
|
127
|
4.25 MB
|
|
|
MX-1800N (serv.man45)
Copier Guide (Supplied as pdf file on m c's Hard Disk Drive).
User Manual / Operation Manual
|
127
|
4.88 MB
|
|
|
MX-1800N (serv.man46)
Document Filing Guide (Supplied as pdf file on m c's Hard Disk Drive).
User Manual / Operation Manual
|
47
|
1.17 MB
|

|
MX-1800N
Mac OS10.8 Driver Rquires Postscript option. Mac OS
Drivers
|
|
2.94 MB
|
|
|
MX-1800N (serv.man5)
Section 2 - Specifications
Service Manual / Specification
|
14
|
346.94 KB
|
|
|
MX-1800N (serv.man52)
Parts change for productivity improvement.
Service Manual / Technical Bulletin
|
3
|
184.15 KB
|
|
|
MX-1800N (serv.man53)
Design change of MF Tray 2 Upper.
Service Manual / Technical Bulletin
|
2
|
216.35 KB
|
|
|
MX-1800N (serv.man54)
Preventing detection of waste toner bottle full.
Service Manual / Technical Bulletin
|
2
|
101.04 KB
|
|
|
MX-1800N (serv.man55)
Temporary change in containment bag for starting powder.
Service Manual / Technical Bulletin
|
1
|
102.62 KB
|
|
|
MX-1800N (serv.man56)
Starting Powder List (This list takes priority over information in Service Manuals).
Service Manual / Technical Bulletin
|
4
|
66.25 KB
|
|
|
MX-1800N (serv.man57)
Material change Rotation Plate Sheet.
Service Manual / Technical Bulletin
|
3
|
290.1 KB
|
|
|
MX-1800N (serv.man58)
Recommended shutdown procedure and Power Cycling of MFD
Service Manual / Technical Bulletin
|
1
|
186.43 KB
|
|
|
MX-1800N (serv.man59)
IMPORTANT Handling of EEPROM's.
Service Manual / Technical Bulletin
|
5
|
203.32 KB
|
|
|
MX-1800N (serv.man60)
Change in material of pick up roller.
Service Manual / Technical Bulletin
|
2
|
77.2 KB
|
|
|
MX-1800N (serv.man61)
CCE-1306 A REMINDER TO INSERT CONNECTORS TO DRIVER PWB COMPLETELY
Service Manual / Technical Bulletin
|
2
|
237.57 KB
|
|
|
MX-1800N (serv.man62)
CCE-1286 COUNTERMEASURE FOR NOISE FROM TN PIPE BK UNIT
Service Manual / Technical Bulletin
|
2
|
126.49 KB
|
|
|
MX-1800N (serv.man63)
CHANGE OF PHOTO SENSOR.
Service Manual / Technical Bulletin
|
2
|
165.18 KB
|
|
|
MX-1800N (serv.man64)
CCE-1076 WHITE STREAK S DUE TO THE DOCTOR COVER SEAL OR INNER BLADE WEAR.
Service Manual / Technical Bulletin
|
3
|
280.8 KB
|
|
|
MX-1800N (serv.man65)
CHANGE OF MICROSWITCH RSPF-DSPF SWITCH
Service Manual / Technical Bulletin
|
3
|
146.49 KB
|
|
|
MX-1800N (serv.man66)
PREVENTION OF F2-6 ERROR. TONER CARTRIDGE DRIVE AND STORAGE NOTES.
Service Manual / Technical Bulletin
|
3
|
154 KB
|
|
|
MX-1800N (serv.man67)
IMPROVEMENTS FOR THE PREVENTION OF LEAKING FROM THE PROCESS ELECTRODE COVER
Service Manual / Technical Bulletin
|
2
|
57.54 KB
|
|
|
MX-1800N (serv.man68)
TRANSPORT JAM FROM THE OPTION DESK. (PPD1_S3 etc.)
Service Manual / Technical Bulletin
|
2
|
71.46 KB
|
|
|
MX-1800N (serv.man69)
COUNTERMEASURES FOR THE 2ND TRANSFER DRIVING PULLEY BELT COMING LOOSE
Service Manual / Technical Bulletin
|
2
|
88.41 KB
|
|
|
MX-1800N (serv.man70)
REMOVAL OF LCD MYLAR A B DUE TO CHANGES TO THE 8.1 TOUCH PANEL
Service Manual / Technical Bulletin
|
1
|
27.59 KB
|
|
|
MX-1800N (serv.man71)
STRENGTH INCREASE TO BEADED PART OF THE 2ND TRANSFER BELT
Service Manual / Technical Bulletin
|
1
|
72.96 KB
|
|
|
MX-1800N (serv.man72)
IMPROVEMENTS TO THE TRANSPORT ROLLER POWER OF THE 2ND CASSETTE PAPER FEED UNIT
Service Manual / Technical Bulletin
|
2
|
183.83 KB
|
|
|
MX-1800N (serv.man73)
INCREASE IN VERTICAL TRANSFERABILITY MARGIN OF RIGHT LOWER DOOR
Service Manual / Technical Bulletin
|
2
|
110.47 KB
|
|
|
MX-1800N (serv.man74)
FIX TO INCREASE THE MARGIN THAT THE FAN MOTOR FASTENER WILL NOT BECOME STRIPPED
Service Manual / Technical Bulletin
|
2
|
49.07 KB
|
|
|
MX-1800N (serv.man75)
SUPPORT AGAINST SCUFFING THE PHOTORECEPTOR DRUM WHEN PULLING OUT THE DV UNIT
Service Manual / Technical Bulletin
|
2
|
124.72 KB
|
|
|
MX-1800N (serv.man76)
FIX FOR THE ABNORMAL NOISE (CLICKING) CREATED BY THE FUSING UNIT UPPER HEAT ROLLER RECEIVER
Service Manual / Technical Bulletin
|
2
|
75.17 KB
|
|
|
MX-1800N (serv.man77)
MXDEX2 - COUNTERMEASURES FOR DPFD2_S, etc. CAUSED BY CARRYING FORCE DECREASE BECAUSE OF PAPER POWDERS
Service Manual / Technical Bulletin
|
1
|
26.09 KB
|
|
|
MX-1800N (serv.man78)
DAMAGE ON DRUM SURFACE CAUSED WHEN DV UNIT IS PULLED OUT
Service Manual / Technical Bulletin
|
2
|
154.79 KB
|
|
|
MX-1800N (serv.man79)
H4-30 ERROR CAUSED BY INSUFFICIENT CRIMPING AT THE TS-HL MAIN HARNESS FASTEN TERMINAL AT THE TOP OF THE FUSING UNIT
Service Manual / Technical Bulletin
|
2
|
84.74 KB
|
|
|
MX-1800N (serv.man80)
ISSUING EXPLANATORY MATERIAL OF JOB LOG CODES.
Service Manual / Technical Bulletin
|
13
|
160.14 KB
|
|
|
MX-1800N (serv.man81)
JAM (APPD1_N) RESULTING FROM ADU FOLLOWER ROLLER SPRING COMING-OFF
Service Manual / Technical Bulletin
|
2
|
119.64 KB
|
|
|
MX-1800N (serv.man82)
CHANGE OF SHAPE OF PROCESS F COVER
Service Manual / Technical Bulletin
|
2
|
44.85 KB
|
|
|
MX-1800N (serv.man83)
L4-31 TROUBLE CODE OCCURRENCE
Service Manual / Technical Bulletin
|
2
|
44.8 KB
|
|
|
MX-1800N (serv.man84)
IMPROVEMENT FOR PRECISION OF DETECTING BEING FULL OF WASTE TONER
Service Manual / Technical Bulletin
|
2
|
45.22 KB
|
|
|
MX-1800N (serv.man85)
STRIPE PRINTING IN DRUM AXIS DIRECTION RESULTING FROM CLOUDY POLYGON MIRROR IN LSU
Service Manual / Technical Bulletin
|
1
|
27.89 KB
|
|
|
MX-1800N (serv.man86)
CONTAMINATION OF WHITE CALIBRATION SHEET ON SPF GLASS UNIT
Service Manual / Technical Bulletin
|
2
|
67.26 KB
|
|
|
MX-1800N (serv.man87)
HANDLING TROUBLE CODE F2-40 INVOLVING LEAK FROM PROCESS ELECTRODE
Service Manual / Technical Bulletin
|
2
|
129.97 KB
|
|
|
MX-1800N (serv.man88)
PAPER FEED JAM (DPFD1_N4, ETC.)
Service Manual / Technical Bulletin
|
2
|
67.87 KB
|
|
|
MX-1800N (serv.man89)
BREAKAGE OF PAPER EMPTY ACTUATOR
Service Manual / Technical Bulletin
|
2
|
76.68 KB
|
|
|
MX-1800N (serv.man90)
INCORRECT DETECTION OF WASTE TONER BOX FULL
Service Manual / Technical Bulletin
|
3
|
132.89 KB
|
|
|
MX-1800N (serv.man91)
COUNTERMEASURES FOR F2-40 TROUBLE
Service Manual / Technical Bulletin
|
2
|
85.71 KB
|
|
|
MX-1800N (serv.man92)
COUNTERMEASURE TO COPE WITH L4-06 TROUBLE,AND OR YELLOW COLOUR DROPPING OUT
Service Manual / Technical Bulletin
|
2
|
101.91 KB
|
|
|
MX-1800N (serv.man93)
IMPROVEMENT OF IMAGE UNEVENNESS
Service Manual / Technical Bulletin
|
2
|
81.7 KB
|
|
|
MX-1800N (serv.man94)
IMPROVEMENT OF E7-11 SHADING TROUBLE.
Service Manual / Technical Bulletin
|
2
|
92.88 KB
|
|
|
MX-1800N (serv.man95)
REPLACEMENT OF UPPER HEAT ROLLER.
Service Manual / Technical Bulletin
|
2
|
78.58 KB
|
|
|
MX-1800N (serv.man96)
STRENGTHENING THE SPRING ATTACHMENT HOLE OF TENSION HOLDER A ON RSPF.
Service Manual / Technical Bulletin
|
1
|
76.72 KB
|
|
|
MX-1800N (serv.man97)
REMEDY FOR OPC LAYER S PEELING-OFF
Service Manual / Technical Bulletin
|
2
|
107.4 KB
|
|
|
MX-1800N (serv.man98)
INFORMATION OF OPERATION PROCEDURE FOR REPLACING THE MFP BOARD
Service Manual / Technical Bulletin
|
2
|
59.18 KB
|
|
|
MX-1800N (serv.man99)
REDUCING UNEVEN CHARGE (IMAGE STREAKING)
Service Manual / Technical Bulletin
|
2
|
80.43 KB
|
|
|
MX-1800N (serv.man100)
IMPROVEMENT OF UPPER HEAT ROLLER AGAINST WRINKLE.
Service Manual / Technical Bulletin
|
1
|
74.31 KB
|
|
|
MX-1800N (serv.man101)
CPFD2 JAMMING (OR OTHER) OCCURS FROM MISSING TRANSPORT LOWER GEAR PULLEY.
Service Manual / Technical Bulletin
|
2
|
100.59 KB
|
|
|
MX-1800N (serv.man102)
Staple cartridge As Service Part
Service Manual / Technical Bulletin
|
1
|
45.97 KB
|
|
|
MX-1800N (serv.man103)
ROM Upgrade
Service Manual / Technical Bulletin
|
3
|
39.21 KB
|
|
|
MX-1800N (serv.man104)
COUNTER MEASURES FOR WASTE TONER AGITATION SHAFT DEVIATION IN WASTE TONER BOTTLE
Service Manual / Technical Bulletin
|
2
|
150.96 KB
|
|
|
MX-1800N (serv.man105)
IMPROVEMENT IN FULL DETECT LEVER RETURN PERFORMANCE
Service Manual / Technical Bulletin
|
2
|
85.02 KB
|
|
|
MX-1800N (serv.man106)
CHANGE OF RSPF HEIGHT AJDUSTMENT METHOD
Service Manual / Technical Bulletin
|
1
|
17.48 KB
|
|
|
MX-1800N (serv.man107)
STRENGTH IMPROVEMENT OF THE OUTPUT AXIS GEAR OF THE LIFT MOTOR A
Service Manual / Technical Bulletin
|
2
|
81.6 KB
|
|
|
MX-1800N (serv.man108)
CHANGE OF THE MEMORY PWB ATTACHING PROCEDURE TO THE MFP PWB
Service Manual / Technical Bulletin
|
1
|
17.74 KB
|
|
|
MX-1800N (serv.man109)
001-NEW SET OF SERVICE PARTS THAT COMBINES THE FILTER COVER WITH TONER FILTER.
Service Manual / Technical Bulletin
|
1
|
64.34 KB
|

|
MX-1800N (serv.man50)
Pastel Light Combined Firmware Version E1.19.L0.a0
Driver / Update
|
|
24.96 MB
|

|
MX-1800N (serv.man51)
(For use with DSK only)
Driver / Update
|
|
25.15 MB
|
|
|
MX-1800N (serv.man2)
NEW EEPROM Programming Request Form
Handy Guide
|
3
|
333.07 KB
|
|
|
MX-1800N (serv.man3)
GENERAL PROCEDURE FOR COLOUR CALIBRATION SET-UP
Handy Guide
|
2
|
83.06 KB
|
|
|
MX-1800N (serv.man4)
August 2007 Version 4 revised handy guide (Includes pastel light, Pastel and C-Jupiter)
Handy Guide
|
53
|
1 MB
|
|
|
MX-1800N (serv.man47)
How To Read A Main Machine Serial Number
FAQ
|
1
|
16.5 KB
|

|
MX-1800N (serv.man48)
UPDATED PJL PCL PS Command Lists
FAQ
|
|
128.83 KB
|
|
|
MX-1800N (serv.man49)
How to connect MX colour product to Linux UNIX systems using CUPS
FAQ
|
9
|
1.45 MB
|

