Sharp MX-M364N / MX-565N (serv.man5) Service Manual ▷ View online
MX-M565N IC card reader 27 – 6
2) Setting
a)
Enter the card reader setting menu as shown below.
System Settings > User Management > Card Type/Card
Reader Settings
System Settings > User Management > Card Type/Card
Reader Settings
b)
Check-mark “Use IC Card for Authentication”.
c)
Press [Submit] button.
G. IC card recognition check
There are two check methods of IC card recognition. Use either
one to check that the IC card reader is recognized.
Check method 1
1) Enter the card reader setting menu as shown below.
one to check that the IC card reader is recognized.
Check method 1
1) Enter the card reader setting menu as shown below.
Home > Settings > System Settings > USB-Device Check
2) Check to confirm that “Card Reader/Writer” is displayed.
Check method 2
Check to confirm that the icon of the card reader is displayed on the
system area of the home screen.
(If there is no check-mark on “Use IC Card for Authentication,” the
icon is not displayed.)
Check to confirm that the icon of the card reader is displayed on the
system area of the home screen.
(If there is no check-mark on “Use IC Card for Authentication,” the
icon is not displayed.)
H. External fixture attachment
Before installation, be sure to turn both the operation and main
power switches off and disconnect the power plug from the power
outlet. Make double sure that the data lamp on the operation panel
does not light up or blink when performing installation.
power switches off and disconnect the power plug from the power
outlet. Make double sure that the data lamp on the operation panel
does not light up or blink when performing installation.
1)
Attach the operation panel cover.
2)
Attach the front cabinet upper.
I. Making and importing of the setting file for HID
card reading
The following procedures are executed only when a request is
made by a user for customizing the data format of IC card reading.
made by a user for customizing the data format of IC card reading.
1)
Make the setting file for HID card reading.
For the making procedures, refer to the Manual of Setting File
for HID Card Reading.
For the making procedures, refer to the Manual of Setting File
for HID Card Reading.
2)
Copy the setting file to a USB memory.
1
3
MX-M565N IC card reader 27 – 7
3) Import the setting file for HID card reading to the machine.
a)
Enter the system settings menu as shown below:
Home > Settings > User Control > Administrator Login >
Card Area Setting
Home > Settings > User Control > Administrator Login >
Card Area Setting
b)
Connect the USB memory to the USB connector in the
operation section.
operation section.
c)
Select the file made in procedure 1) above.
d)
Press [Execute] button.
(The setting file for HID card reading is loaded.)
(The setting file for HID card reading is loaded.)
4) Perform the operation check.
a)
While holding the IC card over the IC card reader, press
[Execute] button of “Card Scan Test”.
[Execute] button of “Card Scan Test”.
b)
The IC card data are loaded. The test result is displayed
as shown below:
Display when loading is successfully completed:
as shown below:
Display when loading is successfully completed:
Display when loading is failed:
When an error occurs, troubleshoot the cause and remove the trou-
ble. Then perform the above procedures again.
Possible causes for an error may be error of the IC card or
improper contents of the setting file for HID card reading.
ble. Then perform the above procedures again.
Possible causes for an error may be error of the IC card or
improper contents of the setting file for HID card reading.
3. Setting file for HID card reading
A. Overview
This manual describes the following setting procedures for reading
data from an IC card by using the HID card reading function:
- Setting of the reading area of card data
- Setting for assignment of read data to the card ID and the facility
data from an IC card by using the HID card reading function:
- Setting of the reading area of card data
- Setting for assignment of read data to the card ID and the facility
code
* If the above setting procedures are not completed, the default
setting is valid, reading all the data in the card and assigning to
the card ID.
the card ID.
The brief steps of the setting are:
- Make the setting file according to the format specified in this man-
- Make the setting file according to the format specified in this man-
ual.
- Import the setting file through web page or by using the system
setting of the machine, “HID user area setting”
In-case of System setting mode:
User control > Card area setting > Importing from the setup file
In-case of System setting mode:
User control > Card area setting > Importing from the setup file
B. Format of the setting file
The format of the setting file should be as shown below:
Section name
Key name = Key value
* Use the template setting file, change the key value, make an
Section name
Key name = Key value
* Use the template setting file, change the key value, make an
arbitrary file name with an arbitrary extension (such as.ini), and
save the file.
save the file.
- A line started with “#” or “;” is treated as a comment.
- A blank line may be inserted.
- Use one-byte alphanumeric characters only (except for comment
- A blank line may be inserted.
- Use one-byte alphanumeric characters only (except for comment
lines).
- A one-byte space may be inserted in front of and at the back of
“=” which connects the key name and the key value.
- Characters for the key value are case-insensitive. (“ABCD” is
considered as the same as “abcd”.)
The section name (which is not changed in principle) and the key
name must be distinguished each other.
The section name (which is not changed in principle) and the key
name must be distinguished each other.
- The size of the setting file must be 4KByte or less.
- For the keys which are not set, the column of the value must be
- For the keys which are not set, the column of the value must be
blank or the whole line may be deleted (commented out).
C. Descriptions on the setting file
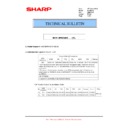
(1) Setting of the general information
*1: This manual describes only the setting of the HID card.
Detail of error
Error display
Error content and remedy
Card is not
found.
found.
Content
The card is not detected.
Remedy
Check to confirm that the card is securely
inserted into the IC card reader.
inserted into the IC card reader.
Read Error.
Content
A read error occurs.
Remedy
Check to confirm that the card and the card
reader operate normally with a personal
computer, etc.
reader operate normally with a personal
computer, etc.
Read Success.
Card ID : XXXXX
Facility Code : XXXXX
Section name
Description
General
Setting of the general information
[General]
Key name
Description
Version
Setting file version (* Fixed to 1.0)
Card
Set as shown below depending on the kind of the card to be
set.
set.
*1
Key value
Description
Felica FeliCa
Card
Hid HID
Card
MX-M565N IC card reader 27 – 8
(2) Setting of the HID setting file
For [Decoding\CardId] section, the same as above.
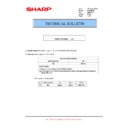
When Data = #!abcde$12345%vxxyz;
Example 1: Specification by position
Position = 3
Length = 5
> Decoded Data = abcde
Example 2: Specification by delimiter
Start.Delimiter = $
End.Delimiter =%
> Decoded Data = 12345
Example 1: Specification by position
Position = 3
Length = 5
> Decoded Data = abcde
Example 2: Specification by delimiter
Start.Delimiter = $
End.Delimiter =%
> Decoded Data = 12345
When Decoded Data = 12345;
Example
Pre = #%
Post = abc
> Padded Data = #%12345abc
Example
Pre = #%
Post = abc
> Padded Data = #%12345abc
D. Card reading test
After importing the user area setting to the machine, a test can be
executed to confirm that the cars is properly read. (* User control >
Card area setting > Card reading test (* Only the system settings of
the machine))
Execute “User control > Card area setting > Card scan test”
executed to confirm that the cars is properly read. (* User control >
Card area setting > Card reading test (* Only the system settings of
the machine))
Execute “User control > Card area setting > Card scan test”
The result displays after completion of a test are described below.
(When reading is successfully completed, the content of data read
from the card is displayed. When reading is failed, an error display
is made.)
(When reading is successfully completed, the content of data read
from the card is displayed. When reading is failed, an error display
is made.)
(1) Error displays in case of a reading failure
(2) Display when card reading is successfully
completed
Read Success.
Card ID: XXXXXX
Facility Code: XXXXXX
* When card reading is successfully completed, the result is indi-
Card ID: XXXXXX
Facility Code: XXXXXX
* When card reading is successfully completed, the result is indi-
cated as shown above with the user information. Check to con-
firm that the displayed items are proper. If not, check the
improper item.
firm that the displayed items are proper. If not, check the
improper item.
HID setting file template
The extension of “ini” should be added.
The extension of “ini” should be added.
Section name
Description
Decoding\Facility
Code
Code
Decode setting of the facility code.
(* If the facility code is not used, there is no need to
describe this item.)
(* If the facility code is not used, there is no need to
describe this item.)
Decoding\CardId
Decode setting of the card ID.
(* If the card ID is not decoded and all the read data
are used for the card ID, there is no need to describe
this item.)
(* If the card ID is not decoded and all the read data
are used for the card ID, there is no need to describe
this item.)
[ Decoding\FacilityCode]
Key name
Description
Location
Location specifying method
ByPosition: Specifying by position
ByDelimiter: Specifying by delimiter
* If the facility code has no setting of this item, it is
ByPosition: Specifying by position
ByDelimiter: Specifying by delimiter
* If the facility code has no setting of this item, it is
NULL.
* If the card ID has no setting of this item, all the data
read from the card is made the card ID.
Position
Start position (1 - 128) is specified with a decimal
number.
(* Specified only when the location key value is
"ByPosition".)
* The head is specified with 1 and later.
number.
(* Specified only when the location key value is
"ByPosition".)
* The head is specified with 1 and later.
Length Position
The length of reading from the position specified with
the key is specified with a decimal number (1 - 128).
(* Specified only when the location key value is
"ByPosition".)
* The total of this set value and the value specified
the key is specified with a decimal number (1 - 128).
(* Specified only when the location key value is
"ByPosition".)
* The total of this set value and the value specified
with Position key must be 128+1 or less.
Start.Delimiter
Delimiter (Front)
(* Specified only when the location key value is
"ByDelimiter".)
* Only ASCII code printable characters can be used
(* Specified only when the location key value is
"ByDelimiter".)
* Only ASCII code printable characters can be used
for specification.
End.Delimiter
Delimiter (Back)
(* Specified only when the location key value is
"ByDelimiter".)
* Only ASCII code printable characters can be used
(* Specified only when the location key value is
"ByDelimiter".)
* Only ASCII code printable characters can be used
for specification.
Section name
Description
Padding\CardId
Card ID padding setting
[Padding\Data]
Key name
Description
Pre
Front padding (Max. 3 characters)
* Only ASCII code printable characters can be used
* Only ASCII code printable characters can be used
for specification.
Post
Back padding (Max. 3 characters)
* Only ASCII code printable characters can be used
* Only ASCII code printable characters can be used
for specification.
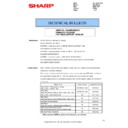
Details of error
Error display
Error content and remedy
Card is not
found.
found.
Content Card is not found.
Remedy
Remedy
Check to confirm that the card is securely set
in the card reader.
in the card reader.
Read Error.
Content A read error occurs.
Remedy
Remedy
Check to confirm that the card and card
reader operate normally with a personal
computer, etc.
reader operate normally with a personal
computer, etc.
hid_template E
;; HID setting file
# General information setting
[General]
Version=1.0
Card=HID
;; HID setting file
# General information setting
[General]
Version=1.0
Card=HID
# Decode setting of the facility code
[Decoding\FacilityCode]
Location=ByPosition
Position=1
Length=8
[Decoding\FacilityCode]
Location=ByPosition
Position=1
Length=8
# Decode setting of the card ID
[Decoding\CardId]
Location=ByDelimiter
Start.Delimiter=!
End.Delimiter=?
[Decoding\CardId]
Location=ByDelimiter
Start.Delimiter=!
End.Delimiter=?
# Card ID padding setting
[Padding\CardId]
Pre=@@@
Post=\\\
[Padding\CardId]
Pre=@@@
Post=\\\
MX-M565N MX-FR44U/FR44 (DATA SECURITY KIT) 28 – 1
MX-M565N
Service Manual
[28] MX-FR44U/FR44 (DATA SECURITY KIT)
1. Unpacking
A. Packed items check
2. Installation
Before installing the data security kit, be sure to perform backup of
data stored in the memory (including HDD) of the main unit.
When the data security kit is installed, all the job data stored in the
memory (including HDD) of the main unit will be lost.
data stored in the memory (including HDD) of the main unit.
When the data security kit is installed, all the job data stored in the
memory (including HDD) of the main unit will be lost.
If the LINE indicator or the DATA indicator for the printer and image
transmission on the operation panel is lit or blinking, data that has
not been processed remains in the memory of the main unit (includ-
ing HDD). Output or transmit all the data to clear the data remaining
in the main unit and then start installation.
transmission on the operation panel is lit or blinking, data that has
not been processed remains in the memory of the main unit (includ-
ing HDD). Output or transmit all the data to clear the data remaining
in the main unit and then start installation.
Before installation, be sure to turn both the operation and main
power switches off and disconnect the power plug from the power
outlet. Make double sure that the data lamp on the operation panel
does not light up or blink when performing installation.
power switches off and disconnect the power plug from the power
outlet. Make double sure that the data lamp on the operation panel
does not light up or blink when performing installation.
A. Left cabinet and shield plate removal
1) Remove the left cabinet.
2) Remove the shield plate.
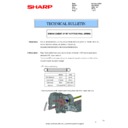
B. Program ROM attachment
1)
Attach the program ROM to the OPT ROM slot of the MFP
control PWB.
control PWB.
2)
Set the BOOT SW on the left upper side of the MFP control
PWB to OFF.
PWB to OFF.
C. Shield plate and left cabinet attachment
1)
Attach the shield plate.
2)
Attach the left cabinet.
No.
Name
Quantity
1
Program ROM
1
2
Product key sheet
1
3
User manual (CD-ROM)
1
4
Firmware program (USB memory)
1
2
1
1
2
2
1
1
1
2
2
1
2

