Sharp MX-6500N / MX-7500N (serv.man10) Service Manual ▷ View online
Parts marked with "
" are important for maintaining the safety of the set. Be sure to replace these parts with
specified ones for maintaining the safety and performance of the set.
SHARP CORPORATION
INSTALLATION MANUAL
Transit, Installation (using) environment, Note
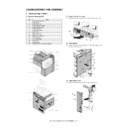
[1] CONFIGURATION. . . . . . . . . . . . . . . . . . . . . . 1-1
[2] MX-6500N/7500N (MAIN UNIT) . . . . . . . . . . . 2-1
[3] Dehumidifying heater kit . . . . . . . . . . . . . . . . . 3-1
[4] MX-LC12 (LARGE CAPACITY TRAY). . . . . . . 4-1
[5] MX-LCX3N (LARGE CAPACITY TRAY) . . . . . 5-1
[6] MX-MF10 (MULTI BYPASS TRAY) . . . . . . . . . 6-1
[7] MX-LT10 (LONG PAPER FEEDING TRAY) . . 7-1
[8] MX-RB14 (PAPER PASS UNIT) . . . . . . . . . . . 8-1
[9] MX-LC13 (LARGE CAPACITY TRAYS) . . . . . 9-1
[10] MX-RB17(CONNECTION MODULE) . . . . . 10-1
[11] MX-MF11 (MULTI BYPASS TRAY) . . . . . . . 11-1
[12] MX-TR14 (EXIT TRAY UNIT) . . . . . . . . . . . 12-1
[13] MX-TU14 (EXIT TRAY CABINET) . . . . . . . . 13-1
[14] MX-RB12 (PAPER PASS UNIT) . . . . . . . . . 14-1
[15] MX-RB15 (CURL CORRECTION UNIT) . . . 15-1
[16] MX-CF11 (INSERTER) . . . . . . . . . . . . . . . . 16-1
[17] MX-ST10/CA10
(HIGH CAPACITY STACKER/PAPER CART) . . 17-1
[18] MX-RB13 (RELAY UNIT). . . . . . . . . . . . . . . 18-1
[19] MX-FD10 (FOLDING UNIT) . . . . . . . . . . . . 19-1
[20] MX-FN21/FN22
(FINISHER/SADDLE STITCH FINISHER) . 20-1
[21] MX-PN13A/B/C/D (PUNCH MODULE) . . . . 21-1
[22] MX-TM10 (TRIMMING MODULE) . . . . . . . . 22-1
[23] MX-KB16 (KEYBOARD) . . . . . . . . . . . . . . . 23-1
[24] MX-PX10/PE10(INTERFACE KIT/FIERY PRINT
CONTROLLER) . . . . . . . . . . . . . . . . . . . . . . 24-1
[25] MX-SL10N (STATUSINDICATOR) . . . . . . . . 25-1
[26] MX-PUX1 (XPS EXPANSION KIT) . . . . . . . 26-1
[27] MX-PF10 (BARCODE FONT KIT) . . . . . . . . 27-1
[28] AR-SU1 (STAMP UNIT) . . . . . . . . . . . . . . . . 28-1
[29] MX-EB11
(ENHANCED COMPRESSION KIT) . . . . . . 29-1
[30] MX-FR43U (DATA SECURITY KIT). . . . . . . 30-1
[31] IC card reader . . . . . . . . . . . . . . . . . . . . . . . 31-1
[32] MX-EB15 (MIRRORING KIT). . . . . . . . . . . . 32-1
[33] MX-AMX1
(APPLICATION INTEGRATION MODULE) . . 33-1
[34] MX-AMX2
(APPLICATION COMMUNICATION MODULE) . . 34-1
[35] MX-AMX3
(EXTERNAL ACCOUNT MODULE) . . . . . . 35-1
[36] MX-AM10
(WEB BROWSING EXPANSION KIT) . . . . . 36-1
[37] Remote operation panel function Enable
setting . . . . . . . . . . . . . . . . . . . . . . . . . . . . . 37-1
[38] Setting, Adjustments, Operation check . . . . 38-1
[39] Setup and adjustment data recording . . . . . 39-1
[40] Necessary works before moving the machine40-1
CODE: 00ZMX7500/I5E
CONTENTS
MX-6500N
MX-7500N
MX-7500N
MODEL
DIGITAL FULL COLOR
MULTIFUNCTIONAL SYSTEM
MULTIFUNCTIONAL SYSTEM
CONTENTS
Transit, Installation (using) environment, Note
1. Installing (use) conditions . . . . . . . . . . . . . . . . . . .
. . . . . . . i
2. Transit and delivery . . . . . . . . . . . . . . . . . . . . . . . .
. . . . . . iii
3. Power configuration . . . . . . . . . . . . . . . . . . . . . . .
. . . . . . iv
[1] CONFIGURATION
1. System diagram . . . . . . . . . . . . . . . . . . . . . . . . . .
1 - 1
2. Option list . . . . . . . . . . . . . . . . . . . . . . . . . . . . . . .
1 - 2
3. Weight list . . . . . . . . . . . . . . . . . . . . . . . . . . . . . . .
1 - 3
[2] MX-6500N/7500N (MAIN UNIT)
1. Unpacking . . . . . . . . . . . . . . . . . . . . . . . . . . . . . . .
2 - 1
2. Installation . . . . . . . . . . . . . . . . . . . . . . . . . . . . . . .
2 - 2
3. Image quality check . . . . . . . . . . . . . . . . . . . . . . .
2 - 12
[3] Dehumidifying heater kit
1. Parts list . . . . . . . . . . . . . . . . . . . . . . . . . . . . . . . .
3 - 1
2. Installation . . . . . . . . . . . . . . . . . . . . . . . . . . . . . . .
3 - 3
[4] MX-LC12 (LARGE CAPACITY TRAY)
1. Unpacking . . . . . . . . . . . . . . . . . . . . . . . . . . . . . . .
4 - 1
2. Installation . . . . . . . . . . . . . . . . . . . . . . . . . . . . . . .
4 - 1
[5] MX-LCX3N (LARGE CAPACITY TRAY)
1. Unpacking . . . . . . . . . . . . . . . . . . . . . . . . . . . . . . .
5 - 1
2. Installation . . . . . . . . . . . . . . . . . . . . . . . . . . . . . . .
5 - 1
[6] MX-MF10 (MULTI BYPASS TRAY)
1. Unpacking . . . . . . . . . . . . . . . . . . . . . . . . . . . . . . .
6 - 1
2. Installation . . . . . . . . . . . . . . . . . . . . . . . . . . . . . . .
6 - 1
[7] MX-LT10 (LONG PAPER FEEDING TRAY)
1. Unpacking . . . . . . . . . . . . . . . . . . . . . . . . . . . . . . .
7 - 1
2. Installation . . . . . . . . . . . . . . . . . . . . . . . . . . . . . . .
7 - 1
[8] MX-RB14 (PAPER PASS UNIT)
1. Unpacking . . . . . . . . . . . . . . . . . . . . . . . . . . . . . . .
8 - 1
2. Installation . . . . . . . . . . . . . . . . . . . . . . . . . . . . . . .
8 - 7
[9] MX-LC13 (LARGE CAPACITY TRAYS)
1. Unpacking . . . . . . . . . . . . . . . . . . . . . . . . . . . . . . .
9 - 1
2. Installation (Befor April / 2013 Production) . . . . . .
9 - 2
3. Installation (Befor April / 2013 Production) . . . . . .
9 - 6
[10] MX-RB17 (CONNECTION MODULE)
1. Unpacking . . . . . . . . . . . . . . . . . . . . . . . . . . . . . . . 10- 1
2. Installation . . . . . . . . . . . . . . . . . . . . . . . . . . . . . . . 10- 1
2. Installation . . . . . . . . . . . . . . . . . . . . . . . . . . . . . . . 10- 1
[11] MX-MF11 (MULTI BYPASS TRAY)
1. Unpacking . . . . . . . . . . . . . . . . . . . . . . . . . . . . . . . 11- 1
2. Installation . . . . . . . . . . . . . . . . . . . . . . . . . . . . . . . 11- 1
2. Installation . . . . . . . . . . . . . . . . . . . . . . . . . . . . . . . 11- 1
[12] MX-TR14 (EXIT TRAY UNIT)
1. Unpacking . . . . . . . . . . . . . . . . . . . . . . . . . . . . . . . 12- 1
2. Installation . . . . . . . . . . . . . . . . . . . . . . . . . . . . . . . 12- 1
2. Installation . . . . . . . . . . . . . . . . . . . . . . . . . . . . . . . 12- 1
[13] MX-TU14 (EXIT TRAY CABINET)
1. Unpacking . . . . . . . . . . . . . . . . . . . . . . . . . . . . . . . 13- 1
2. Installation . . . . . . . . . . . . . . . . . . . . . . . . . . . . . . . 13- 1
2. Installation . . . . . . . . . . . . . . . . . . . . . . . . . . . . . . . 13- 1
[14] MX-RB12 (PAPER PASS UNIT)
1. Unpacking . . . . . . . . . . . . . . . . . . . . . . . . . . . . . . . 14- 1
2. Installation . . . . . . . . . . . . . . . . . . . . . . . . . . . . . . . 14- 1
2. Installation . . . . . . . . . . . . . . . . . . . . . . . . . . . . . . . 14- 1
[15] MX-RB15 (CURL CORRECTION UNIT)
1. Unpacking . . . . . . . . . . . . . . . . . . . . . . . . . . . . . . . 16- 1
2. Installation . . . . . . . . . . . . . . . . . . . . . . . . . . . . . . . 16- 2
2. Installation . . . . . . . . . . . . . . . . . . . . . . . . . . . . . . . 16- 2
[16] MX-CF11 (INSERTER)
1. Unpacking . . . . . . . . . . . . . . . . . . . . . . . . . . . . . . . 16- 1
2. Installation . . . . . . . . . . . . . . . . . . . . . . . . . . . . . . . 16- 2
2. Installation . . . . . . . . . . . . . . . . . . . . . . . . . . . . . . . 16- 2
[17] MX-ST10/CA10 (HIGH CAPACITY STACKER/PAPER CART)
1. Unpacking . . . . . . . . . . . . . . . . . . . . . . . . . . . . . . . 17- 1
2. Installation . . . . . . . . . . . . . . . . . . . . . . . . . . . . . . 17- 1
[18] MX-RB13 (RELAY UNIT)
1. Unpacking . . . . . . . . . . . . . . . . . . . . . . . . . . . . . . 18- 1
2. Installation . . . . . . . . . . . . . . . . . . . . . . . . . . . . . . 18- 1
2. Installation . . . . . . . . . . . . . . . . . . . . . . . . . . . . . . 18- 1
[19] MX-FD10 (FOLDING UNIT)
1. Unpacking . . . . . . . . . . . . . . . . . . . . . . . . . . . . . . 19- 1
2. Installation . . . . . . . . . . . . . . . . . . . . . . . . . . . . . . 19- 2
2. Installation . . . . . . . . . . . . . . . . . . . . . . . . . . . . . . 19- 2
[20] MX-FN21/FN22 (FINISHER/SADDLE STITCH FINISHER)
1. Unpacking . . . . . . . . . . . . . . . . . . . . . . . . . . . . . . 20- 1
2. Installation . . . . . . . . . . . . . . . . . . . . . . . . . . . . . . 20- 3
2. Installation . . . . . . . . . . . . . . . . . . . . . . . . . . . . . . 20- 3
[21] MX-PN13A/B/C/D (PUNCH MODULE)
1. Unpacking . . . . . . . . . . . . . . . . . . . . . . . . . . . . . . 21- 1
2. Installation . . . . . . . . . . . . . . . . . . . . . . . . . . . . . . 21- 2
2. Installation . . . . . . . . . . . . . . . . . . . . . . . . . . . . . . 21- 2
[22] MX-TM10 (TRIMMING MODULE)
1. Unpacking . . . . . . . . . . . . . . . . . . . . . . . . . . . . . . 22- 1
2. Installation . . . . . . . . . . . . . . . . . . . . . . . . . . . . . . 22- 1
2. Installation . . . . . . . . . . . . . . . . . . . . . . . . . . . . . . 22- 1
[23] MX-KB16 (KEYBOARD)
1. Unpacking . . . . . . . . . . . . . . . . . . . . . . . . . . . . . . 23- 1
2. Installation . . . . . . . . . . . . . . . . . . . . . . . . . . . . . . 23- 1
2. Installation . . . . . . . . . . . . . . . . . . . . . . . . . . . . . . 23- 1
[24] MX-PX10/PE10 (INTERFACE KIT/FIERY PRINT
CONTROLLER)
1. Unpacking . . . . . . . . . . . . . . . . . . . . . . . . . . . . . . 24- 1
2. Installation . . . . . . . . . . . . . . . . . . . . . . . . . . . . . . 23- 1
2. Installation . . . . . . . . . . . . . . . . . . . . . . . . . . . . . . 23- 1
[25] MX-SL10N (STATUS INDICATOR)
1. Unpacking . . . . . . . . . . . . . . . . . . . . . . . . . . . . . . 25- 1
2. Installation . . . . . . . . . . . . . . . . . . . . . . . . . . . . . . 25- 1
2. Installation . . . . . . . . . . . . . . . . . . . . . . . . . . . . . . 25- 1
[26] MX-PUX1 (XPS EXPANSION KIT)
1. Unpacking . . . . . . . . . . . . . . . . . . . . . . . . . . . . . . 23- 1
2. Installation . . . . . . . . . . . . . . . . . . . . . . . . . . . . . . 23- 1
2. Installation . . . . . . . . . . . . . . . . . . . . . . . . . . . . . . 23- 1
[27] MX-PF10 (BARCODE FONT KIT)
1. Unpacking . . . . . . . . . . . . . . . . . . . . . . . . . . . . . . 24- 1
2. Installation . . . . . . . . . . . . . . . . . . . . . . . . . . . . . . 24- 1
2. Installation . . . . . . . . . . . . . . . . . . . . . . . . . . . . . . 24- 1
[28] AR-SU1 (STAMP UNIT)
1. Unpacking . . . . . . . . . . . . . . . . . . . . . . . . . . . . . . 26- 1
2. Installation . . . . . . . . . . . . . . . . . . . . . . . . . . . . . . 26- 1
2. Installation . . . . . . . . . . . . . . . . . . . . . . . . . . . . . . 26- 1
[29] MX-EB11 (ENHANCED COMPRESSION KIT)
1. Unpacking . . . . . . . . . . . . . . . . . . . . . . . . . . . . . . 29- 1
2. Installation . . . . . . . . . . . . . . . . . . . . . . . . . . . . . . 29- 1
2. Installation . . . . . . . . . . . . . . . . . . . . . . . . . . . . . . 29- 1
[30] MX-FR43U (DATA SECURITY KIT)
1. Unpacking . . . . . . . . . . . . . . . . . . . . . . . . . . . . . . 39- 1
2. Installation . . . . . . . . . . . . . . . . . . . . . . . . . . . . . . 39- 1
2. Installation . . . . . . . . . . . . . . . . . . . . . . . . . . . . . . 39- 1
[31] IC card reader
1. Preparation . . . . . . . . . . . . . . . . . . . . . . . . . . . . . 31- 1
2. Installation . . . . . . . . . . . . . . . . . . . . . . . . . . . . . . 31- 1
3. Setting file for HID card reading. . . . . . . . . . . . . . 31- 5
2. Installation . . . . . . . . . . . . . . . . . . . . . . . . . . . . . . 31- 1
3. Setting file for HID card reading. . . . . . . . . . . . . . 31- 5
[32] MX-EB15 (MIRRORING KIT)
1. Unpacking . . . . . . . . . . . . . . . . . . . . . . . . . . . . . . 32- 1
2. Data backup. . . . . . . . . . . . . . . . . . . . . . . . . . . . . 32- 1
3. Installation . . . . . . . . . . . . . . . . . . . . . . . . . . . . . . 32- 1
4. Operation check. . . . . . . . . . . . . . . . . . . . . . . . . . 32- 5
5. Deleting the HDD mirroring information . . . . . . . . 32- 5
2. Data backup. . . . . . . . . . . . . . . . . . . . . . . . . . . . . 32- 1
3. Installation . . . . . . . . . . . . . . . . . . . . . . . . . . . . . . 32- 1
4. Operation check. . . . . . . . . . . . . . . . . . . . . . . . . . 32- 5
5. Deleting the HDD mirroring information . . . . . . . . 32- 5
[33] MX-AMX1 (APPLICATION INTEGRATION MODULE)
1. Unpacking . . . . . . . . . . . . . . . . . . . . . . . . . . . . . . 32- 1
2. Installation . . . . . . . . . . . . . . . . . . . . . . . . . . . . . . 32- 1
2. Installation . . . . . . . . . . . . . . . . . . . . . . . . . . . . . . 32- 1
[34] MX-AMX2 (APPLICATION COMMUNICATION MODULE)
1. Unpacking . . . . . . . . . . . . . . . . . . . . . . . . . . . . . . 33- 1
2. Installation . . . . . . . . . . . . . . . . . . . . . . . . . . . . . . 33- 1
2. Installation . . . . . . . . . . . . . . . . . . . . . . . . . . . . . . 33- 1
CONTENTS
[35] MX-AMX3 (EXTERNAL ACCOUNT MODULE)
1. Unpacking . . . . . . . . . . . . . . . . . . . . . . . . . . . . . . . 34- 1
2. Installation. . . . . . . . . . . . . . . . . . . . . . . . . . . . . . . 34- 1
2. Installation. . . . . . . . . . . . . . . . . . . . . . . . . . . . . . . 34- 1
[36] MX-AM10 (WEB BROWSING EXPANSION KIT)
1. Unpacking . . . . . . . . . . . . . . . . . . . . . . . . . . . . . . . 36- 1
2. Installation. . . . . . . . . . . . . . . . . . . . . . . . . . . . . . . 36- 1
2. Installation. . . . . . . . . . . . . . . . . . . . . . . . . . . . . . . 36- 1
[37] Remote operation panel function Enable setting
1. General . . . . . . . . . . . . . . . . . . . . . . . . . . . . . . . . . 37- 1
2. Remote operation panel function password setting
2. Remote operation panel function password setting
procedures . . . . . . . . . . . . . . . . . . . . . . . . . . . . . . 37- 1
[38] Setting, Adjustments, Operation check
1. Firmware version check and version up . . . . . . . . 38- 1
2. Function and operation check. . . . . . . . . . . . . . . . 38- 1
2. Function and operation check. . . . . . . . . . . . . . . . 38- 1
[39] Setup and adjustment data recording . . . . . . . . . . . 39- 1
[40] Necessary works before moving the machine . . . . 40- 1
MX-7500 Transit, Installation (using) environment, Note - i
MX-7500
Service Manual
Transit, Installation (using) environment, Note
1. Installing (use) conditions
Before installing the machine, check that the following installing
(use) conditions are satisfied.
If the installing (use) conditions are not satisfied, the machine may
If the installing (use) conditions are not satisfied, the machine may
not display full performances, resulting in troubles. It may also
cause safety problems. Therefore, be sure to arrange the installing
(use) conditions before setting up the machine.
A. Transportation space
For installation of a large size machine, be sure to check that the
door size is wide enough before bringing in.
B. Installing space
The following space must be provided around the machine in order
to assure machine performances and proper operations.
If any option is installed, provide the additional space for installing
If any option is installed, provide the additional space for installing
it.
Adequate space must be provide behind the machine for proper
Adequate space must be provide behind the machine for proper
ventilation heat and dust. If not, the machine cannot exhibit func-
tions against heat and dust, causing some troubles.
C. Power source (Capacity, voltage, frequency,
safety, plug)
If the power specifications are not satisfied, the machine cannot
exhibit full performances and may cause safety trouble.
Strictly observe the following specifications.
Strictly observe the following specifications.
(1) Power capacity
The power capacity must conforms to “3. Power configuration A.
Indoor wiring (power outlet) and breaker information.”
(2) Power voltage
Measure the voltage during copying to check that the voltage is in
the range of the specified voltage +/-10%.
If the voltage is outside the specified range, please have a certified
If the voltage is outside the specified range, please have a certified
electrician upgrade the outlet.
(An electrical work is required.)
Use of a step-up transformer is also available. In this case, the
(An electrical work is required.)
Use of a step-up transformer is also available. In this case, the
capacity must be great enough for the max. power consumption of
the machine.
(3) Power frequency, waveform
The frequency must be within the range of the specified frequency
+/-2%. If power waveform is deformed, a trouble may occur.
(4) Safety
Be sure to properly ground the machine.
Grounding (earth connection) must be performed before inserting
Grounding (earth connection) must be performed before inserting
the power plug into the power outlet.
When disconnecting the earth connection, be sure to disconnect
When disconnecting the earth connection, be sure to disconnect
the power plug from the power outlet in advance.
(5) Power plug
Check the shape of the power plug of the machine, and insert it into
a power outlet of the acceptable shape.
Power plug stated in power capacity.
D. Floor strength and level
This machine is considerably heavy and becomes heavier with an
option installed.
The floor must be strong enough to safely support the weight of the
The floor must be strong enough to safely support the weight of the
machine as well as any installed options.
If the unit is not horizontally installed, the toner density control is not
If the unit is not horizontally installed, the toner density control is not
performed normally, degrading the copy quality.
If not, color shift or image distortion may occur.
If not, color shift or image distortion may occur.
To assure proper Image quality, make sure the machine is setting
level.
E. Direct rays of the sun, dust, temperature,
humidity, gasses, chemicals, vibration
(1) Temperature and humidity (Environmental
conditions)
This machine is designed to perform properly under the specified
temperature and humidity. If the temperature and humidity exceeds
the specified range, the machine may not operate properly and or
cause equipment failure.
Especially when the humidity is too high, paper absorbs humidity to
Especially when the humidity is too high, paper absorbs humidity to
cause a paper jam or dirty copy.
Do not install the machine near a heater, a cooler, or a humidifier.
Do not install the machine near a heater, a cooler, or a humidifier.
Condensation may form inside the machine causing multiple trou-
bles. Use enough care for ventilation.
No.
Content
1
Transportation space
2
Installing space
3
Power source (Capacity, fluctuation, safety)
4
Floor strength
5
Direct rays of the sun, dust, temperature, humidity, gases,
chemicals
11-13/16"
(30cm)
(30cm)
11-13/16"
(30cm)
(30cm)
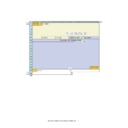
17-23/32"
(45cm)
(45cm)

