Sharp MX-M904 / MX-M1204 (serv.man10) Service Manual ▷ View online
MX-M1204 ADJUSTMENTS 5 – 85
ADJ 16
Document size detection
adjustment
(Document table mode)
adjustment
(Document table mode)
This adjustment is required in the following cases:
* When the document size sensor section is disassembled.
* When the document size sensor section is replaced.
* When the U2 trouble occurs.
* When the scanner control PWB is replaced.
* When the EEPROM on the scanner control PWB is replaced.
1) Enter the Sim. 41-2 mode.
2) Set A3 (11 X 17) paper on the document table, and press
[EXECUTE] button.
At that time, do not close the DSPF unit.
At that time, do not close the DSPF unit.
3) Remove the paper set in the procedure 2) from the document
table.
4) The DSPF unit to the position shown below, and press [EXE-
CUTE] button under that state.
Note:
At that time, the OC mat must be installed to the DSPF unit.
At that time, the OC mat must be installed to the DSPF unit.
After completion of the adjustment, "COMPLETE" is displayed.
ADJ 17
Touch panel coordinate
adjustment
adjustment
This adjustment is required in the following cases:
* When the operation panel is replaced.
* When the U2 trouble occurs.
* When the scanner control PWB is replaced.
* When the EEPROM on the scanner control PWB is replaced.
1) Enter the Sim. 65-1 mode.
* When the operation panel is replaced.
* When the U2 trouble occurs.
* When the scanner control PWB is replaced.
* When the EEPROM on the scanner control PWB is replaced.
1) Enter the Sim. 65-1 mode.
2)
Touch the four cross marks on the corners precisely. Do not
use a finger.
When the cross marks are touched precisely, they are
reversely displayed. When the touch panel adjustment is com-
pleted by touching all the four marks, the display returns to the
sub code entry menu.
use a finger.
When the cross marks are touched precisely, they are
reversely displayed. When the touch panel adjustment is com-
pleted by touching all the four marks, the display returns to the
sub code entry menu.
Note:
When touching the cross marks, never use a sharp tip (such
as a needle and a pin).
When touching the cross marks, never use a sharp tip (such
as a needle and a pin).
ADJ 18
Waste toner detection level
adjustment
adjustment
This adjustment is required in the following cases:
* The waste toner detection section has been disassembled.
* One or more parts of the waste toner detection section have
* The waste toner detection section has been disassembled.
* One or more parts of the waste toner detection section have
been replaced.
Turn the waste toner detection adjustment knob so that height from
upper surface of the adjustment knob to head edge of the tension
bar is 2.0 mm.
upper surface of the adjustment knob to head edge of the tension
bar is 2.0 mm.
150mm
2mm
MX-M1204 ADJUSTMENTS 5 – 86
ADJ 19
Fusing paper guide position
adjustment
(Manual adjustment of fusing
paper guide position)
adjustment
(Manual adjustment of fusing
paper guide position)
This adjustment is required in the following cases:
* When a paper jam occurs in the fusing section.
* When the lead edge of paper is folded in the fusing section.
* When skew is generated in the fusing section.
* When blur or improper focusing is generated on the lead edge
* When a paper jam occurs in the fusing section.
* When the lead edge of paper is folded in the fusing section.
* When skew is generated in the fusing section.
* When blur or improper focusing is generated on the lead edge
section or the rear edge section of an image on paper.
* When wrinkle is generated on paper.
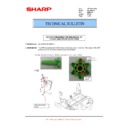
1) Remove the fusing unit.
2) Loosen the screw.
1) Remove the fusing unit.
2) Loosen the screw.
3) Slide the fusing paper guide up or down to adjust the position.
* Check and mark the scale position before the adjustment
(with a pencil, etc.), and slide to the left and the right evenly.
4)
Tighten the screw, and fix the fusing paper guide.
5)
Install the fusing unit to the main unit, and check the adjust-
ment result in the copy mode.
* There is no jam.
* The paper lead edge is not folded.
* There is no skew.
* There is no blur of improper focusing on the lead edge and
ment result in the copy mode.
* There is no jam.
* The paper lead edge is not folded.
* There is no skew.
* There is no blur of improper focusing on the lead edge and
the rear edge of an image on paper.
* There is no wrinkle on paper.
ADJ 20
Decurler roller adjustment
This adjustment must be performed in the following cases:
* If there occurred a paper jam (POIND_N) with winding around
* If there occurred a paper jam (POIND_N) with winding around
the Drum when duplex copying.
The ADU section is provided with the decurler (curl correction)
function. The curl correction amount can be adjusted by rotating
the dial.
The adjustment can be made in 9 steps (Default value : 4). The
normally value is 4. The greater the value is from 4, the greater the
correction is.
function. The curl correction amount can be adjusted by rotating
the dial.
The adjustment can be made in 9 steps (Default value : 4). The
normally value is 4. The greater the value is from 4, the greater the
correction is.
NOTE: Perform a fine adjustment depending on the paper kind
and the use environment.
The direction of being pointed by the dial which is surrounded with
a is the curl correction amount.
a is the curl correction amount.
MX-M1204 ADJUSTMENTS 5 – 87
ADJ 21
DSPF CCD calibration
21-A
DSPF shading adjustment
This adjustment is required in the following cases:
* When the DSPF CCD unit is replaced.
* When a U2 trouble occurs.
* When the DSPF control PWB is replaced.
* When the DSPF CCD unit is replaced.
* When a U2 trouble occurs.
* When the DSPF control PWB is replaced.
(1) Note before adjustment
1) Check to insure that there is no dirt or dust on the DSPF scan-
ning glass, the mirror, and the lens surface. (If there is, clean it
with alcohol.)
with alcohol.)
2) Open the DSPF document scan section, and insert the white
reference jig (PSHEP5859FCZZ). Then, close the DSPF docu-
ment scan section, and close the DSPF.
ment scan section, and close the DSPF.
3) Enter the SIM 63-2 mode.
4) Select "DSPF SHADING".
5) Press [EXECUTE] key. (The shading adjustment process is
4) Select "DSPF SHADING".
5) Press [EXECUTE] key. (The shading adjustment process is
started.)
* During shading adjustment, "SHADING EXECUTING..." is
* During shading adjustment, "SHADING EXECUTING..." is
displayed.
* When [EXECUTE] key is pressed during shading adjust-
ment, the operation is interrupted.
* When shading adjustment is completed normally, [EXE-
CUTE] key returns to the normal display and "COMPLETE"
is displayed.
is displayed.
<Descriptions of keys>
<Result display>
21-B
CCD gamma adjustment (CCD calibration)
(DSPF mode)
(DSPF mode)
This adjustment is required in the following cases:
* When the DSPF CCD unit is replaced.
* When a U2 trouble occurs.
* When the DSPF control PWB is replaced.
* When the DSPF CCD unit is replaced.
* When a U2 trouble occurs.
* When the DSPF control PWB is replaced.
(1) Note before adjustment
1)
Check to insure that there is no dirt or dust on the DSPF scan-
ning glass, the mirror, and the lens surface. (If there is, clean it
with alcohol.)
ning glass, the mirror, and the lens surface. (If there is, clean it
with alcohol.)
2)
Check to confirm that the patches in BK1 and BK2 arrays of
the SIT chart (UKOG-0280FCZZ or UKOG-0280FCZ1) are
free from dirt and scratches.
If they are dirty, clean them.
If they are scratched or streaked, replace with new one.
the SIT chart (UKOG-0280FCZZ or UKOG-0280FCZ1) are
free from dirt and scratches.
If they are dirty, clean them.
If they are scratched or streaked, replace with new one.
NOTE:
Since the SIT chart is easily discolored by sunlight (especially ultra-
violet rays) and humidity and temperature, put it in a bag such as a
clear file) and store in a dark place of low temperature and low
humidity.
Since the SIT chart is easily discolored by sunlight (especially ultra-
violet rays) and humidity and temperature, put it in a bag such as a
clear file) and store in a dark place of low temperature and low
humidity.
Insert from the notch of the white
reference jig, and set.
reference jig, and set.
White reference jig set reference
Insert so that the rear edge of the white
reference jig is in parallel with the transport roller
(as shown with the dotted line in the figure).
reference jig is in parallel with the transport roller
(as shown with the dotted line in the figure).
Insert so that the rear edge of the white reference
jig is fit with the upper transport PG edge.
jig is fit with the upper transport PG edge.
Display
Content
OC
SHADING
SHADING
OC analog correction level correction, and shading
correction data making (Document table mode)
correction data making (Document table mode)
DSPF
SHADING
SHADING
Analog correction level correction, and shading correction
data making (DSPF mode)
data making (DSPF mode)
Display
Content
COMPLETE
Normal completion
ERROR
Abnormal completion
INCOMPLETE
Incomplete, interruption
MX-M1204 ADJUSTMENTS 5 – 88
(2) Adjustment procedures
1) Set the SIT chart (UKOG-0280FCZZ or UKOG-0280FCZ1)
face-down in the DSPF paper feed tray.
If the SIT chart is not available, execute SIM 63-5 to set the
CCD gamma to the default. In this case, however, the adjust-
ment accuracy is lower when compared with the adjustment
method using the SIT chart.
NOTE: UKOG-0280FCZZ is equivalent to UKOG-0280FCZ1.
CCD gamma to the default. In this case, however, the adjust-
ment accuracy is lower when compared with the adjustment
method using the SIT chart.
NOTE: UKOG-0280FCZZ is equivalent to UKOG-0280FCZ1.
2) Enter the SIM 63-3 mode.
3) When a color key is selected, the adjustment value of the
3) When a color key is selected, the adjustment value of the
selected color is displayed.
* When [B] (Blue), [G] (Green), or [R] (Red) key is selected,
* When [B] (Blue), [G] (Green), or [R] (Red) key is selected,
the selected key is highlighted and the adjustment value of
the selected color is displayed.
the selected color is displayed.
* Only one color key can be selected, and the selected key is
highlighted. In the initial state, [B] is selected.
* If there is a page over [
], an active display is shown and the
page moves up. If there is no page upward, the display
grays out and the operation is invalid.
If there is a page under [
grays out and the operation is invalid.
If there is a page under [
], an active display is shown and
the page moves down. If there is no page downward, the
display grays out and the operation is invalid.
display grays out and the operation is invalid.
4) When [DSPF] key is pressed, it is highlighted, and the color
automatic adjustment execution screen is displayed.
5) Press [EXECUTE] key and it is highlighted and the color auto
adjustment is executed.
* When [EXECUTE] key is pressed during the automatic
* When [EXECUTE] key is pressed during the automatic
adjustment, the automatic adjustment is interrupted.
6) After normal completion, the result of calculation is displayed
in the initial screen.
* When an error occurs in execution, the following screen is dis-
played.
* When an error occurs in the automatic adjustment, all the error
patch numbers are displayed.
When [RESULT] key is pressed, the display returns to the initial
screen. (The previous value is displayed)
When [RESULT] key is pressed, the display returns to the initial
screen. (The previous value is displayed)
* When the operation is completed normally, "COMPLETE" is dis-
played. When [RESULT] key is pressed, the display returns to
the initial screen. (The calculation result of normal completion is
displayed.)
the initial screen. (The calculation result of normal completion is
displayed.)

