|
|
MX-2300N MX-2700N MX-2300G MX-2700G MX-2300FG MX-2700FG (serv.man8)
Installation Manual
Service Manual
|
88
|
21.98 MB
|
|
|
MX-2300N MX-2700N MX-2300G MX-2700G MX-2300FG MX-2700FG (serv.man9)
All Sections
Service Manual
|
127
|
63.42 MB
|
|
|
MX-2300N MX-2700N MX-2300G MX-2700G MX-2300FG MX-2700FG (serv.man10)
Circuit Diagram
Service Manual
|
127
|
17.88 MB
|
|
|
MX-2300N MX-2700N MX-2300G MX-2700G MX-2300FG MX-2700FG (serv.man11)
Service Manual MX-RPX1
Service Manual
|
56
|
10.06 MB
|
|
|
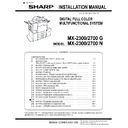
MX-2300N MX-2700N MX-2300G MX-2700G MX-2300FG MX-2700FG (serv.man12)
Installation Manual, Main Unit and Peripherals.
Service Manual
|
|
19.66 MB
|
|
|
MX-2300N MX-2700N MX-2300G MX-2700G MX-2300FG MX-2700FG (serv.man13)
Service Manual and Parts guide for MX-FNX1(Finisher) MX-PNX1A B C D(Punch Modules).
Service Manual
|
80
|
16.43 MB
|
|
|
MX-2300N MX-2700N MX-2300G MX-2700G MX-2300FG MX-2700FG (serv.man14)
Service Manual and Parts guide for MX-DEX1 DEX2 Desk Units.
Service Manual
|
44
|
8.38 MB
|
|
|
MX-2300N MX-2700N MX-2300G MX-2700G MX-2300FG MX-2700FG (serv.man18)
User's Guide (Supplied as pdf file on m c's Hard Disk Drive).
User Manual / Operation Manual
|
69
|
2.8 MB
|
|
|
MX-2300N MX-2700N MX-2300G MX-2700G MX-2300FG MX-2700FG (serv.man19)
System Settings Guide (Supplied as pdf file on m c's Hard Disk Drive).
User Manual / Operation Manual
|
127
|
2.72 MB
|
|
|
MX-2300N MX-2700N MX-2300G MX-2700G MX-2300FG MX-2700FG (serv.man20)
Scanner Guide (Supplied as pdf file on m c's Hard Disk Drive).
User Manual / Operation Manual
|
127
|
3.27 MB
|
|
|
MX-2300N MX-2700N MX-2300G MX-2700G MX-2300FG MX-2700FG (serv.man21)
Printer Guide (Supplied as pdf file on m c's Hard Disk Drive).
User Manual / Operation Manual
|
61
|
2.62 MB
|
|
|
MX-2300N MX-2700N MX-2300G MX-2700G MX-2300FG MX-2700FG (serv.man23)
Copier Guide (Supplied as pdf file on m c's Hard Disk Drive).
User Manual / Operation Manual
|
127
|
4.68 MB
|
|
|
MX-2300N MX-2700N MX-2300G MX-2700G MX-2300FG MX-2700FG (serv.man24)
Document Filing Guide (Supplied as pdf file on m c's Hard Disk Drive).
User Manual / Operation Manual
|
47
|
1.12 MB
|
|
|
MX-2300N MX-2700N MX-2300G MX-2700G MX-2300FG MX-2700FG (serv.man25)
Sharpdesk Installation Manual (Hard copy supplied with product)
User Manual / Operation Manual
|
8
|
363.69 KB
|
|
|
MX-2300N MX-2700N MX-2300G MX-2700G MX-2300FG MX-2700FG (serv.man26)
Fax Quick Ref Guide (Hard copy supplied with MX-FXX1 Fax Option)
User Manual / Operation Manual
|
36
|
1.75 MB
|
|
|
MX-2300N MX-2700N MX-2300G MX-2700G MX-2300FG MX-2700FG (serv.man27)
Software Setup Guide (Hard copy supplied with product).
User Manual / Operation Manual
|
48
|
2.94 MB
|
|
|
MX-2300N MX-2700N MX-2300G MX-2700G MX-2300FG MX-2700FG (serv.man28)
Safety Guide (Hard copy supplied with product).
User Manual / Operation Manual
|
28
|
1.35 MB
|
|
|
MX-2300N MX-2700N MX-2300G MX-2700G MX-2300FG MX-2700FG (serv.man29)
Troubleshooting Guide (Hard copy supplied with product).
User Manual / Operation Manual
|
44
|
1.81 MB
|
|
|
MX-2300N MX-2700N MX-2300G MX-2700G MX-2300FG MX-2700FG (serv.man30)
Quick Start Guide (Hard copy supplied with product).
User Manual / Operation Manual
|
88
|
5.23 MB
|

|
MX-2300N MX-2700N MX-2300G MX-2700G MX-2300FG MX-2700FG
Mac OS10.8 Driver Rquires Postscript option. Mac OS
Drivers
|
|
2.94 MB
|
|
|
MX-2300N MX-2700N MX-2300G MX-2700G MX-2300FG MX-2700FG (serv.man15)
Revised Nov 11
Service Manual / Parts Guide
|
19
|
2.26 MB
|
|
|
MX-2300N MX-2700N MX-2300G MX-2700G MX-2300FG MX-2700FG (serv.man16)
Revised Nov 11
Service Manual / Parts Guide
|
109
|
16.74 MB
|
|
|
MX-2300N MX-2700N MX-2300G MX-2700G MX-2300FG MX-2700FG (serv.man17)
Revised Nov 11
Service Manual / Parts Guide
|
50
|
694.19 KB
|

|
MX-2300N MX-2700N MX-2300G MX-2700G MX-2300FG MX-2700FG (serv.man6)
Test tif MX scanning
Service Manual / Specification
|
|
3.86 MB
|
|
|
MX-2300N MX-2700N MX-2300G MX-2700G MX-2300FG MX-2700FG (serv.man7)
General Product Specifications, (taken from Service Manual)
Service Manual / Specification
|
16
|
374.42 KB
|
|
|
MX-2300N MX-2700N MX-2300G MX-2700G MX-2300FG MX-2700FG (serv.man39)
Parts change for productivity improvement.
Service Manual / Technical Bulletin
|
3
|
184.15 KB
|
|
|
MX-2300N MX-2700N MX-2300G MX-2700G MX-2300FG MX-2700FG (serv.man40)
Design change of MF Tray 2 Upper.
Service Manual / Technical Bulletin
|
2
|
216.35 KB
|
|
|
MX-2300N MX-2700N MX-2300G MX-2700G MX-2300FG MX-2700FG (serv.man41)
Modification of drive belt shaft.
Service Manual / Technical Bulletin
|
2
|
68.49 KB
|
|
|
MX-2300N MX-2700N MX-2300G MX-2700G MX-2300FG MX-2700FG (serv.man42)
Preventing detection of waste toner bottle full.
Service Manual / Technical Bulletin
|
2
|
101.04 KB
|
|
|
MX-2300N MX-2700N MX-2300G MX-2700G MX-2300FG MX-2700FG (serv.man43)
Change in shape of open close lock pawl.
Service Manual / Technical Bulletin
|
3
|
97.28 KB
|
|
|
MX-2300N MX-2700N MX-2300G MX-2700G MX-2300FG MX-2700FG (serv.man44)
Temporary change in containment bag for starting powder.
Service Manual / Technical Bulletin
|
1
|
102.62 KB
|
|
|
MX-2300N MX-2700N MX-2300G MX-2700G MX-2300FG MX-2700FG (serv.man45)
Starting Powder List (This list takes priority over information in Service Manuals).
Service Manual / Technical Bulletin
|
4
|
66.25 KB
|
|
|
MX-2300N MX-2700N MX-2300G MX-2700G MX-2300FG MX-2700FG (serv.man46)
Material change Rotation Plate Sheet.
Service Manual / Technical Bulletin
|
3
|
290.1 KB
|
|
|
MX-2300N MX-2700N MX-2300G MX-2700G MX-2300FG MX-2700FG (serv.man47)
Recommended shutdown procedure and Power Cycling of MFD
Service Manual / Technical Bulletin
|
1
|
186.43 KB
|
|
|
MX-2300N MX-2700N MX-2300G MX-2700G MX-2300FG MX-2700FG (serv.man48)
IMPORTANT Handling of EEPROM's.
Service Manual / Technical Bulletin
|
5
|
203.32 KB
|
|
|
MX-2300N MX-2700N MX-2300G MX-2700G MX-2300FG MX-2700FG (serv.man49)
Change in material of pick up roller.
Service Manual / Technical Bulletin
|
2
|
77.2 KB
|
|
|
MX-2300N MX-2700N MX-2300G MX-2700G MX-2300FG MX-2700FG (serv.man50)
CCE-1306 A REMINDER TO INSERT CONNECTORS TO DRIVER PWB COMPLETELY
Service Manual / Technical Bulletin
|
2
|
237.57 KB
|
|
|
MX-2300N MX-2700N MX-2300G MX-2700G MX-2300FG MX-2700FG (serv.man51)
Treatment for F2-6 Trouble Code.
Service Manual / Technical Bulletin
|
3
|
117.12 KB
|
|
|
MX-2300N MX-2700N MX-2300G MX-2700G MX-2300FG MX-2700FG (serv.man52)
CCE-1286 COUNTERMEASURE FOR NOISE FROM TN PIPE BK UNIT
Service Manual / Technical Bulletin
|
2
|
126.49 KB
|
|
|
MX-2300N MX-2700N MX-2300G MX-2700G MX-2300FG MX-2700FG (serv.man53)
CCE-1076 WHITE STREAK S DUE TO THE DOCTOR COVER SEAL OR INNER BLADE WEAR.
Service Manual / Technical Bulletin
|
3
|
280.8 KB
|
|
|
MX-2300N MX-2700N MX-2300G MX-2700G MX-2300FG MX-2700FG (serv.man54)
STRENGTH ENHANCEMENT OF PRIMARY TRANSFER LINK FIXING PLATE
Service Manual / Technical Bulletin
|
2
|
95.37 KB
|
|
|
MX-2300N MX-2700N MX-2300G MX-2700G MX-2300FG MX-2700FG (serv.man55)
CHANGE OF MICRO SWITCH AT RSPF PAPER FEED SECTION
Service Manual / Technical Bulletin
|
4
|
151.91 KB
|
|
|
MX-2300N MX-2700N MX-2300G MX-2700G MX-2300FG MX-2700FG (serv.man56)
CHANGE OF MICROSWITCH RSPF-DSPF SWITCH
Service Manual / Technical Bulletin
|
3
|
146.49 KB
|
|
|
MX-2300N MX-2700N MX-2300G MX-2700G MX-2300FG MX-2700FG (serv.man57)
PREVENTION OF F2-6 ERROR. TONER CARTRIDGE DRIVE AND STORAGE NOTES.
Service Manual / Technical Bulletin
|
3
|
154 KB
|
|
|
MX-2300N MX-2700N MX-2300G MX-2700G MX-2300FG MX-2700FG (serv.man58)
IMPROVEMENTS FOR THE PREVENTION OF LEAKING FROM THE PROCESS ELECTRODE COVER
Service Manual / Technical Bulletin
|
2
|
57.68 KB
|
|
|
MX-2300N MX-2700N MX-2300G MX-2700G MX-2300FG MX-2700FG (serv.man59)
TRANSPORT JAM FROM THE OPTION DESK. (PPD1_S3 etc.)
Service Manual / Technical Bulletin
|
2
|
71.58 KB
|
|
|
MX-2300N MX-2700N MX-2300G MX-2700G MX-2300FG MX-2700FG (serv.man60)
COUNTERMEASURES FOR THE 2ND TRANSFER DRIVING PULLEY BELT COMING LOOSE
Service Manual / Technical Bulletin
|
2
|
88.6 KB
|
|
|
MX-2300N MX-2700N MX-2300G MX-2700G MX-2300FG MX-2700FG (serv.man61)
REMOVAL OF LCD MYLAR A B DUE TO CHANGES TO THE 8.1 TOUCH PANEL
Service Manual / Technical Bulletin
|
1
|
27.72 KB
|
|
|
MX-2300N MX-2700N MX-2300G MX-2700G MX-2300FG MX-2700FG (serv.man62)
STRENGTH INCREASE TO BEADED PART OF THE 2ND TRANSFER BELT
Service Manual / Technical Bulletin
|
1
|
73.03 KB
|
|
|
MX-2300N MX-2700N MX-2300G MX-2700G MX-2300FG MX-2700FG (serv.man63)
IMPROVEMENTS TO THE TRANSPORT ROLLER POWER OF THE 2ND CASSETTE PAPER FEED UNIT
Service Manual / Technical Bulletin
|
2
|
184.03 KB
|
|
|
MX-2300N MX-2700N MX-2300G MX-2700G MX-2300FG MX-2700FG (serv.man64)
INCREASE IN VERTICAL TRANSFERABILITY MARGIN OF RIGHT LOWER DOOR
Service Manual / Technical Bulletin
|
2
|
110.59 KB
|
|
|
MX-2300N MX-2700N MX-2300G MX-2700G MX-2300FG MX-2700FG (serv.man65)
FIX TO INCREASE THE MARGIN THAT THE FAN MOTOR FASTENER WILL NOT BECOME STRIPPED
Service Manual / Technical Bulletin
|
2
|
49.27 KB
|
|
|
MX-2300N MX-2700N MX-2300G MX-2700G MX-2300FG MX-2700FG (serv.man66)
PRECAUTIONS WHEN INSERTING A TONER CARTRIDGE
Service Manual / Technical Bulletin
|
1
|
15.47 KB
|
|
|
MX-2300N MX-2700N MX-2300G MX-2700G MX-2300FG MX-2700FG (serv.man67)
FRX1U (DSK) ROM UPGRADE ... (7)
Service Manual / Technical Bulletin
|
5
|
50.5 KB
|
|
|
MX-2300N MX-2700N MX-2300G MX-2700G MX-2300FG MX-2700FG (serv.man68)
SUPPORT AGAINST SCUFFING THE PHOTORECEPTOR DRUM WHEN PULLING OUT THE DV UNIT
Service Manual / Technical Bulletin
|
2
|
124.85 KB
|
|
|
MX-2300N MX-2700N MX-2300G MX-2700G MX-2300FG MX-2700FG (serv.man69)
FIX FOR THE ABNORMAL NOISE (CLICKING) CREATED BY THE FUSING UNIT UPPER HEAT ROLLER RECEIVER
Service Manual / Technical Bulletin
|
2
|
75.3 KB
|
|
|
MX-2300N MX-2700N MX-2300G MX-2700G MX-2300FG MX-2700FG (serv.man70)
ROM UPGRADE... (10). VER 01.19.P0
Service Manual / Technical Bulletin
|
5
|
56.21 KB
|
|
|
MX-2300N MX-2700N MX-2300G MX-2700G MX-2300FG MX-2700FG (serv.man71)
MXDEX2 - COUNTERMEASURES FOR DPFD2_S, etc. CAUSED BY CARRYING FORCE DECREASE BECAUSE OF PAPER POWDERS
Service Manual / Technical Bulletin
|
1
|
26.16 KB
|
|
|
MX-2300N MX-2700N MX-2300G MX-2700G MX-2300FG MX-2700FG (serv.man72)
DAMAGE ON DRUM SURFACE CAUSED WHEN DV UNIT IS PULLED OUT
Service Manual / Technical Bulletin
|
2
|
154.91 KB
|
|
|
MX-2300N MX-2700N MX-2300G MX-2700G MX-2300FG MX-2700FG (serv.man73)
H4-30 ERROR CAUSED BY INSUFFICIENT CRIMPING AT THE TS-HL MAIN HARNESS FASTEN TERMINAL AT THE TOP OF THE FUSING UNIT
Service Manual / Technical Bulletin
|
2
|
84.76 KB
|
|
|
MX-2300N MX-2700N MX-2300G MX-2700G MX-2300FG MX-2700FG (serv.man74)
ISSUING EXPLANATORY MATERIAL OF JOB LOG CODES.
Service Manual / Technical Bulletin
|
13
|
160.14 KB
|
|
|
MX-2300N MX-2700N MX-2300G MX-2700G MX-2300FG MX-2700FG (serv.man75)
JAM (APPD1_N) RESULTING FROM ADU FOLLOWER ROLLER SPRING COMING-OFF
Service Manual / Technical Bulletin
|
2
|
119.7 KB
|
|
|
MX-2300N MX-2700N MX-2300G MX-2700G MX-2300FG MX-2700FG (serv.man76)
CHANGE OF INITIAL VALUES OF PREHEAT MODE AND AUTO POWER SHUT-OFF MODE INVOLVED IN SUPPORT OF ENERGY STAR VER1.1 (TIER II)
Service Manual / Technical Bulletin
|
1
|
27.85 KB
|
|
|
MX-2300N MX-2700N MX-2300G MX-2700G MX-2300FG MX-2700FG (serv.man77)
CHANGE OF SHAPE OF PROCESS F COVER
Service Manual / Technical Bulletin
|
2
|
44.98 KB
|
|
|
MX-2300N MX-2700N MX-2300G MX-2700G MX-2300FG MX-2700FG (serv.man78)
L4-31 TROUBLE CODE OCCURRENCE
Service Manual / Technical Bulletin
|
2
|
44.93 KB
|
|
|
MX-2300N MX-2700N MX-2300G MX-2700G MX-2300FG MX-2700FG (serv.man79)
IMPROVEMENT FOR PRECISION OF DETECTING BEING FULL OF WASTE TONER
Service Manual / Technical Bulletin
|
2
|
45.31 KB
|
|
|
MX-2300N MX-2700N MX-2300G MX-2700G MX-2300FG MX-2700FG (serv.man80)
STRIPE PRINTING IN DRUM AXIS DIRECTION RESULTING FROM CLOUDY POLYGON MIRROR IN LSU
Service Manual / Technical Bulletin
|
1
|
28.02 KB
|
|
|
MX-2300N MX-2700N MX-2300G MX-2700G MX-2300FG MX-2700FG (serv.man81)
CONTAMINATION OF WHITE CALIBRATION SHEET ON SPF GLASS UNIT
Service Manual / Technical Bulletin
|
2
|
67.07 KB
|
|
|
MX-2300N MX-2700N MX-2300G MX-2700G MX-2300FG MX-2700FG (serv.man82)
HANDLING TROUBLE CODE F2-40 INVOLVING LEAK FROM PROCESS ELECTRODE
Service Manual / Technical Bulletin
|
2
|
129.99 KB
|
|
|
MX-2300N MX-2700N MX-2300G MX-2700G MX-2300FG MX-2700FG (serv.man83)
PAPER FEED JAM (DPFD1_N4, ETC.)
Service Manual / Technical Bulletin
|
2
|
67.99 KB
|
|
|
MX-2300N MX-2700N MX-2300G MX-2700G MX-2300FG MX-2700FG (serv.man84)
BREAKAGE OF PAPER EMPTY ACTUATOR
Service Manual / Technical Bulletin
|
2
|
76.81 KB
|
|
|
MX-2300N MX-2700N MX-2300G MX-2700G MX-2300FG MX-2700FG (serv.man85)
INCORRECT DETECTION OF WASTE TONER BOX FULL
Service Manual / Technical Bulletin
|
3
|
133.02 KB
|
|
|
MX-2300N MX-2700N MX-2300G MX-2700G MX-2300FG MX-2700FG (serv.man86)
COUNTERMEASURES FOR F2-40 TROUBLE
Service Manual / Technical Bulletin
|
2
|
85.78 KB
|
|
|
MX-2300N MX-2700N MX-2300G MX-2700G MX-2300FG MX-2700FG (serv.man87)
COUNTERMEASURE TO COPE WITH L4-06 TROUBLE,AND OR YELLOW COLOUR DROPPING OUT
Service Manual / Technical Bulletin
|
2
|
102.03 KB
|
|
|
MX-2300N MX-2700N MX-2300G MX-2700G MX-2300FG MX-2700FG (serv.man88)
IMPROVEMENT OF IMAGE UNEVENNESS
Service Manual / Technical Bulletin
|
2
|
81.79 KB
|
|
|
MX-2300N MX-2700N MX-2300G MX-2700G MX-2300FG MX-2700FG (serv.man89)
IMPROVEMENT OF E7-11 SHADING TROUBLE.
Service Manual / Technical Bulletin
|
2
|
93 KB
|
|
|
MX-2300N MX-2700N MX-2300G MX-2700G MX-2300FG MX-2700FG (serv.man90)
REPLACEMENT OF UPPER HEAT ROLLER.
Service Manual / Technical Bulletin
|
2
|
79.31 KB
|
|
|
MX-2300N MX-2700N MX-2300G MX-2700G MX-2300FG MX-2700FG (serv.man91)
STRENGTHENING THE SPRING ATTACHMENT HOLE OF TENSION HOLDER A ON RSPF.
Service Manual / Technical Bulletin
|
1
|
77.26 KB
|
|
|
MX-2300N MX-2700N MX-2300G MX-2700G MX-2300FG MX-2700FG (serv.man92)
REMEDY FOR OPC LAYER S PEELING-OFF
Service Manual / Technical Bulletin
|
2
|
107.89 KB
|
|
|
MX-2300N MX-2700N MX-2300G MX-2700G MX-2300FG MX-2700FG (serv.man93)
INFORMATION OF OPERATION PROCEDURE FOR REPLACING THE MFP BOARD
Service Manual / Technical Bulletin
|
2
|
59.27 KB
|
|
|
MX-2300N MX-2700N MX-2300G MX-2700G MX-2300FG MX-2700FG (serv.man94)
REDUCING UNEVEN CHARGE (IMAGE STREAKING)
Service Manual / Technical Bulletin
|
2
|
80.92 KB
|
|
|
MX-2300N MX-2700N MX-2300G MX-2700G MX-2300FG MX-2700FG (serv.man95)
IMPROVEMENT OF UPPER HEAT ROLLER AGAINST WRINKLE.
Service Manual / Technical Bulletin
|
1
|
74.56 KB
|
|
|
MX-2300N MX-2700N MX-2300G MX-2700G MX-2300FG MX-2700FG (serv.man96)
CPFD2 JAMMING (OR OTHER) OCCURS FROM MISSING TRANSPORT LOWER GEAR PULLEY.
Service Manual / Technical Bulletin
|
2
|
101.15 KB
|
|
|
MX-2300N MX-2700N MX-2300G MX-2700G MX-2300FG MX-2700FG (serv.man97)
Staple cartridge As Service Part
Service Manual / Technical Bulletin
|
1
|
45.97 KB
|
|
|
MX-2300N MX-2700N MX-2300G MX-2700G MX-2300FG MX-2700FG (serv.man98)
Procedure Cautions For Replacing The HDD
Service Manual / Technical Bulletin
|
5
|
116.25 KB
|
|
|
MX-2300N MX-2700N MX-2300G MX-2700G MX-2300FG MX-2700FG (serv.man99)
Changes To The Waste Toner Bottle
Service Manual / Technical Bulletin
|
2
|
150.96 KB
|
|
|
MX-2300N MX-2700N MX-2300G MX-2700G MX-2300FG MX-2700FG (serv.man100)
ROM Upgrade 0117P0 (OSA Embedded)
Service Manual / Technical Bulletin
|
3
|
43.05 KB
|
|
|
MX-2300N MX-2700N MX-2300G MX-2700G MX-2300FG MX-2700FG (serv.man101)
INCREASING SHEET FEEDING FORCE WHEN FEEDING AN INDEFINITE SIZE HEAVY PAPER
Service Manual / Technical Bulletin
|
1
|
64.93 KB
|
|
|
MX-2300N MX-2700N MX-2300G MX-2700G MX-2300FG MX-2700FG (serv.man102)
IMPROVEMENT IN MINOR UNEVEN CONTRASTING DENSITY AT A CONSTANT PITCH
Service Manual / Technical Bulletin
|
1
|
75.91 KB
|
|
|
MX-2300N MX-2700N MX-2300G MX-2700G MX-2300FG MX-2700FG (serv.man103)
IMPROVEMENT IN FULL DETECT LEVER RETURN PERFORMANCE
Service Manual / Technical Bulletin
|
2
|
85.02 KB
|
|
|
MX-2300N MX-2700N MX-2300G MX-2700G MX-2300FG MX-2700FG (serv.man104)
CHANGE OF RSPF HEIGHT AJDUSTMENT METHOD
Service Manual / Technical Bulletin
|
4
|
340.92 KB
|
|
|
MX-2300N MX-2700N MX-2300G MX-2700G MX-2300FG MX-2700FG (serv.man105)
STRENGTH IMPROVEMENT OF THE OUTPUT AXIS GEAR OF THE LIFT MOTOR A
Service Manual / Technical Bulletin
|
2
|
81.61 KB
|
|
|
MX-2300N MX-2700N MX-2300G MX-2700G MX-2300FG MX-2700FG (serv.man106)
CHANGE OF THE MEMORY PWB ATTACHING PROCEDURE TO THE MFP PWB.
Service Manual / Technical Bulletin
|
1
|
17.74 KB
|
|
|
MX-2300N MX-2700N MX-2300G MX-2700G MX-2300FG MX-2700FG (serv.man107)
050-NEW SET OF SERVICE PARTS THAT COMBINES THE FILTER COVER WITH TONER FILTER.
Service Manual / Technical Bulletin
|
1
|
64.48 KB
|
|
|
MX-2300N MX-2700N MX-2300G MX-2700G MX-2300FG MX-2700FG (serv.man108)
049-NEW TYPE MFP CONTROL PWB
Service Manual / Technical Bulletin
|
2
|
150.66 KB
|
|
|
MX-2300N MX-2700N MX-2300G MX-2700G MX-2300FG MX-2700FG (serv.man109)
048-SPOT DELETION OWING TO RUST ON THE METAL PART OF THE 1ST TRANSFER COAT ROLLER.
Service Manual / Technical Bulletin
|
2
|
74.91 KB
|
|
|
MX-2300N MX-2700N MX-2300G MX-2700G MX-2300FG MX-2700FG (serv.man110)
030-PROCEDURE TO OVERCOME POOR FUSING-REVISED AUGUST 07
Service Manual / Technical Bulletin
|
5
|
76.17 KB
|
|
|
MX-2300N MX-2700N MX-2300G MX-2700G MX-2300FG MX-2700FG (serv.man111)
047-ABOLITION OF STARTING POWDER APPLICATION WHEN INSTALLING THE PRIMARY TRANSFER UNIT.
Service Manual / Technical Bulletin
|
2
|
70.65 KB
|
|
|
MX-2300N MX-2700N MX-2300G MX-2700G MX-2300FG MX-2700FG (serv.man112)
046-SETUP OF WASTE TONER BOTTLE NOZZLES AND CUSHIONS AS SERVICE PARTS
Service Manual / Technical Bulletin
|
2
|
90.64 KB
|
|
|
MX-2300N MX-2700N MX-2300G MX-2700G MX-2300FG MX-2700FG (serv.man113)
045-INFORMATION ON ACTIONS WHEN BLACK STRIPES ARE CAUSED ON THE REVERSE OF COPIED PAPER.
Service Manual / Technical Bulletin
|
2
|
97.12 KB
|
|
|
MX-2300N MX-2700N MX-2300G MX-2700G MX-2300FG MX-2700FG (serv.man114)
044-PAPER FEEDS IN A BUNDLE OWING TO THE STOPPER THAT DESCENDS WHEN LOADING PAPER TO THE BYPASS TRAY.
Service Manual / Technical Bulletin
|
2
|
78.05 KB
|
|
|
MX-2300N MX-2700N MX-2300G MX-2700G MX-2300FG MX-2700FG (serv.man115)
043-DEFECTIVE BLACK AND WHITE PRINTING
Service Manual / Technical Bulletin
|
2
|
80.63 KB
|
|
|
MX-2300N MX-2700N MX-2300G MX-2700G MX-2300FG MX-2700FG (serv.man116)
042-METHOD FOR ADJUSTING RSPF BELT TENSION
Service Manual / Technical Bulletin
|
2
|
102.29 KB
|
|
|
MX-2300N MX-2700N MX-2300G MX-2700G MX-2300FG MX-2700FG (serv.man117)
041-IMPROVEMENT IN LEVEL OF LSU DUSTPROOF GLASS DIRT PREVENTION.
Service Manual / Technical Bulletin
|
2
|
83.87 KB
|
|
|
MX-2300N MX-2700N MX-2300G MX-2700G MX-2300FG MX-2700FG (serv.man118)
040-MEASURES AGAINST JAMMED MC CLEANER SHAFT WHEN INSERTING.
Service Manual / Technical Bulletin
|
2
|
92.11 KB
|
|
|
MX-2300N MX-2700N MX-2300G MX-2700G MX-2300FG MX-2700FG (serv.man119)
039-MEASURES AGAINST SPPD3_N JAM at RSPF WHEN SETTING UP
Service Manual / Technical Bulletin
|
1
|
73.86 KB
|
|
|
MX-2300N MX-2700N MX-2300G MX-2700G MX-2300FG MX-2700FG (serv.man120)
038-MEASURES AGAINST POD3_N JAM OWING TO DELIVERY ROLLER DIAMETER EXPANSION
Service Manual / Technical Bulletin
|
1
|
78.43 KB
|
|
|
MX-2300N MX-2700N MX-2300G MX-2700G MX-2300FG MX-2700FG (serv.man121)
037-INCREASE IN MARGIN AGAINST TONER FALLING FROM DV UNIT.
Service Manual / Technical Bulletin
|
2
|
97.75 KB
|
|
|
MX-2300N MX-2700N MX-2300G MX-2700G MX-2300FG MX-2700FG (serv.man122)
036-MEASURES AGAINST ABNORMAL SOUNDS FROM THE TONER PIPE UNIT.
Service Manual / Technical Bulletin
|
2
|
82.52 KB
|
|
|
MX-2300N MX-2700N MX-2300G MX-2700G MX-2300FG MX-2700FG (serv.man123)
GENERAL PROCEDURE FOR COLOUR CALIBRATION SET-UP
Service Manual / Technical Bulletin
|
2
|
83.06 KB
|
|
|
MX-2300N MX-2700N MX-2300G MX-2700G MX-2300FG MX-2700FG (serv.man124)
035-MEASURES AGAINST JAMMED MC CLEANER SHAFT WHEN INSERTING.
Service Manual / Technical Bulletin
|
2
|
89.09 KB
|
|
|
MX-2300N MX-2700N MX-2300G MX-2700G MX-2300FG MX-2700FG (serv.man125)
034-IMPROVEMENT IN CLEANING BY PREVENTING THE DEFORMATION OF THE TONER STIRRING SHEET OF THE PROCESS UNIT.
Service Manual / Technical Bulletin
|
2
|
118.41 KB
|
|
|
MX-2300N MX-2700N MX-2300G MX-2700G MX-2300FG MX-2700FG (serv.man126)
034-SERVICE PARTS FOR THE PAPER TRAY HEATER.
Service Manual / Technical Bulletin
|
2
|
113.53 KB
|
|
|
MX-2300N MX-2700N MX-2300G MX-2700G MX-2300FG MX-2700FG (serv.man127)
033-SETTING OF LSU HEATER SERVICE PARTS.
Service Manual / Technical Bulletin
|
11
|
654.21 KB
|
|
|
MX-2300N MX-2700N MX-2300G MX-2700G MX-2300FG MX-2700FG (serv.man128)
032-SERVICE PARTS FOR THE ELECTRIC COMPONENT KIT FOR HEATER
Service Manual / Technical Bulletin
|
5
|
316.7 KB
|
|
|
MX-2300N MX-2700N MX-2300G MX-2700G MX-2300FG MX-2700FG (serv.man129)
031-SETTING OF SCANNER DRY HEATER AS SERVICE PART.
Service Manual / Technical Bulletin
|
5
|
274.92 KB
|
|
|
MX-2300N MX-2700N MX-2300G MX-2700G MX-2300FG MX-2700FG (serv.man130)
029-REMINDER TO UNLOCK PAPER CASSETTE
Service Manual / Technical Bulletin
|
1
|
74.2 KB
|
|
|
MX-2300N MX-2700N MX-2300G MX-2700G MX-2300FG MX-2700FG (serv.man131)
028-CHANGE OF MG ROLLER IN DV UNIT.
Service Manual / Technical Bulletin
|
1
|
64.41 KB
|
|
|
MX-2300N MX-2700N MX-2300G MX-2700G MX-2300FG MX-2700FG (serv.man132)
IC Failure causing scan copy issues
Service Manual / Technical Bulletin
|
4
|
116.08 KB
|
|
|
MX-2300N MX-2700N MX-2300G MX-2700G MX-2300FG MX-2700FG (serv.man133)
027-ADDING INDICATION LABEL.
Service Manual / Technical Bulletin
|
2
|
98.79 KB
|
|
|
MX-2300N MX-2700N MX-2300G MX-2700G MX-2300FG MX-2700FG (serv.man134)
026-CHANGE OF FUSING RELEASE LEVER COLOUR (BLUE TO BLACK).
Service Manual / Technical Bulletin
|
2
|
77.69 KB
|
|
|
MX-2300N MX-2700N MX-2300G MX-2700G MX-2300FG MX-2700FG (serv.man135)
025-PREVENTING LEFT TRANSFER GUIDE PLATE FROM DROPOUT ON FRONT SIDE.
Service Manual / Technical Bulletin
|
2
|
70.98 KB
|
|
|
MX-2300N MX-2700N MX-2300G MX-2700G MX-2300FG MX-2700FG (serv.man136)
024-DISPLACEMENT OF THE 500 SHEET CASSETTE S
Service Manual / Technical Bulletin
|
4
|
190.3 KB
|
|
|
MX-2300N MX-2700N MX-2300G MX-2700G MX-2300FG MX-2700FG (serv.man137)
023-TURNING THE CORNERS OF THE COPY PAPER
Service Manual / Technical Bulletin
|
1
|
83.8 KB
|
|
|
MX-2300N MX-2700N MX-2300G MX-2700G MX-2300FG MX-2700FG (serv.man138)
021-Firmware Upgrade ... (3, 4 and 5).
Service Manual / Technical Bulletin
|
7
|
100.77 KB
|
|
|
MX-2300N MX-2700N MX-2300G MX-2700G MX-2300FG MX-2700FG (serv.man139)
020-IMPROVEMENT IN TN PIPE UNIT FOR BLACK TONER
Service Manual / Technical Bulletin
|
2
|
75.83 KB
|
|
|
MX-2300N MX-2700N MX-2300G MX-2700G MX-2300FG MX-2700FG (serv.man140)
019-DISPLACEMENT OF PRIMARY TRANSFER ROLLER
Service Manual / Technical Bulletin
|
2
|
89.4 KB
|
|
|
MX-2300N MX-2700N MX-2300G MX-2700G MX-2300FG MX-2700FG (serv.man141)
018-PREVENTING FAILURES IN LIFT-UP MOTOR OPERATION.
Service Manual / Technical Bulletin
|
1
|
61.43 KB
|
|
|
MX-2300N MX-2700N MX-2300G MX-2700G MX-2300FG MX-2700FG (serv.man142)
017-RSPF OC MAT PASTE PROCEDURE.
Service Manual / Technical Bulletin
|
3
|
131.19 KB
|
|
|
MX-2300N MX-2700N MX-2300G MX-2700G MX-2300FG MX-2700FG (serv.man143)
016-IMPROVEMENT OF PRIMARY TRANSFER BELT CLEANING
Service Manual / Technical Bulletin
|
10
|
391.08 KB
|
|
|
MX-2300N MX-2700N MX-2300G MX-2700G MX-2300FG MX-2700FG (serv.man144)
015-NEW COLOUR TEST CHART FOR SERVICE PARTS.
Service Manual / Technical Bulletin
|
2
|
155.47 KB
|
|
|
MX-2300N MX-2700N MX-2300G MX-2700G MX-2300FG MX-2700FG (serv.man145)
014-REDUCING POD1_N JAM OR A H5-01
Service Manual / Technical Bulletin
|
4
|
203.88 KB
|
|
|
MX-2300N MX-2700N MX-2300G MX-2700G MX-2300FG MX-2700FG (serv.man146)
013-CHANGE OF C-J PACKING MYLAR SHAPE.
Service Manual / Technical Bulletin
|
2
|
95.09 KB
|
|
|
MX-2300N MX-2700N MX-2300G MX-2700G MX-2300FG MX-2700FG (serv.man147)
012-COUNTERMEASURES TO COPE WITH TONER CLOGGING IN TN PIPE UNIT (FOR BLACK).
Service Manual / Technical Bulletin
|
2
|
86.54 KB
|
|
|
MX-2300N MX-2700N MX-2300G MX-2700G MX-2300FG MX-2700FG (serv.man148)
011-COUNTERMEASURES TO COPE WITH WRONG IMAGE SENDING BY IMAGE SEND FUNCTION.
Service Manual / Technical Bulletin
|
2
|
89.72 KB
|
|
|
MX-2300N MX-2700N MX-2300G MX-2700G MX-2300FG MX-2700FG (serv.man149)
010-INCREASE IN INTENSITY OF POSITIIONING BOSSES ATTACHED TO REVERSE PG OF RIGHT DOOR UNIT.
Service Manual / Technical Bulletin
|
1
|
78.05 KB
|
|
|
MX-2300N MX-2700N MX-2300G MX-2700G MX-2300FG MX-2700FG (serv.man150)
009-ROM UPGRADE... (1) TO (2)
Service Manual / Technical Bulletin
|
3
|
75.89 KB
|
|
|
MX-2300N MX-2700N MX-2300G MX-2700G MX-2300FG MX-2700FG (serv.man151)
005-SETTING OF STRONTIUM TITANATE SERVICE PARTS.
Service Manual / Technical Bulletin
|
1
|
64.7 KB
|
|
|
MX-2300N MX-2700N MX-2300G MX-2700G MX-2300FG MX-2700FG (serv.man152)
008-COUNTERMEASURES TO COPE WITH E7-03 ERROR (HDD TROUBLE).
Service Manual / Technical Bulletin
|
1
|
64.98 KB
|
|
|
MX-2300N MX-2700N MX-2300G MX-2700G MX-2300FG MX-2700FG (serv.man153)
007-CAUTIONS ON HDD REPLACEMENT AND PROCEDURE FOR UPDATING INSTRUCTION MANUAL.
Service Manual / Technical Bulletin
|
5
|
136.07 KB
|
|
|
MX-2300N MX-2700N MX-2300G MX-2700G MX-2300FG MX-2700FG (serv.man154)
006-COMMONALITY OF PRIMARY TRANSFER UNIT WITH MX3500 4500 SYSTEM.
Service Manual / Technical Bulletin
|
4
|
160.06 KB
|
|
|
MX-2300N MX-2700N MX-2300G MX-2700G MX-2300FG MX-2700FG (serv.man155)
004-ACTION WHEN INSTALLING MX-FRX1U
Service Manual / Technical Bulletin
|
2
|
55.01 KB
|
|
|
MX-2300N MX-2700N MX-2300G MX-2700G MX-2300FG MX-2700FG (serv.man156)
003-IMPROVEMENT OF MARGIN FOR CARRIER RISE ON REAR SIDE OF PROCESS UNIT
Service Manual / Technical Bulletin
|
2
|
101.61 KB
|
|
|
MX-2300N MX-2700N MX-2300G MX-2700G MX-2300FG MX-2700FG (serv.man157)
002-RSPF Cleaning bulletin
Service Manual / Technical Bulletin
|
1
|
61.83 KB
|

|
MX-2300N MX-2700N MX-2300G MX-2700G MX-2300FG MX-2700FG (serv.man36)
PCU V01.18.P0
Driver / Update
|
|
25.07 MB
|

|
MX-2300N MX-2700N MX-2300G MX-2700G MX-2300FG MX-2700FG (serv.man37)
MX2300 2700 Special Firmware v01.19.P0.c0 for OSA Accounting solutions to support auto logout in copy mode when no button is pressed.
Driver / Update
|
|
25.04 MB
|

|
MX-2300N MX-2700N MX-2300G MX-2700G MX-2300FG MX-2700FG (serv.man38)
Production Run Date 20 01 2010 - Support Tier 2 Running Change (For use with DSK only)
Driver / Update
|
|
25.16 MB
|
|
|
MX-2300N MX-2700N MX-2300G MX-2700G MX-2300FG MX-2700FG (serv.man2)
NEW EEPROM Programming Request Form
Handy Guide
|
3
|
333.07 KB
|
|
|
MX-2300N MX-2700N MX-2300G MX-2700G MX-2300FG MX-2700FG (serv.man3)
GENERAL PROCEDURE FOR COLOUR CALIBRATION SET-UP
Handy Guide
|
2
|
83.06 KB
|
|
|
MX-2300N MX-2700N MX-2300G MX-2700G MX-2300FG MX-2700FG (serv.man4)
August 2007 Version 4 revised handy guide (Includes pastel light, Pastel and C-Jupiter)
Handy Guide
|
53
|
1 MB
|

|
MX-2300N MX-2700N MX-2300G MX-2700G MX-2300FG MX-2700FG (serv.man5)
Tool to assist in determining the cause of repeating marks lines on prints copies.
Handy Guide
|
|
12.12 KB
|
|
|
MX-2300N MX-2700N MX-2300G MX-2700G MX-2300FG MX-2700FG (serv.man31)
How To Read A Main Machine Serial Number
FAQ
|
1
|
16.5 KB
|

|
MX-2300N MX-2700N MX-2300G MX-2700G MX-2300FG MX-2700FG (serv.man32)
UPDATED PJL PCL PS Command Lists
FAQ
|
|
128.84 KB
|
|
|
MX-2300N MX-2700N MX-2300G MX-2700G MX-2300FG MX-2700FG (serv.man33)
How to connect MX colour product to Linux UNIX systems using CUPS
FAQ
|
9
|
1.45 MB
|

|
MX-2300N MX-2700N MX-2300G MX-2700G MX-2300FG MX-2700FG (serv.man34)
Batch Print information
FAQ
|
|
5.73 MB
|

|
MX-2300N MX-2700N MX-2300G MX-2700G MX-2300FG MX-2700FG (serv.man35)
PCL PJL COMMANDS FOR MX SERIES
FAQ
|
|
69.87 KB
|
|
|
MX-2300N MX-2700N MX-2300G MX-2700G MX-2300FG MX-2700FG (serv.man159)
MSDS for MX-27GVSA Yellow Developer, (F-31398)
Regulatory Data
|
4
|
31.8 KB
|
|
|
MX-2300N MX-2700N MX-2300G MX-2700G MX-2300FG MX-2700FG (serv.man160)
MSDS for MX-27GVSA Magenta Developer, (F-31397)
Regulatory Data
|
4
|
32.56 KB
|
|
|
MX-2300N MX-2700N MX-2300G MX-2700G MX-2300FG MX-2700FG (serv.man161)
MSDS for MX-27GVSA Cyan Developer, (F-31396)
Regulatory Data
|
4
|
32.62 KB
|
|
|
MX-2300N MX-2700N MX-2300G MX-2700G MX-2300FG MX-2700FG (serv.man162)
MSDS for MX-27GVBA Black Developer, (F-31391)
Regulatory Data
|
4
|
34.79 KB
|
|
|
MX-2300N MX-2700N MX-2300G MX-2700G MX-2300FG MX-2700FG (serv.man163)
MSDS for MX-27GTYA Yellow Toner, (F-01398)
Regulatory Data
|
4
|
32 KB
|
|
|
MX-2300N MX-2700N MX-2300G MX-2700G MX-2300FG MX-2700FG (serv.man164)
MSDS for MX-27GTMA Magenta Toner, (F-01397)
Regulatory Data
|
4
|
31.99 KB
|
|
|
MX-2300N MX-2700N MX-2300G MX-2700G MX-2300FG MX-2700FG (serv.man165)
MSDS for MX-27GTCA Cyan Toner, (F-01396)
Regulatory Data
|
4
|
32 KB
|
|
|
MX-2300N MX-2700N MX-2300G MX-2700G MX-2300FG MX-2700FG (serv.man166)
MSDS for MX-27GTBA Black Toner, (F-01391)
Regulatory Data
|
4
|
34.04 KB
|

|
MX-2300N MX-2700N MX-2300G MX-2700G MX-2300FG MX-2700FG (serv.man158)
Test
Brochure
|
|
184 B
|


.jpg)
