Sharp AR-PE1 (serv.man42) Service Manual / Technical Bulletin ▷ View online
Sharp Electronics (UK) Ltd., NIS Systems Support
NIS Bulletin 021.doc
Page: 13 of 14
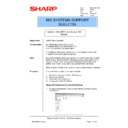
4.1 Click on the Configuration tab and add the options that are fitted to the copier, as shown below.
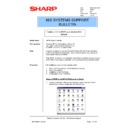
4.2 Click on the Postscript Tab and change the Postscript Output Format from “Optimise for Speed”
to “Optimise for Portability”. This setting is required to overcome potential postscript errors.
Sharp Electronics (UK) Ltd., NIS Systems Support
NIS Bulletin 021.doc
Page: 14 of 14
4.3 Now go to the Fiery Printing tab and ensure that A4 is the default paper size within the paper
source window.
4.4 Now click on Finishing and ensure that the Page Order is set to Reverse. This ensures that multi
paged documents are printed with their last page at the bottom face up and their first page at the
top face up. At this point you can also set any other printer driver defaults that you may wish to
set.
top face up. At this point you can also set any other printer driver defaults that you may wish to
set.
4.5 You can now click on the General tab and print out a test page. The installation is now complete.
Perform this procedure on all workstations that wish to print through the ARPE1. If you wish to
have multiple drivers installed that allows printing via the DIRECT or HOLD queues, the
procedure must be performed a second and third time.
have multiple drivers installed that allows printing via the DIRECT or HOLD queues, the
procedure must be performed a second and third time.

