Sharp AR-NC3D (serv.man3) Handy Guide ▷ View online
10
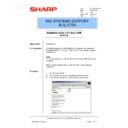
Setting Up LPR Printing
If the printer driver has not already been installed, please install it before
continuing. In the following instructions, some field or dialog names may vary
depending on the NT release pack in use.
continuing. In the following instructions, some field or dialog names may vary
depending on the NT release pack in use.
Windows NT 3.51
1. In the Program Manager group Main, open the Control Panel and double
click on Printers.
2. Highlight the appropriate printer and select Properties from the Printer
menu.
3. Select Other from the list of ports displayed in the Print to: dialog, then select
LPR port from the list of Print Destinations.
4. In
the Name or address of host providing lpd: field, enter the IP address
of the NIC (that was assigned with NTBOOTP).
5. In
the
Name of printer or print queue on that server: field, enter any
desired port name, e.g. LPR1 and click OK to return to the Printer Properties
dialog.
dialog.
6. If the printer is to be shared, click on the checkbox next to Share this
printer on the network. Click on OK when finished.
Windows NT 4.0
1. Click on the Windows 95 Start Button and select Settings, and the Printers.
2. Right click on the appropriate printer and select Properties.
3. On the Ports tab, click on Add Port.
4. Double click on LPR Port in the list of available printer ports.
5. In
2. Right click on the appropriate printer and select Properties.
3. On the Ports tab, click on Add Port.
4. Double click on LPR Port in the list of available printer ports.
5. In
the Name or address of host providing lpd: field, enter the IP address
of the NIC (that was assigned with NTBOOTP).
6. In
the
Name of printer or print queue on that server: field, enter any
desired port name, e.g. LPR1 and click on OK.
7. Click
on
Close to close the Printer Ports dialog. The NIC IP address is now
displayed and currently selected on the list of ports.
8. If the printer is to be shared, click on the Sharing tab, select Shared and
enter the Share name. Click on OK when finished.
Selecting a Shared Printer
This section briefly describes the steps for setting up client access to a shared
printer.
Windows 95: In the Printer Properties on the Details tab, click the Add Port
button and browse the network for the shared printer.
Windows NT 3.51: Select Connect to Printer from the Printer menu in Print
Manager and choose the shared printer from the shared printers list.
printer.
Windows 95: In the Printer Properties on the Details tab, click the Add Port
button and browse the network for the shared printer.
Windows NT 3.51: Select Connect to Printer from the Printer menu in Print
Manager and choose the shared printer from the shared printers list.
Windows NT 4.0: Add a new printer (with Add Printer), select Network
Printer Server rather than My Computer and choose the shared printer from the
shared printers list.
shared printers list.
11
UNIX Configuration
UNIX printing utilizes a line printer daemon (lpd) to direct jobs to the printer. The
NIC supports two modes of lpd printing, host-based lpd and printer-based lpd.
With host-based lpd, the line printer daemon is run on one or more workstations
(hosts) where print jobs are accepted and sent to the NIC. With printer-based
lpd, the NIC acts as the line printer daemon host and accepts print jobs directly.
Many UNIX systems allow either lpd mode to be used, although configuration
may be easier for one of the modes depending on the UNIX system. Following
are some advantages and disadvantages of each mode:
Banner Page Comparison
The host-based lpd can include the user name and file name on the banner
page, while the print-based lpd can only include the host name.
page, while the print-based lpd can only include the host name.
Configuration Comparison
The host-based lpd requires configuration on each host that will be sending jobs
to the printer, while the printer-based lpd requires only the NIC to be configured.
to the printer, while the printer-based lpd requires only the NIC to be configured.
NIC Configuration
TCP/IP configuration of the NIC is needed for all versions of UNIX. Lpd
configuration depends upon the mode selected and the UNIX system in use.
Please refer to the NIC User's Manual for lpd configuration instructions for a
particular UNIX system.
configuration depends upon the mode selected and the UNIX system in use.
Please refer to the NIC User's Manual for lpd configuration instructions for a
particular UNIX system.
Setting the IP Address
The NIC IP address may be initially set in a variety of ways; including with the
MAP utility when a NetWare server is present, with the UNIX bootp daemon, with
rarp, or with the standard UNIX command line utility, arp. The following
instructions use arp, but the other methods may be used instead, depending on
user preference. For directions on using on of the other methods, please refer to
the NIC User's Manual.
1. Press the Status key on the front panel of the printer with the NIC, or if the
printer is off, turn it on and wait for the power-up network status page to
print.
print.
2. Add an entry to the hosts file (usually etc/hosts) that includes the printer's
name and the IP address. For example, to name the printer and associate it
with an IP address of 197.42.211.5, place the following entry in the hosts file:
197.42.211.5 <PrinterName>
with an IP address of 197.42.211.5, place the following entry in the hosts file:
197.42.211.5 <PrinterName>
3. At the UNIX command prompt, type:
arp -s <desired_IP_address> <NIC_Ethernet_address>
(The Ethernet address is listed on the network status page as Network
Address.) For example, arp -s 197.42.211.5 00-40-AF-13-A2-70
(The Ethernet address is listed on the network status page as Network
Address.) For example, arp -s 197.42.211.5 00-40-AF-13-A2-70
4. At the UNIX command prompt, type: ping <desired_IP_address>
For example, ping 197.42.211.5 The NIC will not respond to this ping
command, but will read the IP address.
command, but will read the IP address.
12
5. After a few minutes (usually between 1 and 2 minutes, but possibly up to 5
minutes on very large or busy networks), the NIC will reset and print its
network status page. The new IP address will be listed in the TCP/IP
Network Information section. If the status page doesn't print, recheck the
NIC's Ethernet address entry in the arp command. Once the status page
prints, the new IP address may also be verifies with the ping command.
network status page. The new IP address will be listed in the TCP/IP
Network Information section. If the status page doesn't print, recheck the
NIC's Ethernet address entry in the arp command. Once the status page
prints, the new IP address may also be verifies with the ping command.
Setting Other TCP/IP Parameters
Once the IP address is set, the NIC can be configured via telnet or with a
standard web browser. The following steps describe configuration with a
standard browser. For instructions of configuring via telnet, refer to the NIC
User's Manual.
standard web browser. The following steps describe configuration with a
standard browser. For instructions of configuring via telnet, refer to the NIC
User's Manual.
1. In the browser, connect to http://<NIC_IP_address>
For example, http://197.42.211.5
2. At the NIC's Home Page, click on NIC Configuration.
3. Many of the configuration options are password protected. The default
3. Many of the configuration options are password protected. The default
password is: sysadm The password is case sensitive. To change the
password, select Change Password in the System column.
password, select Change Password in the System column.
4. Select
Setup TCP/IP in the Protocols column and change the settings as
appropriate. If unsure of the correct Subnet mask, and the first number in
the NIC's IP address is from 192 to 254, then use 255.255.255.0 as the
Subnet mask. The Base Port Number displayed is one less than the
printer's actual port number, this for the default of 9100, the Base Port
Number is set to 9099. Host-based lpd requires a port number of 10001,
therefore, if using host-based lpd, change the Base Port Number to 10000.
5. Type the sysadm password in the appropriate box and click Accept
Settings. After a few seconds, the screen should report that the update was
successful. Click the Back Arrow icon twice to return to the NIC
Configuration page.
successful. Click the Back Arrow icon twice to return to the NIC
Configuration page.
6. Optional: Click on Configure Status Page in the Printer column to define
power-up status page settings, e.g. disabling the power-up status page.
7. The changes made to the NIC do not take effect until the unit is reset. Click
on Reset in the System column and click Reset Unit. After a few seconds
the screen should report that the unit was reset. TCP/IP configuration is
now complete.
the screen should report that the unit was reset. TCP/IP configuration is
now complete.


