Sharp PG-A10X (serv.man31) User Manual / Operation Manual ▷ View online
Basic Operation
-27
3
Press
,
or
on the
remote control to select the IN-
PUT mode.
PUT mode.
• After pressing
once on the projector,
use
to select the desired input mode.
Note
• When no signal is received, “NO SIG-
NAL” will be displayed. When a signal
that the projector is not preset to re-
ceive is received, “NOT REG.” will be
displayed.
that the projector is not preset to re-
ceive is received, “NOT REG.” will be
displayed.
• The INPUT mode is not displayed
when “OSD Display” is set to “OFF”.
(See page
(See page
44
.)
About the INPUT mode
4
Press
or
on the remote
control to adjust the volume.
Note
• Pressing
will lower the volume.
Pressing
will raise the volume.
• On the projector, the volume can be
adjusted by pressing
or
.
5
Press
on the remote con-
trol to temporarily display a
black screen and turn off the
sound.
black screen and turn off the
sound.
Note
• Pressing
again will turn the pro-
jected image and sound back on.
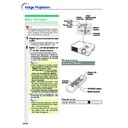
"On-screen Display (Example)
Using RGB
Using
Component
Component
INPUT 1 mode
INPUT 3 mode
Using Video
Using Video
INPUT 2 mode
Using S-Video
Using S-Video
➝
➝
➝
Used for projecting im-
ages from equipment that
sends RGB signals or
component signals con-
nected to the RGB input
terminal.
ages from equipment that
sends RGB signals or
component signals con-
nected to the RGB input
terminal.
Used for projecting im-
ages from equipment
connected to the S-
VIDEO input terminal.
ages from equipment
connected to the S-
VIDEO input terminal.
Used for projecting im-
ages from equipment
connected to the VIDEO
input terminal.
ages from equipment
connected to the VIDEO
input terminal.
INPUT 1
(RGB/
Component)
(RGB/
Component)
INPUT 2
(S-Video)
(S-Video)
INPUT 3
(Video)
(Video)
-28
Image Projection
-28
', ", \, |
buttons
buttons
MENU button
Power OFF
button
ENTER
button
“Language” menu icon
6
Press
on the projector or
on the remote control, then
press that button again while the
confirmation message is dis-
played, to turn off the projector.
confirmation message is dis-
played, to turn off the projector.
Note
• If you accidentally pressed
or
and do not want to turn off the
power, wait until the confirmation
message disappears.
message disappears.
• The projector cannot be operated
while a message “Shutting down.
Please wait.” is displayed.
Please wait.” is displayed.
Info
• Do not unplug the power cord during
projection or cooling fan operation.
This can cause damage due to rise
in internal temperature, as the cool-
ing fan also stops.
This can cause damage due to rise
in internal temperature, as the cool-
ing fan also stops.
Selecting the On-screen
Display Language
Display Language
The on-screen display language of the projec-
tor can be set to English, German, Spanish,
Dutch, French, Italian, Swedish, Portuguese,
Chinese, Korean or Japanese. For operating the
menu screen, see pages
tor can be set to English, German, Spanish,
Dutch, French, Italian, Swedish, Portuguese,
Chinese, Korean or Japanese. For operating the
menu screen, see pages
32
to
35
.
1
Press
on the remote con-
trol.
• The “Picture” menu will be displayed.
2
Press \ or | to select the “Lan-
guage” menu icon.
guage” menu icon.
• The “Language” menu will be displayed.
3
Press ' or " to select the de-
sired language, and then press
sired language, and then press
.
4
Press
.
• The desired language will be set as the
on-screen display.
Basic Operation
-29
Keystone Correction
(Correcting Trapezoidal Distortion)
Correcting Trapezoidal
Distortion
Distortion
This function allows for Keystone (On-screen
Trapezoidal Distortion) Correction.
Trapezoidal Distortion) Correction.
Note
• When the image is projected either from the
top or from the bottom towards the screen
at an angle, the image becomes distorted
trapezoidally.
The function for correcting trapezoidal dis-
tortion is called Keystone Correction.
at an angle, the image becomes distorted
trapezoidally.
The function for correcting trapezoidal dis-
tortion is called Keystone Correction.
• The Keystone Correction can be adjusted up
to an angle of approximately ±35 degrees
(when the picture display mode is set to
“NORMAL” (see page
(when the picture display mode is set to
“NORMAL” (see page
40
)).
1
Press
.
• You can also use
on the projector.
2
Press ', ", \ and | to adjust
the Keystone correction.
• You can also adjust the Keystone cor-
rection using the
or
but-
tons on the projector.
Note
• Since the trapezoidal distortion of the
image can be corrected up to an angle
of approximately ±35 degrees (when
the picture display mode is set to
“NORMAL” (see page
of approximately ±35 degrees (when
the picture display mode is set to
“NORMAL” (see page
40
)), the actual
screen can be diagonally set up to
that angle as well.
that angle as well.
• Press
to make the default set-
ting.
• Straight lines or the edges of images
may appear jagged while adjusting
the image.
the image.
3
Press
.
• You can also use
on the projector.
Note
• You can use the same settings used
in NORMAL mode 4:3 for 16:9.
Compresses
upper side.
upper side.
Compresses
lower side.
lower side.
', ", \, |
buttons
buttons
KEYSTONE
button
UNDO
button
-30
Menu Items
This list shows the items that can be set in the projector.
■ INPUT 1 Mode
Note
• In the “Picture” menu of INPUT 1, “Color”, “Tint” and “Sharp” are only displayed when “Signal Type” is set
to “Component”.
• In the “Picture” menu of INPUT 1, “sRGB” is only displayed when “Signal Type” is set to “RGB”.
+30
−30
+30
−30
+30
−30
+30
−30
+30
−30
+30
−30
+30
−30
Main menu
Sub menu
Main menu
Sub menu
Contrast
Bright
Color
Tint
Sharp
Red
Blue
Reset
sRGB [ON/OFF]
CLR Temp
Gamma
Signal Type
Memory
RGB
Component
Component
5500 K
6500 K
7500 K
8500 K
9300 K
10500 K
6500 K
7500 K
8500 K
9300 K
10500 K
Standard
Presentation
Cinema
Game
Presentation
Cinema
Game
Memory 1
Memory OFF
Memory OFF
Memory 5
Picture
Page
36
+15
−15
+30
−30
+30
−30
+30
−30
Fine Sync
Page
38
Clock
Phase
H-Pos
V-Pos
Reset
Special Modes
Signal Info
Options
Page
44
OSD Display [ON/OFF]
Background
Eco Mode [Eco/Standard]
Sharp
Blue
None
Blue
None
Auto Power Off [ON/OFF]
Menu Position
Password
Anti-Theft
Center
Upper Right
Lower Right
Upper Left
Lower Left
Upper Right
Lower Right
Upper Left
Lower Left
Old Password
New Password
Reconfirm
New Password
Reconfirm
Menu Color
[Opaque/Translucent]
[Opaque/Translucent]
Old Code
New Code
Reconfirm
New Code
Reconfirm
Language
Page
28
Page
50
Lamp Timer (Life)
PRJ Mode
Front
Ceiling+Front
Rear
Ceiling+Rear
Ceiling+Front
Rear
Ceiling+Rear
English
Deutsch
Español
Nederlands
Français
Italiano
Svenska
Português
Deutsch
Español
Nederlands
Français
Italiano
Svenska
Português

