Sharp MX-2630 Service Manual ▷ View online
MX-2630N MX-PK13 (PS3 EXPANSION KIT) 19 – 1
MX-2630N
Service Manual
[19] MX-PK13 (PS3 EXPANSION KIT)
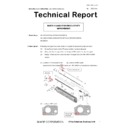
1. Unpacking
A. Packed items check
2. Installation
To install the MX-PK11 (PS3 EXPANSION KIT), the printer expansion
kit MX-PB14 is required.
kit MX-PB14 is required.
A. Enable setting of functions
1)
Enter the product key to enable the functions.
a)
Enter the system setting mode.
b)
The machine enters the product key input mode.
c)
Enter the product key.
d)
Press the registration key.
2)
After completion of the product key input, turn OFF the power
switch on the operation panel of the machine, and turn OFF the
main power switch.
switch on the operation panel of the machine, and turn OFF the
main power switch.
3)
Turn ON the main power switch and the power switch on the oper-
ation panel.
ation panel.
B. Confirmation of function enable
Execute SIM22-10 (Machine configuration display) to check to confirm
that the set functions are enable.
that the set functions are enable.
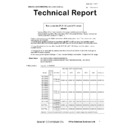
No.
Name
Quantity
1
CD-ROM (For Screen Font)
1
2
Product key sheet
1
1
2
MX-2630N MX-PF10 (BARCODE FONT KIT) 20 – 1
MX-2630N
Service Manual
[20] MX-PF10 (BARCODE FONT KIT)
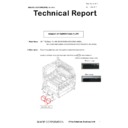
1. Unpacking
A. Packed items check
2. Installation
A. Enable setting of functions
1)
Enter the product key to enable the functions.
a)
Enter the system setting mode.
b)
The machine enters the product key input mode.
c)
Enter the product key.
d)
Press the registration key.
2)
After completion of the product key input, turn OFF the power
switch on the operation panel of the machine, and turn OFF the
main power switch.
switch on the operation panel of the machine, and turn OFF the
main power switch.
3)
Turn ON the main power switch and the power switch on the oper-
ation panel.
ation panel.
B. Confirmation of function enable
Execute SIM22-10 (Machine configuration display) to check to confirm
that the set functions are enable.
that the set functions are enable.
No.
Name
Quantity
1
CD-ROM
1
2
Product key sheet
1
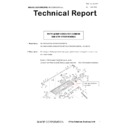
Font No.
Font name
1
Code128TT-Regular
2
Code128-NarrowTT-Regular
3
Code128-WideTT-Regular
4
Code39HalfInch-Regular
5
Code39OneInch-Regular
6
Code39QuarterInch-Regular
7
Code39SmallHigh-Regular
8
Code39Slim-Regular
9
Code39SmallLow-Regular
10
Code39SmallMedium-Regular
11
Code39Wide-Regular
12
Codabar-Regular
13
Interleaved2of5-Regular
14
Interleaved2of5-Thin-Regular
15
OCR-A
16
OCR-B
17
OCR-B-C39-Regular
18
UPC-Half
19
UPC-Half-Bars
20
UPC-HalfMusic
21
UPC-HalfNarrow
22
UPC-HalfThin
23
UPC-Tall-Regular
24
UPC-TallBarsThin-regular
25
UPC-TallMusicThin-Regular
26
UPC-TallNarrow-Regular
27
UPC-TallThin-regular
28
ZipCodeBarcode-Regular
1
2
MX-2630N MX-PU10 (DIRECT PRINT EXPANSION KIT) 21 – 1
MX-2630N
Service Manual
[21] MX-PU10 (DIRECT PRINT EXPANSION KIT)
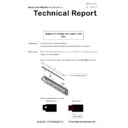
1. Unpacking
A. Packed items check
2. Installation
A. Enable setting of functions
1)
Enter the product key to enable the functions.
a)
b)
The machine enters the product key input mode.
c)
Enter the product key.
d)
Press the registration key.
2)
After completion of the product key input, turn OFF the power
switch on the operation panel of the machine, and turn OFF the
main power switch.
switch on the operation panel of the machine, and turn OFF the
main power switch.
3)
Turn ON the main power switch and the power switch on the oper-
ation panel.
ation panel.
B. Confirmation of function enable
Execute SIM22-10 (Machine configuration display) to check to confirm
that the set functions are enable.
that the set functions are enable.
No.
Name
Quantity
1
Product key sheet
1
2
CD-ROM
1
1
2
MX-2630N MX-FX15 (FACSIMILE EXPANSION KIT) 22 – 1
MX-2630N
Service Manual
[22] MX-FX15 (FACSIMILE EXPANSION KIT)
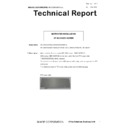
1. Unpacking
A. Packed items check
* This is not bundled with the machines whose destinations are not
above mentioned destinations.
above mentioned destinations.
* From July 2017 production.
2. Installation
Before installation, be sure to turn both the operation and main power
switches off and disconnect the power plug from the power outlet.
Make double sure that the data lamp on the operation panel does not
light up or blink when performing installation.
switches off and disconnect the power plug from the power outlet.
Make double sure that the data lamp on the operation panel does not
light up or blink when performing installation.
A. FAX unit installation
1)
Remove the screw on the rear cabinet cover of the rear cabinet.
2)
Remove the six screws on the MFPC cover of the main unit.
3)
Remove the cabinet.
4)
Cut the cover in a nipper.
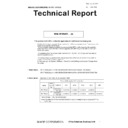
No.
Name
Quantity
1
Fax unit
1
2
Ferrite core
2
3
Step screw
1
4
Screw M3-10
1
5
Screw M3-6
1
6
Line cable
1
7*
Interface cable
(Not used)
1
2
1
4
7
3
5
6*
France
Germany
U.K

