Sharp XG-P25XE (serv.man10) Service Manual ▷ View online
XG-P25X
25
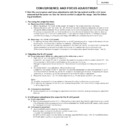
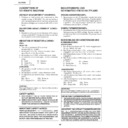
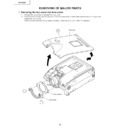
Replacing the R-LCD panel
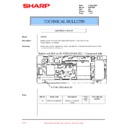
(1) Disconnect the LCD flat cable from the output PWB connector.
<Figure 1>
(2) Remove the two screws "A".
(3) Lift and detach the plate "B" together with the incident light deflection plate.
(2) Remove the two screws "A".
(3) Lift and detach the plate "B" together with the incident light deflection plate.
<Figure 2>
(4) Remove the four screws "C" and separate the units D and E from each other.
(5) Take the R-LCD panel out of the adjusting plate.
(6) Place and fix a new R-LCD panel in the reverse steps.
(7) Adjust the deflection plate. (See page 26).
(8) Adjust the focus and convergence. (See page 21.)
(4) Remove the four screws "C" and separate the units D and E from each other.
(5) Take the R-LCD panel out of the adjusting plate.
(6) Place and fix a new R-LCD panel in the reverse steps.
(7) Adjust the deflection plate. (See page 26).
(8) Adjust the focus and convergence. (See page 21.)
~
Readjust the convergence and focus. Note that the G LCD panel needs no convergence adjustment and has
a small adjustment range in the Z direction.
a small adjustment range in the Z direction.
R-LCD panel
mounting screws
mounting screws
R adjusting plate
R-LCD
4
A
B
A
D
C
C
E
Fig.1
Fig.2
SIDE VIEW
XG-P25X
26
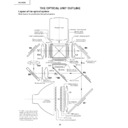
Adjusting the optical axis of the mirrors (M1, M5 and M6)
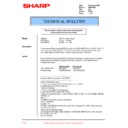
The optical axis must be readjusted if an eclipse happens with the R. G or B mirrors. Generally speaking,
this adjustment is needed when any of the internal optical components has been replaced.
this adjustment is needed when any of the internal optical components has been replaced.
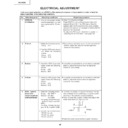
Adjustment procedure required when any of the panels has been replaced or the convergence has been
adjusted
(1) Disconnect the flat cables of all the LCD panels.
(2) Let the lamp light up.
(3) To adjust the G mirror, shield the R and B mirrors with shielding plates (You can use a business card or the like to
adjusted
(1) Disconnect the flat cables of all the LCD panels.
(2) Let the lamp light up.
(3) To adjust the G mirror, shield the R and B mirrors with shielding plates (You can use a business card or the like to
block the light).
(4) Loosen the lock screw of the M1 adjust lever.
(5) Looking at the G image on the screen, turn or slide the M1 adjust lever until the eclipse on the screen disappears.
(5) Looking at the G image on the screen, turn or slide the M1 adjust lever until the eclipse on the screen disappears.
Tighten up the screw.
(6) To adjust the R mirror, shield the G and B mirrors and adjust the M5 adjust lever. For the B mirror, shield the R and
G mirrors and adjust the M6 adjust lever.
(Take the same steps 4 and 5 above.)
(Take the same steps 4 and 5 above.)
(7) Remove all the shielding plates to have a white image.
Make sure there is no eclipse.
FRONT
M5
adjust lever
Lock screws
turn
turn
slide
slide
Shielding plate R
M6
adjust lever
Lock screws
Shielding plate B
Shielding plate G
M1
adjust lever
Lock screws
turn
slide
XG-P25X
27
Color
adjustment
Adjustment direction
Amount of adjustment.
Adjustment place form
Ajdustment jig
Fixing screw
Fixed screw tool.
Red
polarizing plate adjustment
θ
direction
±1°
Notch & Hole A
eccentric screwdriver
A
Phillips screwdriver
Green
polarizing plate adjustment
θ
direction
±1°
Notch & Hole B
eccentric screwdriver
B
Phillips screwdriver
Blue
polarizing plate adjustment
θ
direction
±1°
Notch & Hole C
eccentric screwdriver
C
Phillips screwdriver
Adjustment procedure reguired when the lamp has been replaced and you can see ununifomity. (Case of
Right and Left have ununifomity on the screen)
(1) Let the lamp light up.
(2) Receive the white pattern signal at 100%.
(3) Loosen the four lock screws from the lamp duct.
(4) Looking at the white image on the screen, turn the lamp duct until the uniformity comes to best point on the screen.
(5) Tighten the lock screws of the lamp duct. (Tighten torque is 10±2kg·cm)
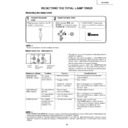
Adjusting the lamp duct.
Adjustment of incident polarizing plate.
Carry it out when removing polarizingplate.
(From the condition that the top cabinet opens.)
1.Remove screws, earth plate from the output PWB.
2.Extend each FFC cable of R, G, B (Using QCNW-4852CEZZ) and try so that it can move a PWB so that it can
1.Remove screws, earth plate from the output PWB.
2.Extend each FFC cable of R, G, B (Using QCNW-4852CEZZ) and try so that it can move a PWB so that it can
see the part which adjusts polarizing plate from the top.
3.Turn on the power, and indicate a black screen on the screen.
<Adjusting the G-LCD incident polarizing plate.>
4.Move an output PWB so that you can see screw B and notch & hole B.
5.Put an eccentric screwdriver (9EQDRIVER-NV1A) in notch & hole B, and loosen screw B.
<Adjusting the G-LCD incident polarizing plate.>
4.Move an output PWB so that you can see screw B and notch & hole B.
5.Put an eccentric screwdriver (9EQDRIVER-NV1A) in notch & hole B, and loosen screw B.
(Loosen it too much, and be careful that the screw doesn't come off.)
6.Adjust with the eccentric screwdriver in the place where a brightness is the lowest, and tighten screw B, and fix it
with seeing a black screen.
Adjust it with screw A and notch & hole A when adjusting incident polarizing plate of R-LCD.
Adjust it with screw C and notch & hole C when adjusting incident polarizing plate of B-LCD.
Adjust it with screw A and notch & hole A when adjusting incident polarizing plate of R-LCD.
Adjust it with screw C and notch & hole C when adjusting incident polarizing plate of B-LCD.
❈
Adjust it in the turn of Green, Red, Blue with 3 place of RGB as well when adjusting it.
❈
Be careful not to make it short-circuit when moving an output PWB.
Lamp duct
turn
Lock screws
Screw C
Notch & Hole C
Screw A
Screw B
Notch & Hole A
Notch & Hole B
Display

