Sharp PG-A10X (serv.man10) Service Manual ▷ View online
27
PG-A10X
PG-A10X-SL
PG-A10X-SL
AN-A10T
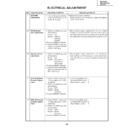
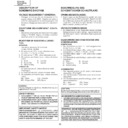
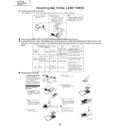
1. Select OFF from the process mode.
Make sure the off-timer starts with 5 minutes
onscreen and count one minute in one second.
And then indication is 0 minute, the power supply
of the set is cut off.
onscreen and count one minute in one second.
And then indication is 0 minute, the power supply
of the set is cut off.
.
24
Off-timer per-
formance
formance
1. Heat the thermistor with a
hair dryer.
1.Make sure that the temperature is indicated.
25
Thermistor
performance
checking
performance
checking
1.Make the following settings.
Process adjustment
Remote control adjustment
S3
Factory setting at 3
27
Delivery set-
tings
tings
1. Feed the phase check pat-
tern signal.
1.In the VGA, SVGA and XGA modes, make sure the
Clock, Phase, H-Pos and V-Pos settings can be au-
tomatically adjusted.
tomatically adjusted.
26
Auto sync
performance
checking
performance
checking
No.
Adjusting point
Adjusting conditions
Adjusting procedure
28
PG-A10X
PG-A10X-SL
PG-A10X-SL
AN-A10T
1.Calling and quitting the process mode with the control keys on this model.
1-1. Calling and quitting
With no menu onscreen, press the "UP", "UP", "DOWN", "DOWN", "RIGHT", "LEFT" and "ENTER" keys, in this
order, on the remote controller (Type A10, or C50/45 and P25/20 series remote controllers).
order, on the remote controller (Type A10, or C50/45 and P25/20 series remote controllers).
1-2. Others
Press the S2002 process key (toggle) on the main PWB to call and quit the process menu.
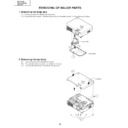
2.Resetting the lamp timer for this model
2-1. Resetting procedure
While holding down the Vol+ and AUTOSYNC keys, press the POWER ON and Vol- keys. The "LAMP 000H"
indicator appears for 60 seconds after the power is turned on.
indicator appears for 60 seconds after the power is turned on.
3.Forced disabling of the Anti-Seft of this model
3-1. Disabling procedure
With Anti-Seft input window onscreen, press the "MENU", "ENTER", "ENTER", "MENU", "UNDO", "UNDO" and
"MENU" keys, in this order, on the remote controller.
"MENU" keys, in this order, on the remote controller.
4.Forced disabling of the password of this model
1-1. Disabling procedure
In whatever state, press the "ON", "+", "–", "ON", "+", "–" and "INPUT" keys in this order.
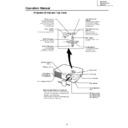
Power On
Power Off
Input Select
Volume Up
Volume Down
Keystone
Auto Sync
Power On
Power Off
Input Select
Volume Up
Volume Down
Keystone
Auto Sync
29
PG-A10X
PG-A10X-SL
PG-A10X-SL
AN-A10T
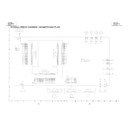
Process menu1
Adjustment Process Menu
First layer
DTV
Pedestal
DVD
VERSION
VIDEO
SS
AD
TEMP
OUTPUT1
PATTERN
OUTPUT2
LAMP
OUTPUT3
LINE
VIDEO1
EXIT
second layer
Initial Value
DTV
Contrast
4
Tint
5
Color
13
Sharpness
1
CTI-Level
1
LTI-Level
0
CB-Offset
7
CR-Offset
7
Bright
15
B-DRIVE
41
R-DRIVE
41
EXIT
DVD
Contrast
3
Tint
5
Color
10
Sharpness
1
CTI-Level
1
LTI-Level
0
CB-Offset
7
CR-Offset
7
Bright
16
B-DRIVE
41
R-DRIVE
41
EXIT
VIDEO
Contrast
2
N-Tint
5
P-Tint
5
S-Tint
5
N-Color
10
P-Color
10
S-Color
10
Sharpness
1
CTI-Level
1
LTI-Level
0
CB-Offset
7
VIDEO
CR-Offset
7
Bright
16
B-DRIVE
41
R-DRIVE
41
EXIT
AD
R-Bright
67
G-Bright
67
B-Bright
67
R-Contrast
167
G-Contrast
167
B-Contrast
167
EXIT
OUTPUT1
R1-BLK
120
R1-GAIN
152
G1-BLK
140
G1-GAIN
152
B1-BLK
160
B1-GAIN
152
S-R1-BLK
120
S-R1-GAIN
152
S-G1-BLK
140
S-G1-GAIN
152
S-B1-BLK
160
S-B1-GAIN
152
EXIT
OUTPUT2
PSIG-H
64
PSIG-L
146
EXIT
OUTPUT3
RC
135
GC
135
BC
135
GCK-PHASE
8
CC
1
EXIT
VIDEO1
N-Contrast
14
P-Contrast
14
S-Contrast
15
Color
17
NT3.58 Delay
1
NT4.43 Delay
1
PAL Delay
1
SECAM Delay
3
EXIT
Pedestal
R-Bright
-10
G-Bright
-10
B-Bright
-10
30
PG-A10X
PG-A10X-SL
PG-A10X-SL
AN-A10T
Process menu2
Pedestal
R-Contrast
+10
G-Contrast
+10
B-Contrast
+10
EXIT
VERSION
Build
Boot Code
Config
Rom Code
GUI
EXIT
SS
SS2
SS3 EU
SS4 US
SS5 JPN
SS6 CHIN
EXIT
TEMP
Temp1
Parameter of sensor 1
Temp2
Parameter of sensor 2
Temp3
No Use
Temp4
No Use
EXIT
PATTERN
Cross Hatch
Color Bar
EXIT
LAMP
Current Time
Current time of use
History1
One earlier
History2
Two earlier
History3
Three earlie
History4
Four earlier
TOTAL TIME
Total operating hours
EXIT
LINE
OFF
LED CHECK
EXIT
Display

