Sharp AR-NC3D (serv.man26) Service Manual / Technical Bulletin ▷ View online
Sharp Electronics (UK) Ltd., NIS Systems Support
NIS Bulletin 001.doc
Page: 5 of 8
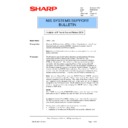
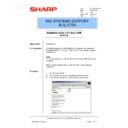
This completes the IP Peer-to-Peer utility installation procedure for Windows 95/98. The next
procedure explains how to use the IP Peer to Peer connection in a Windows 95/98 environment.
procedure explains how to use the IP Peer to Peer connection in a Windows 95/98 environment.
To use the Peer-to-Peer connection, create a logical printer using the Add Printer Wizard
according to the instructions for your printer.
according to the instructions for your printer.
Procedure:
1. Start Windows 95/98.
2. From the Start menu go to Settings and then Printers.
3. In the Printers dialog box, double-click on Add Printer.
2. From the Start menu go to Settings and then Printers.
3. In the Printers dialog box, double-click on Add Printer.
4. The Add Printer Wizard will appear. To begin installing a new printer, click Next:
5. Select Local Printer and click the Next button:
Sharp Electronics (UK) Ltd., NIS Systems Support
NIS Bulletin 001.doc
Page: 6 of 8
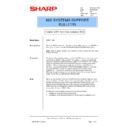
6. Select Have Disk to install the Sharp AR-PB2 /+ printer driver software from the installation disk:
7. Insert the Sharp AR-PB2/+ print driver disk into the floppy drive and click OK:
8. Select the print driver to be installed and click Next:
The following will be displayed for the PCL print driver:
The following will be displayed for the PostScript driver:
Sharp Electronics (UK) Ltd., NIS Systems Support
NIS Bulletin 001.doc
Page: 7 of 8
Note: If prompted to keep the existing driver, you may choose to do so by clicking Next. Otherwise, a
newer version driver may be chosen.
newer version driver may be chosen.
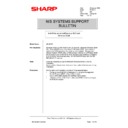
9. When you are asked to choose an available port, select the name of the IP Peer to Peer printer
you wish to print to. Select the IP Address of the Sharp printer and click Next:
10. The next window will allow you to enter a name for the printer or keep the default name. This
name will appear in the printers list when selecting printers from within an application. You may
also choose to make this the default printer for all Windows programs from this screen. Enter the
printer name and click Next:
also choose to make this the default printer for all Windows programs from this screen. Enter the
printer name and click Next:
Sharp Electronics (UK) Ltd., NIS Systems Support
NIS Bulletin 001.doc
Page: 8 of 8
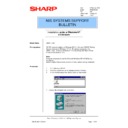
11. Print a test page by clicking on
Finish:
12. Confirm to Windows that the test page printed properly by clicking Yes:
13.
After successful completion of a new printer installation, the new printer will be displayed as an
icon in the Printers dialog box:
icon in the Printers dialog box:
Installation of the AR-PB2/+ print driver using the redirector port is now complete. Return to step 3 of
the Installation of the Print Driver section to add additional drivers.
the Installation of the Print Driver section to add additional drivers.
Display

