Sharp SD-EX100H (serv.man6) Service Manual ▷ View online
SD-EX100H
– 12 –
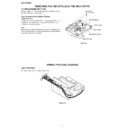
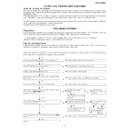
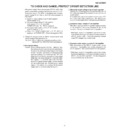
The initialization procedures of the mechanism vary with the location of the CD mechanism
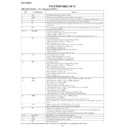
Error display
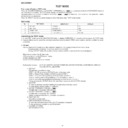
The following errors of the loading mechanism are detected.
Switch sensor input error
Form Er-CD_TA:
: represents the HEX value.
The combination of inputs is abnormal. Check the relevant switches and sensors.
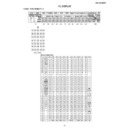
MSB
LSB
7
Pu-in
Switch
6
5
4
3
2
1
0
Juming
Mecha Carrier
Sensor
UpEnd
DownEnd
OpenEnd
CloseEnd
Tray
12cm
Sensor
Position
Sensor
Definition of the numbers
7
: Indicates whether the pickup is located in the inner periphery. If not, the operation of the mechanism is disabled.
6
: Detects the output of the jamming detection circuit when the power is on. If jamming is detected, check the circuit.
5, 4
: Test results of the tray end switch. If both ends are detected simultaneously, check the corresponding switch.
3
: Inspection is not conducted automatically.
2, 1, 0 : Test results of the position sensor input and the tray end switch.
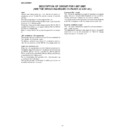
Operation timer error
Form Er-CD_TA:
1
2
3
Each operation is not completed within the specified time. Check the relevant switches.
1
: Recognized disc size
?: Unknown
8: 8 cm
C: 12 cm
8: 8 cm
C: 12 cm
2
Relevant switch
U: mechanism up switch [SW_U]
D: mechanism down switch [SE_D]
C: tray close switch [SE_C]
O: tray open switch [SE_O]
D: mechanism down switch [SE_D]
C: tray close switch [SE_C]
O: tray open switch [SE_O]
3
Operation in which an error occurred
0: initializing the mechanism
1: loading
2: ejecting
3: ejecting the error
4: recovering the error of the tray position
5: recovering the error of the mechanism up/down
6: recovering detection of jamming
1: loading
2: ejecting
3: ejecting the error
4: recovering the error of the tray position
5: recovering the error of the mechanism up/down
6: recovering detection of jamming
Input error from the tray position sensor
Form Er-CD_TA_PH
Even if the tray is moved during operation, the tray position is not input.
Check the tray position sensor.
Check the tray position sensor.
Common errors
Er-CD
TA 80
The pickup is not located in the inner periphery. Check the CD circuit.
Er-CD
TA 40
The jamming detection circuit is activated improperly. Check the CD circuit.
Er-CD
TA 30
Both end switches of the back and forth mechanism are turned on.
Er-CD
TA 03
Both end switches of the up/down mechanism are turned on.
Er-CD
TA 22
The back/forth and the up/down mechanisms logically conflict with each other.
Er-CD
TA 06
The end switch of the tray logically conflicts with the position sensor.
Er-CD
TA 05
The end switch of the tray logically conflicts with the position sensor.
Er-CD
TA? D0
The CD mechanism cannot be moved backward when initializing the mechanism.
Er-CD
TA? C0
The tray cannot be lowered when initializing the mechanism.
Er-CD
TA? D2
The CD mechanism cannot be moved backward when ejecting.
Er-CD
TA? O0
The tray cannot be lifted when initializing the mechanism.
Er-CD
TA PH
No input from the photo sensor when the tray is transferred.
– 13 –
SD-EX100H
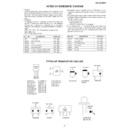
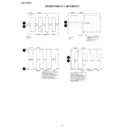
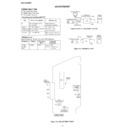
Inspection method of a 12-cm disc sensor
The sensor is located on the right of the insertion slot when you face the unit.
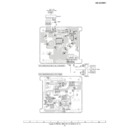
When the unit is in ejecting completed state, insert a card between the photo interrupters to cover the sensor. Check the change
in voltage while observing output (QD02 collector).
Note) When a 12-cm disc is loaded, the sensor cannot be blocked.
When the unit is in ejecting completed state, insert a card between the photo interrupters to cover the sensor. Check the change
in voltage while observing output (QD02 collector).
Note) When a 12-cm disc is loaded, the sensor cannot be blocked.
Card
(A1)x1
(B1)x1
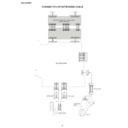
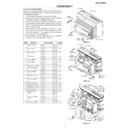
How to remove a CD (opening the CD door)
(See Fig. 13-2)
(See Fig. 13-2)
1. Rotate a worm gear (A1) x 1 downward when the CD slot is
closed.
2. The disc is unchucked to open the CD slot.
3. Place the unit upside down and remove the CD.
3. Place the unit upside down and remove the CD.
Figure 13-1
Figure 13-2
Figure 13-3
How to move the tray manually
(See Fig. 13-3)
(See Fig. 13-3)
Note) You can manually move the tray by removing the CD
mechanism from the unit.
1. Lower the CD mechanism.
2. When the tray is locked, move a lock lever (B1) x 1 downward
mechanism from the unit.
1. Lower the CD mechanism.
2. When the tray is locked, move a lock lever (B1) x 1 downward
using a thin screwdriver.
3. The unlocked tray can be moved by hand. (However, the
tray is locked again if it is lowered to bottom.)
Display

