Sharp DV-RW250H (serv.man11) User Manual / Operation Manual ▷ View online
57
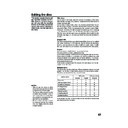
Editing the disc
This section explains how to edit
the recorded contents on DVD-
RWs. However, the items that you
can edit vary with the recording
formats. In VR mode, you can edit
various title menus, whereas in
Video mode, you can edit only a
few items.
the recorded contents on DVD-
RWs. However, the items that you
can edit vary with the recording
formats. In VR mode, you can edit
various title menus, whereas in
Video mode, you can edit only a
few items.
Title menu
For the disc in VR mode, when the content is recorded, a title name
that includes the date, time, channel number and other information is
created automatically.
For the disc in Video mode, when you record a content first time on
the disc where nothing is recorded, the recorded content is automati-
cally set to Title1. Then, the second recorded content is set to Title2,
and so on. Therefore, the title is numbered according to the recording
order. The title is created max. 99. The title menu lists up these titles.
The title menu can be used when you playback after confirming the
contents (see page 31), or when you check the contents recorded on
the disc.
Original title
The titles explained above are called original titles; these will be added
with every recording. In VR mode you can do various editing opera-
tions i.e., you can rename the titles, or add the chapter marks. In addi-
tion, you can erase the unnecessary titles to increase the disc space.
with every recording. In VR mode you can do various editing opera-
tions i.e., you can rename the titles, or add the chapter marks. In addi-
tion, you can erase the unnecessary titles to increase the disc space.
Playlist
You can create a playlist based on the original titles.
You can combine or erase undesired scenes.
If you create a playlist it will become the primary list used by the disc.
If you create a playlist to customise your viewing preferences, and
choose to delete it, the original titles will not be affected. It is recom-
mended to create and edit the playlist to prevent important titles from
being erased accidentally.
If you create a playlist, both the original title and playlist will be dis-
played on the title menu.
Editable items
The items that can be edited are different between original title and
playlist. For the disc in Video mode, only the title name can be edited.
The items can be edited in each are as follows:
playlist. For the disc in Video mode, only the title name can be edited.
The items can be edited in each are as follows:
NOTES:
• This unit can not record or edit a
• This unit can not record or edit a
disc which was recorded or edited
using another DVD recorder.
using another DVD recorder.
• You cannot edit or record the disc
on which disc protection is set. In
such a case, be sure to cancel the
disc protection (see page 23) be-
fore starting the operation.
such a case, be sure to cancel the
disc protection (see page 23) be-
fore starting the operation.
• When a scene has been erased,
the selected position for erasing
may vary slightly from the actual
erased position.
may vary slightly from the actual
erased position.
Editing items
VR mode
Video mode
Original
Playback
Adding chapter mark
Combining chapters
Erasing scenes
Erasing titles
Renaming titles
Creating playlist
Combining titles
Original
Playlist
Y
Y
Y
Y
Y
Y
Y
N
Y
N
N
Y
Y
Y
N
Y
Y
N
N
N
N
Y
N
N
If you finalise the disc in Video mode, the title list will be created and
you cannot use the title menu.
you cannot use the title menu.
2D50901A P44-57
7/20/04, 12:25 PM
57
58
Editing a playlist
You can create and edit the playlist
based on the original title.
based on the original title.
NOTES:
• A playlist can only be created with
• A playlist can only be created with
a DVD-RW in VR mode. You can-
not create a playlist with a DVD-
RW in Video mode, nor with a
DVD-R.
not create a playlist with a DVD-
RW in Video mode, nor with a
DVD-R.
• In case the disc includes more than
10 titles, you can turn to the next
or the previous page. (See page
31.)
or the previous page. (See page
31.)
• You cannot switch to the VCR
mode when the title menu is show-
ing. Press TITLE MENU to clear
the title menu, then press DVD/
VCR to switch to the VCR mode.
ing. Press TITLE MENU to clear
the title menu, then press DVD/
VCR to switch to the VCR mode.
Preparation:
• Turn ON the TV and select its AV channel (this may be labelled EXT
/ AUX etc.)
• Load the recorded DVD-RW (VR).
• Press DVD/VCR to select the DVD mode. (The DVD indicator will light.)
• Press DVD/VCR to select the DVD mode. (The DVD indicator will light.)
Creating a playlist
1
Press TITLE MENU.
The title menu will appear.
The title menu will appear.
2
Press
or
to select the original title which will be used as the
base of a playlist.
3
Press
.
The editing menu of original title will appear.
4
Press
or
to select “NEW PLAYLIST”.
5
Press ENTER.
The editing menu closes and the created playlist appears at the
bottom of the list.
The editing menu closes and the created playlist appears at the
bottom of the list.
RETURN
PLAY
BACK
SET
END
SELECT
TITLE
MENU
ENTER
DISC NAME: - - - -
Title 1
11/25/2003 10:03 11 SP
11/29/2003 11:30 09 SP
12/01/2003 06:52 06 XP
11/23/2003 08:41 06 SLP
REC DATE :11/23/2003
TIME
:08:41
LENGTH
:00:30:17
CHANNEL
:06
REC MODE :SLP
TITLE MENU
RETURN
ENTER
BACK
SET
END
SELECT
TITLE
MENU
ENTER
DISC NAME: - - - -
Title 1
11/25/2003 10:03 11 SP
11/29/2003 11:30 09 SP
12/01/2003 06:52 06 XP
11/23/2003 08:41 06 SLP PL
11/23/2003 08:41 06 SLP
REC DATE :11/23/2003
TIME
:08:41
LENGTH
:00:30:17
CHANNEL
:06
REC MODE :SLP
TITLE MENU
Created playlist
RETURN
ENTER
BACK
SET
END
SELECT
TITLE
MENU
ENTER
DISC NAME: - - - -
Title 1
11/25/2003 10:03 11 SP
11/29/2003 11:30 09 SP
12/01/2003 06:52 06 XP
Title 1
11/25/2003 10:03 11 SP
11/29/2003 11:30 09 SP
12/01/2003 06:52 06 XP
11/23/2003 08:41 06 SLP
REC DATE :11/23/2003
TIME
TIME
: 08:41
LENGTH
: 00:01:17
TITLE MENU
PLAY
ADD CHAPTER MARK
COMBINE CHAPTERS
EDIT TITLE
DELETE TITLE
RENAME TITLE
NEW PLAYLIST
ADD CHAPTER MARK
COMBINE CHAPTERS
EDIT TITLE
DELETE TITLE
RENAME TITLE
NEW PLAYLIST
NEW PLAYLIST
2D50901A P58-65
7/20/04, 12:25 PM
58
59
Editing a playlist
NOTES:
• The title name can be a maximum
• The title name can be a maximum
of 64 characters. Long names will
be shortened in the title menu.
be shortened in the title menu.
• For using the keyboard screen, see
“Changing a disc name” (page 70).
Changing a title name
1
Press TITLE MENU to display the title menu.
2
Select the playlist where you want to change the title name.
• Press
or
to select the playlist.
• Press
to display the editing menu of the playlist.
• Press
or
to select “RENAME TITLE”.
3
Press ENTER.
The keyboard screen will appear.
The keyboard screen will appear.
4
Use the keyboard screen to enter the title name (See P. 70).
5
Press DISPLAY to return the title menu.
Family
1
(
.
<
>
#
2
a
b
c
3
d
e
f
CANCEL
Back
RETUREN
Exit
Caps
0
Space bar
4
g
h
i
5
j
k
l
6
m
n
o
7
q
p
r
s
8
t
u
v
9
w
x
y
z
DISPLAY
OK
DISPLAY
OK
Numbers
Signs
Letters
RETURN
ENTER
BACK
SET
END
SELECT
TITLE
MENU
ENTER
DISC NAME: - - - -
11/23/2003 08:41 06 SLP
11/25/2003 10:03 11 SP
11/29/2003 11:30 09 SP
12/01/2003 06:52 06 XP
11/23/2003 08:41 06 SLP PL
11/23/2003 08:41 06 SLP
11/25/2003 10:03 11 SP
11/29/2003 11:30 09 SP
12/01/2003 06:52 06 XP
11/23/2003 08:41 06 SLP PL
REC DATE :11/23/2003
TIME
TIME
:08:41
LENGTH
:00:30:17
CHANNEL :006
REC MODE :SLP
REC MODE :SLP
TITLE MENU
PLAY
EDIT TITLE
DELETE PLAYLIST
RENAME TITLE
TITLE COMBINE
EDIT TITLE
DELETE PLAYLIST
RENAME TITLE
TITLE COMBINE
RENAME TITLE
RETURN
ENTER
BACK
SET
END
SELECT
TITLE
MENU
ENTER
DISC NAME: - - - -
11/23/2003 08:41 06 SLP
11/25/2003 10:03 11 SP
11/29/2003 11:30 09 SP
12/01/2003 06:52 06 XP
Family
REC DATE :11/23/2003
TIME
:08:41
LENGTH
:00:30:17
CHANNEL
:06
REC MODE :SLP
TITLE MENU
2D50901A P58-65
7/20/04, 12:25 PM
59
60
Editing a playlist
Erasing a scene (Edit title)
You can erase an unnecessary scene from the created playlist.
When you erase the scene from the playlist, the scene is not erased
from the original title.
When you erase the scene from the playlist, the scene is not erased
from the original title.
1
Press TITLE MENU to display the title menu.
2
Select the playlist where a scene you want to erase is included.
• Press
• Press
or
to select the playlist.
• Press
to display the editing menu of the playlist.
• Press
or
to select “EDIT TITLE”.
3
Press ENTER.
The EDIT TITLE screen appears.
The EDIT TITLE screen appears.
4
Press ENTER to playback the playlist on the EDIT TITLE screen.
• Use each operation button (F.FWD, REW, SKIP +, SKIP –, PLAY,
• Use each operation button (F.FWD, REW, SKIP +, SKIP –, PLAY,
PAUSE/STILL, SLOW, CM SKIP) for the playback to search
the starting point of the scene you want to erase.
the starting point of the scene you want to erase.
RETURN
ENTER
BACK
SET
END
SELECT
TITLE
MENU
ENTER
DISC NAME: - - - -
11/23/2003 08:41 06 SLP
11/25/2003 10:03 11 SP
11/29/2003 11:30 09 SP
12/01/2003 06:52 06 XP
Family
11/23/2003 08:41 06 SLP
11/25/2003 10:03 11 SP
11/29/2003 11:30 09 SP
12/01/2003 06:52 06 XP
Family
REC DATE :11/23/2003
TIME
TIME
:08:41
LENGTH
:00:30:17
CHANNEL :006
REC MODE :SLP
REC MODE :SLP
TITLE MENU
PLAY
EDIT PROGRAM
DELETE PLAYLIST
RENAME TITLE
TITLE COMBINE
EDIT PROGRAM
DELETE PLAYLIST
RENAME TITLE
TITLE COMBINE
EDIT TITLE
RETURN
ENTER
BACK
END
TITLE
MENU
ENTER
EDIT TITLE
NAME
Family
CHAPTER
1/3
LENGTH 00:00:00/00:30:17
00:00:00
00:00:00
00:00:00
Preview
Press
ENTER
to start
to start
SELECT
RETURN
ENTER
BACK
END
TITLE
MENU
ENTER
EDIT TITLE
00:08:28
00:00:00
00:00:00
Preview
SET START
SET END
Finish
NAME
Family
CHAPTER
1/3
LENGTH 00:08:28/00:30:17
2D50901A P58-65
7/20/04, 12:25 PM
60

