Sharp TU-X1E (serv.man6) Service Manual ▷ View online
TU-X1E/RU
5 – 9
[2] MICROCOMPUTER SOFT WRITING
1. MAIN microcomputer soft writing (MAIN board)
1. Turn off the AC power (Unplug the AC power cord).
2. Insert the upgrading USB flash memory for upgrade into the service slot.
3. While holding down the power button, plug in the AC power cord of the main unit to turn on the power.
4. Upgrade begins automatically.
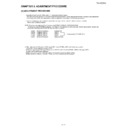
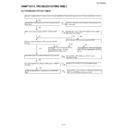
After the set starts, the upgrade screen like the figure below is displayed.
5. If any of the procedures fails, the following upgrade failure screen shows up. For the failing procedure, the “NG” marking turns red.
NOTE: In such case, try to upgrade the software again. If it still fails, the hardware may be in trouble.
<SYSTEM UPGRADE>
System Version: E0708081
BANK 1
BANK 2
STATUS
100%
OK NG
OK NG
100%
BANK 3
OK NG
UPGRADE COMPLETE
100%
<SYSTEM UPGRADE>
System Version: E0708081
BANK 1
BANK 2
STATUS
100%
OK NG
OK NG
100%
BANK 3
OK NG
UPGRADE COMPLETE
100%
TU-X1E/RU
5 – 10
6. When all the procedures are complete, the following upgrade success screen shows up. The new software version can be confirmed
on screen.
The version number appears when each item has been successfully upgraded. Finally the main version number appears on screen.
The version number appears when each item has been successfully upgraded. Finally the main version number appears on screen.
7. Turn off the AC power (Unplug the AC power cord). Take out the upgrading USB flash memory.
8. Now the software has been upgraded.
NOTE: Then get the set started and call the process adjustment screen 1/33 to check the main software version.
CAUTION
1) Do not take out and put in the USB flash memory during formatting.
2) It takes about one minute to the rewriting completion.
Please confirm the upgrade status on the screen becomes 100%.
<SYSTEM UPGRADE>
System Version: E0708081
BANK 1
BANK 2
STATUS
100%
OK NG
OK NG
100%
BANK 3
OK NG
UPGRADE COMPLETE
100%

