Sharp XV-Z90E (serv.man28) User Manual / Operation Manual ▷ View online
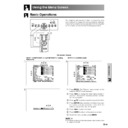
Basic Operation
-38
Adjustments for the Screen Position and Size
On-screen Display
You can adjust settings according to the position and
size of the screen.
size of the screen.
Description of Adjustment Items
Digital Shift Setting
This function allows you to adjust the vertical position
of the image.
of the image.
Description of Digital Shift
1 Press MENU. The “Picture” menu screen appears.
2 Press / to display the “Options” menu screen.
3 Press / to select “Digital Shift”.
4 Press / to move the mark of the Digital Shift
setting.
5 To exit the menu screen, press MENU.
• The “Digital Shift” cannot be adjusted when Keystone
correction is applied.
2,3,4
1, 5
Digital Shift
Subtitle
Reset
Adjusts the vertical position of the image.
Adjusts the vertical size of the image.
Digital Shift and Subtitle adjustments are
returned to the factory preset settings.
Description
Selected item
The image moves up.
The image moves down.
button
button
Basic Operation
-39
1 Press MENU. The “Picture” menu screen appears.
2 Press / to display the “Options” menu screen.
3 Press / to select “Subtitle”.
4 Press
/
to move the mark of the Subtitle
setting.
5 To exit the menu screen, press MENU.
• When changing the screen with the Subtitle setting, not only
the bottom of the screen rises, but also the upper part is
changed to a certain point.
changed to a certain point.
• The subtitle setting can be adjusted more effectively with
the Digital Shift function.
• The “Subtitle” cannot be adjusted when Keystone
correction is applied.
Adjustments for the Screen Position and Size
On-screen Display
2,3,4
1, 5
Subtitle Setting
With this function, you can adjust the vertical size of the
display to allow for subtitles.
display to allow for subtitles.
Description of Subtitle Setting
The image is enlarged by
adjusting the vertical size of the
display.
adjusting the vertical size of the
display.
The image is compressed by
adjusting the vertical size of the
display.
adjusting the vertical size of the
display.
button
button
Basic Operation
-40
Selecting the Menu Screen Position
This function allows you to select the desired position
of the menu screen.
of the menu screen.
Description of Menu Position
1 Press MENU. The “Picture” menu screen appears.
2 Press / to display the “Options” menu screen.
3 Press / to select “Menu Position”, and then
press
.
4 Press / to select the desired menu position.
5 Press ENTER to save the setting.
6 To exit the menu screen, press MENU.
2,3,4
1,6
5
On-screen Display
Center
Upper Right
Lower Right
Upper Left
Lower Left
The menu is displayed on the centre of the image.
The menu is displayed on the upper right of the image.
The menu is displayed on the lower right of the image.
The menu is displayed on the upper left of the image.
The menu is displayed on the lower left of the image.
Description
Selected
item
item
2,3,4
1, 5
Selecting the Menu Colour
This function allows you to select the colour of the menu
screen.
screen.
Description of Menu colour
1 Press MENU. The “Picture” menu screen appears.
2 Press / to display the “Options” menu screen.
3 Press / to select “Menu Color”.
4 Press
/
to select “Opaque” ( ) or
“Translucent”( ).
5 To exit the menu screen, press MENU.
Opaque (
)
Translucent
( )
The menu is displayed opaquely.
The menu is displayed translucently. The part of
the menu on the image becomes transparent.
Description
Selected item
On-screen Display
Basic Operation
-41
Automatic Power Shut-off Function
2,3,4
1, 5
On-screen Display
When no input signal is detected for more than 15
minutes, the projector will automatically shut off. The
on-screen message on the left will appear five minutes
before the power is automatically turned off.
minutes, the projector will automatically shut off. The
on-screen message on the left will appear five minutes
before the power is automatically turned off.
Description of Automatic Power Shut-off
1 Press MENU. The “Picture” menu screen appears.
2 Press / to display the “Options” menu screen.
3 Press / to select “Auto Power Off”.
4 Press / to select “ ” or “ ”.
5 To exit the menu screen, press MENU.
• “Auto Power Off” is factory preset to “
”.
• When the Auto Power Off function is set to “
(On)”, 5
minutes before the power turns off, the message “Power
OFF in X min.” will appear on the screen to indicate the
remaining minutes.
OFF in X min.” will appear on the screen to indicate the
remaining minutes.
Power automatically shuts off after 15 minutes without
an input signal.
an input signal.
Automatic Power Shut-off disabled.
Description
Selected
item
item
Click on the first or last page to see other XV-Z90E (serv.man28) service manuals if exist.

