Sharp XV-Z90E (serv.man28) User Manual / Operation Manual ▷ View online
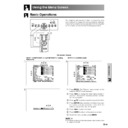
Basic Operation
-34
Adjusting the Computer and DVD/DTV Images
Special Modes Adjustment
Ordinarily, the type of input signal is detected and the
correct resolution mode is automatically selected.
However, for some signals, the optimal resolution mode
in “Special Modes” on the “Fine Sync” menu screen
may need to be selected to match the computer display
mode.
correct resolution mode is automatically selected.
However, for some signals, the optimal resolution mode
in “Special Modes” on the “Fine Sync” menu screen
may need to be selected to match the computer display
mode.
1 Press MENU. The “Picture” menu screen appears.
2 Press
/
to display the “Fine Sync” menu
screen.
3 Press
/
to select “Special Modes”, and then
press
.
4 Press
/
to select the optimal resolution.
5 Press ENTER to save the setting.
6 To exit the menu screen, press MENU.
• Avoid displaying computer patterns which repeat every other line
(horizontal stripes). (Flickering may occur, making the image hard
to see.)
to see.)
• When inputting DTV 1080
I
signal, select the corresponding type
of signal in step 4 above.
• When inputting 720P RGB signal, select the corresponding type
of signal in step 4 above.
On-screen Display
On-screen Display
Checking the Input Signal
This function allows you to check the current input signal
information.
information.
1 Press MENU. The “Picture” menu screen appears.
2 Press
/
to display the “Fine Sync” menu
screen.
3 Press / to select “Signal Info” to display the
current input signal.
4 To exit the menu screen, press MENU.
2,3,4
1, 6
5
2,3
1, 4
Basic Operation
-35
Adjusting the Computer and DVD/DTV Images
Auto Sync Adjustment
• Used to automatically adjust a computer image.
• Select whether the image is to be synchronized
• Select whether the image is to be synchronized
automatically when switching the signal with “ON” or
“OFF”.
“OFF”.
OFF (
)
• Synchronized adjustment is not automatically
performed.
• Press AUTO SYNC to perform manual adjustment.
ON (
ON (
)
• Synchronized adjustment is automatically performed.
1 Press MENU. The “Picture” menu screen appears.
2 Press
/
to display the “Fine Sync” menu
screen.
3 Press / to select “Auto Sync”.
4 Press / to select “ON” or “OFF”.
5 To exit the menu screen, press MENU.
• When the optimum image cannot be achieved with Auto
Sync adjustment, use manual adjustments. (See page 33.)
• The Auto Sync adjustment may take some time to complete,
depending on the image of the computer connected to the
projector.
projector.
On-screen Display
2,3,4
1, 5
AUTO SYNC
button
Auto Sync Adjustment Using the
Remote Control
Remote Control
1 Press AUTO SYNC button on the Remote Control.
Synchronized adjustment starts.
AUTO SYNC
button
Basic Operation
-36
Turning On/Off the On-screen Display
This function allows you to turn on or off the on-screen
messages that appear during input select.
messages that appear during input select.
1 Press MENU. The “Picture” menu screen appears.
2 Press / to display the “Options” menu screen.
3 Press / to select “OSD Display”.
4 Press / to select “ON” ( ) or “OFF” ( ).
5 To exit the menu screen, press MENU.
On-screen Display
Description
Selected item
ON (
)
OFF (
)
Description of OSD Display
All On-screen Display are displayed.
INPUT is not displayed.
2,3,4
1, 5
2,3,4
1, 5
On-screen Display
This function allows you to select the input signal type
Component or RGB for INPUT 2.
Component or RGB for INPUT 2.
1 Press MENU. The “Picture” menu screen appears.
2 Press / to display the “Options” menu screen.
3 Press
/
to select “Signal Type”, and then
press
.
4 Press / to select “RGB” or “Component”.
5 To exit the menu screen, press MENU.
“RGB” or “Component” can be selected with the
RGB/COMP. button on the remote control only in
INPUT 2.
RGB/COMP. button on the remote control only in
INPUT 2.
Selecting the Signal Type
RGB/COMP. button
Basic Operation
-37
Selecting a Background Image
On-screen Display
This function allows you to select the image displayed
when no signal is being sent to the projector.
when no signal is being sent to the projector.
Description of Background Images
1 Press MENU. The “Picture” menu screen appears.
2 Press / to display the “Options” menu screen.
3 Press / to select “Background”.
4 Press / to select the background image you
want to display on the screen.
5 To exit the menu screen, press MENU.
Selected item
Blue (
)
None (
)
Description
Blue screen
Black screen
2,3,4
1, 5
Setting the Video Signal (VIDEO menu only)
The video input system mode is preset to “Auto”;
however, it can be changed to a specific system mode
if the selected system mode is not compatible with the
connected audiovisual equipment.
however, it can be changed to a specific system mode
if the selected system mode is not compatible with the
connected audiovisual equipment.
1 Press MENU. The “Picture” menu screen appears.
2 Press / to display the “Options” menu screen.
3 Press
/
to select “Video System”, and then
press
.
4 Press
/
to select the desired video system
mode.
5 Press ENTER to save the setting.
6 To exit the menu screen, press MENU.
• When the system mode is set to “Auto”, you may not receive
a clear picture due to signal differences. Should this occur,
switch to the video system of the source signal.
switch to the video system of the source signal.
• “Auto” cannot be set for PAL-M and PAL-N input signals.
Select “PAL-M” or “PAL-N” in “Video System” menu for
PAL-M and PAL-N input signals.
PAL-M and PAL-N input signals.
2,3,4
1, 6
5
On-screen Display
Click on the first or last page to see other XV-Z90E (serv.man28) service manuals if exist.

