Sharp XG-C50XE (serv.man43) Service Manual / Technical Bulletin ▷ View online
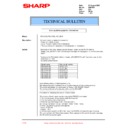
LV-082
Sharp Electronics (UK) Ltd., Technical Services Group
5. Connect RS-232C-IN port on the projector to RS-232C port on the computer with a RS-
232C cross cable.
6. Execute the communication program file " ttermpro.exe ".
7. Send the 232c command "SUM_ 101".
- If the returned value is "6b", the boot loader is latest version.
- If the returned value is "cc" or "ea", the boot loader is old version. Update the boot loader
to
"loader_x64_20030513.bwh".
8. Unplug the AC cord of projector.
-----------------------------------------------
Procedure for updating the boot loader
------------------------------------------------
Preparation:
1. Copy the following software to the PC.
“bootloader_c50 and c45_0513.ZIP” (compression file)
2. Decompress "bootloader_c50 and c45_0513.ZIP".
Updating:
1. Turn on the power of a projector (with the lamp on).
2. Call the factory adjustment mode.
( Press a operation key in the following turn )
on / vol up / vol down / vol up / vol down / enter / enter / menu
3. Select the following group and subjects.
- group : SPECIAL
- subject : IPL2
4. Set the cursor position to IPL2 and press the ENTER of projector's operation key.
The lamp will turn off, and ready to update software.
Wait a few seconds. Then unplug the AC cord of projector and plug the AC cord of
projector again.
5. Connect RS-232C-IN port on the projector to RS-232C port on the computer with a RS-
232C cross cable.
6. Execute the program file named " bhx_write.bat ".
7. When update process is being done normally, the numerical value is counted up.
When update process is finished, " COM1:Transfer completion " is displayed on the
screen, and the lamp
LED will light red.
(When "ERR" is displayed, perform from the step 1 again )
- continued -
LV-082
232C cross cable.
6. Execute the communication program file " ttermpro.exe ".
7. Send the 232c command "SUM_ 101".
- If the returned value is "6b", the boot loader is latest version.
- If the returned value is "cc" or "ea", the boot loader is old version. Update the boot loader
to
"loader_x64_20030513.bwh".
8. Unplug the AC cord of projector.
-----------------------------------------------
Procedure for updating the boot loader
------------------------------------------------
Preparation:
1. Copy the following software to the PC.
“bootloader_c50 and c45_0513.ZIP” (compression file)
2. Decompress "bootloader_c50 and c45_0513.ZIP".
Updating:
1. Turn on the power of a projector (with the lamp on).
2. Call the factory adjustment mode.
( Press a operation key in the following turn )
on / vol up / vol down / vol up / vol down / enter / enter / menu
3. Select the following group and subjects.
- group : SPECIAL
- subject : IPL2
4. Set the cursor position to IPL2 and press the ENTER of projector's operation key.
The lamp will turn off, and ready to update software.
Wait a few seconds. Then unplug the AC cord of projector and plug the AC cord of
projector again.
5. Connect RS-232C-IN port on the projector to RS-232C port on the computer with a RS-
232C cross cable.
6. Execute the program file named " bhx_write.bat ".
7. When update process is being done normally, the numerical value is counted up.
When update process is finished, " COM1:Transfer completion " is displayed on the
screen, and the lamp
LED will light red.
(When "ERR" is displayed, perform from the step 1 again )
- continued -
LV-082
SOFTWARE UPDATE PROCEDURE (2/2)
Note:
When update process is stopped during data transferring, the projector sometimes become
unable to turn on the power. In this case, open the top cabinet, and move the writing switch
on the PC I/F board to the write side. Then, turn on the power of projector ( with the lamp
off ), and perform from the step 6 again. When update process is finished, move the writing
switch of the PC I/F board to the normal side.
Caution:
If the AC power supply of PC or Projector is turned off during transferring data, the
projector becomes unable to turn on the power. In this case, the PC I/F board has to be
replaced with new one.
8. Unplug the AC cord of projector. The update is finished.
If the AC power supply of PC or Projector is turned off during transferring data, the
projector becomes unable to turn on the power. In this case, the PC I/F board has to be
replaced with new one.
8. Unplug the AC cord of projector. The update is finished.
LV-082
Sharp Electronics (UK) Ltd., Technical Services Group
5. Connect RS-232C-IN port on the projector to RS-232C port on the computer with a RS-
232C cross cable.
6. Execute the communication program file " ttermpro.exe ".
7. Send the 232c command "SUM_ 101".
- If the returned value is "6b", the boot loader is latest version.
- If the returned value is "cc" or "ea", the boot loader is old version. Update the boot loader
to
"loader_x64_20030513.bwh".
8. Unplug the AC cord of projector.
-----------------------------------------------
Procedure for updating the boot loader
------------------------------------------------
Preparation:
1. Copy the following software to the PC.
“bootloader_c50 and c45_0513.ZIP” (compression file)
2. Decompress "bootloader_c50 and c45_0513.ZIP".
Updating:
1. Turn on the power of a projector (with the lamp on).
2. Call the factory adjustment mode.
( Press a operation key in the following turn )
on / vol up / vol down / vol up / vol down / enter / enter / menu
3. Select the following group and subjects.
- group : SPECIAL
- subject : IPL2
4. Set the cursor position to IPL2 and press the ENTER of projector's operation key.
The lamp will turn off, and ready to update software.
Wait a few seconds. Then unplug the AC cord of projector and plug the AC cord of
projector again.
5. Connect RS-232C-IN port on the projector to RS-232C port on the computer with a RS-
232C cross cable.
6. Execute the program file named " bhx_write.bat ".
7. When update process is being done normally, the numerical value is counted up.
When update process is finished, " COM1:Transfer completion " is displayed on the
screen, and the lamp
LED will light red.
(When "ERR" is displayed, perform from the step 1 again )
- continued -
LV-082
232C cross cable.
6. Execute the communication program file " ttermpro.exe ".
7. Send the 232c command "SUM_ 101".
- If the returned value is "6b", the boot loader is latest version.
- If the returned value is "cc" or "ea", the boot loader is old version. Update the boot loader
to
"loader_x64_20030513.bwh".
8. Unplug the AC cord of projector.
-----------------------------------------------
Procedure for updating the boot loader
------------------------------------------------
Preparation:
1. Copy the following software to the PC.
“bootloader_c50 and c45_0513.ZIP” (compression file)
2. Decompress "bootloader_c50 and c45_0513.ZIP".
Updating:
1. Turn on the power of a projector (with the lamp on).
2. Call the factory adjustment mode.
( Press a operation key in the following turn )
on / vol up / vol down / vol up / vol down / enter / enter / menu
3. Select the following group and subjects.
- group : SPECIAL
- subject : IPL2
4. Set the cursor position to IPL2 and press the ENTER of projector's operation key.
The lamp will turn off, and ready to update software.
Wait a few seconds. Then unplug the AC cord of projector and plug the AC cord of
projector again.
5. Connect RS-232C-IN port on the projector to RS-232C port on the computer with a RS-
232C cross cable.
6. Execute the program file named " bhx_write.bat ".
7. When update process is being done normally, the numerical value is counted up.
When update process is finished, " COM1:Transfer completion " is displayed on the
screen, and the lamp
LED will light red.
(When "ERR" is displayed, perform from the step 1 again )
- continued -
LV-082
SOFTWARE UPDATE PROCEDURE (2/2)
Note:
When update process is stopped during data transferring, the projector sometimes become
unable to turn on the power. In this case, open the top cabinet, and move the writing switch
on the PC I/F board to the write side. Then, turn on the power of projector ( with the lamp
off ), and perform from the step 6 again. When update process is finished, move the writing
switch of the PC I/F board to the normal side.
When update process is stopped during data transferring, the projector sometimes become
unable to turn on the power. In this case, open the top cabinet, and move the writing switch
on the PC I/F board to the write side. Then, turn on the power of projector ( with the lamp
off ), and perform from the step 6 again. When update process is finished, move the writing
switch of the PC I/F board to the normal side.
Caution:
If the AC power supply of PC or Projector is turned off during transferring data, the
projector becomes unable to turn on the power. In this case, the PC I/F board has to be
replaced with new one.
8. Unplug the AC cord of projector. The update is finished.
If the AC power supply of PC or Projector is turned off during transferring data, the
projector becomes unable to turn on the power. In this case, the PC I/F board has to be
replaced with new one.
8. Unplug the AC cord of projector. The update is finished.
Display

