Sharp AR-F14 (serv.man3) Service Manual ▷ View online
AR-F14/PN1 UNPACKING AND INSTALLATION 3-9
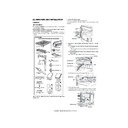
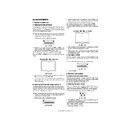
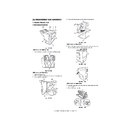
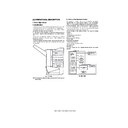
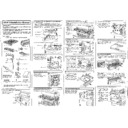
5) Attach the punch module.
<1>Insert the two bosses of the punch unit into the boss holes of the
finisher and fix the punch module using three screws.
Note: For the screws, use a supplied screw and the two screws that have
been removed in step 4).
6) Connect the harness of the punch module to the PWB of the finisher.
<1>Remove the clamps that fix the harness, handle the wiring of
harness A (purple) and harness B (orange), and fix them with
the clamps.
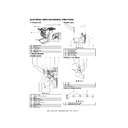
7) Reattach the covers that have been removed.
<1>Hang the two pawls of the top cover and secure them using the
two screws.
<2>Pass the relay harness to the rear cabinet and secure the rear
cabinet using the three screws.
<3>Remove the lock release lever that has been attached to the
front cabinet.
Reattach the front cabinet to its original position, push in the
staple unit, and attach it using the two screws.
staple unit, and attach it using the two screws.
Insert the protrusion (B) of the lock release lever that has been
removed before to the hole (C) of the latch arm.
After attaching it, move the lever to check that it moves smoothly.
After attaching it, move the lever to check that it moves smoothly.
If the lever does not move smoothly, remove the lock release
lever by releasing the pawl at the lower part of the lock release
lever using a flat-blade screwdriver or the like and then insert it
lever using a flat-blade screwdriver or the like and then insert it
again.
Boss
Boss hole
Boss
Boss hole
Screw (with rosette)
(supplied with this unit)
(supplied with this unit)
Screw
Screw
Punch module
Clamps
Clamps
Harness A (purple)
Harness B (orange)
Harness A (purple)
Harness B (orange)
Connect to CN12 on PWB
Connect to CN14 on PWB
Screw
Screw
Top cover
Pawl
Screw
Relay harness
Opening for
relay harness
relay harness
Screws
Rear cabinet
Staple unit
Screws
Front cabinet
Lock release lever (A)
Projection (B)
Latch arm
Pawl (D)
(C)
[03]UNPACKINGANDINSTALLATION.fm 9 ページ 2004年4月27日 火曜日 午後7時4分
AR-F14/PN1 UNPACKING AND INSTALLATION 3-10
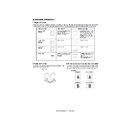
<4>Reattach the jam handling dial and close the front cover.
8) Paste the dust box label to the top cover.
<1> Paste the supplied dust box label to the location indicated in the
illustration.
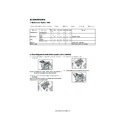
9) Connect the connector to the stand/paper drawer and connect the
AC cord of the power supply unit to the main unit of the printer.
<1>Connect the connector of the relay harness of the finisher to the
stand/paper drawer and tighten the screws of the connector.10)
Paste the label.
Paste the label.
(Paste it only if the scanner module is installed.)
<1>Paste the label to the position shown in the illustration.
Jam handling dial
Staple position label
Punch position label
[03]UNPACKINGANDINSTALLATION.fm 10 ページ 2004年4月27日 火曜日 午後7時15分

