Sharp AR-F14 (serv.man4) Service Manual ▷ View online
AR-F14/PN1 OPERATIONAL DESCRIPTION 4-1
[4] OPERATIONAL DESCRIPTION
1. Basic Operations
A. Specifications
The finisher serves to deliver sheets coming from its host machine. The
mode of delivery may be non-sort stack, job offset*, or staple delivery.
The saddle unit built into the finisher is used to fold a stack of sheets
The saddle unit built into the finisher is used to fold a stack of sheets
coming from the finisher unit in half for delivery.
All these operations are controlled by various commands sent by the
host machine in addition to the commands from the finisher controller
host machine in addition to the commands from the finisher controller
PCB.
The puncher unit (option) is designed for installation to the pickup
assembly of the finisher, and is used to punch holes in sheets coming
assembly of the finisher, and is used to punch holes in sheets coming
from the host machine.
The above operations are controlled with various commands from the
finisher controller PCB as well as the commands from the punch
finisher controller PCB as well as the commands from the punch
controller PCB.
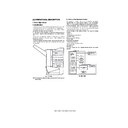
Fig.F02-101-01
NOTE:The position of delivery is shifted to the front/rear for each stack to
assist sorting.
B. Outline of the Electrical Circuitry
The sequence of finisher operations is controlled by the finisher
controller PCB. The finisher controller PCB is a 16-bit microprocessor
(CPU), and is also used for combination with the host machine (serial).
The finisher controller PCB drive motors and other loads in response to
The finisher controller PCB drive motors and other loads in response to
the various commands from the host machine. It also communicates
such data as on the states of various sensors and switches to the host
machine by way of the serial communication line.
machine by way of the serial communication line.
The ICs mounted to the finisher controller PCB have the following
functions:
•IC13 (CPU)
•IC13 (CPU)
Controls sequence of operations.
•IC12 (EEP-ROM)
Backs up adjustment settings.
Backs up adjustment settings.
•IC6 (EP-ROM)
Stores sequence programs.
•IC11 (communication IC)
•IC11 (communication IC)
Communicates with the host machine.
•IC1 (regulator IC)
Generates 5 V.
Generates 5 V.
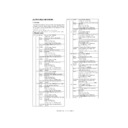
F02-102-01 shows the flow of signals between finisher and options
controller:
Fig.F02-102-01
Puncher unit drive
system (puncher unit;
option)
system (puncher unit;
option)
Alignment drive system
Stapler drive system
Delivery drive system
Feed drive system
Tray drive system
Saddle unit
drive system
Control system
Host machine DC
controller PCB
CPU
controller PCB
CPU
Punch controller
PCB
Finisher
controller
PCB
IC13
CPU
IC12
EEP-ROM
IC11
Communica-
tion IC
IC6
EP-ROM
IC1
Regulator IC
Motor
Clutch
Switch
Sensor
Motor
Sensor
Finisher unit
Puncher unit (option)
[04]OPERATIONALDESCRIPTION.fm 1 ページ 2004年4月19日 月曜日 午後1時37分
AR-F14/PN1 OPERATIONAL DESCRIPTION 4-2
C. Inputs to and Outputs from the Finisher Controller PCB
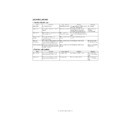
•Inputs to the Finisher Controller PCB (1/2)
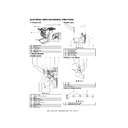
Fig.F02-103-01
•Inputs to the Finisher Controller PCB (2/2)
Fig.F02-103-02
•Outputs from the Finisher Controller PCB (1/2)
Fig.F02-103-03
•Outputs from the Finisher Controller PCB (2/2)
Fig.F02-103-04
Inlet sensor
Paddle home
position sensor
position sensor
Swing guide
home position
sensor
home position
sensor
Aligning plate
home position
sensor (front)
home position
sensor (front)
Aligning plate
home position
sensor (rear)
home position
sensor (rear)
Delivery belt
home position
sensor
home position
sensor
Processing
tray sensor
tray sensor
OBHPS
AS
RJHPS
FJHPS
ARHPS
PHPS
ES
CN44-3
-2
-1
CN16-10
Finisher controller PCB
When the sensor
detects paper, ‘1’ .
detects paper, ‘1’ .
+5 V
ENT_S
ENT_S
+5 V
PDL_HP
PDL_HP
+5 V
F JOG_HP
F JOG_HP
When the aligning
plate (rear) is at
home position, ‘1’.
plate (rear) is at
home position, ‘1’.
+5 V
R JOG_HP
R JOG_HP
+5 V
ADJ_TRAY_S
ADJ_TRAY_S
When the delivery belt
is at home position, ‘1’.
is at home position, ‘1’.
+5 V
EJCT_BLT_HP
EJCT_BLT_HP
+5 V
BDL_ROL_HP
BDL_ROL_HP
-11
-12
-2
CN43-1
-3
-2
CN42-3
-1
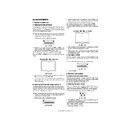
CN9-1
-2
-3
CN51-1
-2
-3
When the paddle is at
home position, ‘1’.
home position, ‘1’.
CN55-3
-2
-1
CN9-7
-8
-9
-2
CN54-1
-3
-2
CN53-3
-1
When the swing guide
is at home position, ‘1’.
is at home position, ‘1’.
Tray paper sensor
Paper surface
sensor
sensor
Folding position
sensor
sensor
FPS
SLS
BES
When paper is present
on the tray, ‘1’.
on the tray, ‘1’.
+5 V
TRY_EMPS
TRY_EMPS
When the paper
surface is detected,
‘1’.
surface is detected,
‘1’.
+5 V
LVL_S
LVL_S
+5 V
BIND_P
BIND_P
CN4
-2
-3
CN23-3
-2
-1
When the aligning
plate (front) is at
home position, ‘1’.
plate (front) is at
home position, ‘1’.
CN5-13
-14
-15
CN36-3
-2
-1
CN30-3
-2
-1
CN5-1
-2
-3
-2
CN29-1
-3
-8
CN28-9
-7
When the sensor
detects paper, ‘1’.
detects paper, ‘1’.
CN31-3
-2
-1
-4
-5
-6
CN32-3
-2
-1
-7
-8
-9
-4
-5
-6
-7
-8
-9
-6
-5
-4
-3
-2
-1
CN35-3
-2
-1
CN5-10
-11
-12
-2
CN34-1
-3
-2
CN33-3
-1
CN39-3
-1
-2
CN16-1
-3
-2
-3
CN38-1
-2
-7
CN37-9
-8
BIND_L
When paper is
detected, ‘0’.
When LED is lit, ‘1’.
detected, ‘0’.
When LED is lit, ‘1’.
Folding home
position sensor
position sensor
Stack feed roller
(upper) home
position sensor
(upper) home
position sensor
Bind tray sensor
Staple/fold motor
clock sensor
clock sensor
Shift upper limit
sensor
sensor
Shift motor clock
sensor
sensor
Shift lower limit
sensor
sensor
LE
LLLS
ULS
FE
FES
FRHPS
FHPS
CN40-3
-2
-1
CN16-4
Finisher controller PCB
When at folding home position, ‘0’.
+5 V
BIND_HP
BIND_HP
+5 V
BIND_ROL_HP
BIND_ROL_HP
+5 V
BIND_CLK
BIND_CLK
When the tray is at the
upper limit, ‘1’.
upper limit, ‘1’.
+5 V
SIFT_UPLMT
SIFT_UPLMT
+5 V
SIFT_DNLMT
SIFT_DNLMT
While the shift motor
is rotating, alternates
between ‘1’ and ‘0’.
is rotating, alternates
between ‘1’ and ‘0’.
+5 V
SIFT_CLK
SIFT_CLK
+5 V
BIND_EMPS
BIND_EMPS
-5
-6
-5
CN38-4
-6
-5
CN37-6
-4
-7
-8
-9
CN41-3
-2
-1
When the stack feed roller
(upper) is at home position, ‘1’.
(upper) is at home position, ‘1’.
CN47-3
-2
-1
CN15-1
-2
-3
When the sensor
detects paper, ‘1’.
detects paper, ‘1’.
Front door sensor
Upper cover sensor
TCS
FDS
When the front door
is open, ‘1’.
is open, ‘1’.
+5 V
FDOOR_S
FDOOR_S
When the upper cover
is open, ‘1’.
is open, ‘1’.
When the paper is
full, ‘1’.
full, ‘1’.
+5 V
TOPCOV_S
TOPCOV_S
CN9-6
-4
-5
CN52-1
-3
-2
When the staple/fold motor is
rotating, alternates between
‘1’ and ‘0’.
rotating, alternates between
‘1’ and ‘0’.
CN15-10
-11
-12
CN50-3
-2
-1
CN49-3
-2
-1
CN15-7
-8
-9
When the tray is at the
lower limit, ‘1’.
lower limit, ‘1’.
CN48-3
-2
-1
-5
-6
CN25-3
-2
-1
-8
-9
CN24-3
-2
-1
CN4-4
-5
-6
Full stack sensor
XXXX
+5 V
PAPER_F
PAPER_F
CN73-3
-2
-1
CN19-1
-2
-3
-7
-8
-9
-3
-2
-1
CN15-4
CN4-7
FDSW
Joint switch
N. O.
+24 VP
When the front
door is closed, ‘1’.
door is closed, ‘1’.
JS
SSS
Front door switch
Stapler safety
switch
switch
N. O.
N. O.
JOINT SW
FRONT SW
STPLSAFE SW
CN69-2
-1
CN8-6
-5
CN8-4
-3
CN8-2
-1
CN68-2
-1
CN66-2
-1
When the swing
guide is closed, ‘1’.
guide is closed, ‘1’.
When connected to
the host machine, ‘1’.
the host machine, ‘1’.
Finisher controller PCB
When the drive is transmitted,
‘1’.
‘1’.
Feed motor
FEEDMTR_A
+24 V
CN10-1
-1
CN62-5
Paddle motor
+24 V
FPM
FFC
B_CLU
+24 V
CN72
-1
-2
-2
-1
CN18-1
-2
Binding clutch
Delivery motor
+24 V
FAM
Alignment motor
(front)
+24 V
FFJM
Alignment motor
(rear)
+24 V
FRJM
Switches between ‘1’ and
‘0’ according to the
direction of motor rotation.
‘0’ according to the
direction of motor rotation.
-2
-3
-4
-5
-6
FFM
-2
-3
-4
-5
-6
CN56
-6
-5
-4
-3
-2
-1
FEEDMTR_*A
FEEDMTR_B
FEEDMTR_*B
PDLMTR_A
Switches between ‘1’ and
‘0’ according to the
direction of motor rotation.
‘0’ according to the
direction of motor rotation.
PDLMTR_*A
PDLMTR_B
PDLMTR_*B
CN10-7
-8
-9
-10
-11
-12
-1
-2
-3
-4
-5
-6
CN57
-6
-5
-4
-3
-2
-1
EJCTMTR_A
Switches between ‘1’ and
‘0’ according to the
direction of motor rotation.
‘0’ according to the
direction of motor rotation.
EJCTMTR_*A
EJCTMTR_B
EJCTMTR_*B
CN13-1
-1
-2
-3
-4
-5
-6
-2
-3
-4
-5
-6
CN59
-6
-5
-4
-3
-2
-1
CN3-1
-2
-3
-4
-5
FJOGMTR_A
Switches between ‘1’ and
‘0’ according to the
direction of motor rotation.
‘0’ according to the
direction of motor rotation.
FJOGMTR_*A
FJOGMTR_B
FJOGMTR_*B
CN63-1
-2
-3
-4
-5
-4
-3
-2
-1
CN64-5
CN3-6
-7
-8
-9
-10
CN65-1
-2
-3
-4
-5
-4
-3
-2
-1
RJOGMTR_A
Switches between ‘1’ and
‘0’ according to the
direction of motor rotation.
‘0’ according to the
direction of motor rotation.
RJOGMTR_*A
RJOGMTR_B
RJOGMTR_*B
Finisher controller PCB
Shift motor
SIFTMTR_1
Switches between ‘+’ and
‘–’ according to the
direction of motor rotation.
‘–’ according to the
direction of motor rotation.
CN6-1
-2
FLM
-2
-1
CN70
-2
-1
SIFTMTR_0
-2
-1
-2
-1
-2
-1
CN70
-2
-1
Staple/fold motor
BINDMTR_1
Switches between ‘+’ and
‘–’ according to the
direction of motor rotation.
‘–’ according to the
direction of motor rotation.
CN6-3
-4
FFSM
BINDMTR_0
CN71
[04]OPERATIONALDESCRIPTION.fm 2 ページ 2004年4月19日 月曜日 午後1時37分
AR-F14/PN1 OPERATIONAL DESCRIPTION 4-3
•Inputs to and Outputs from the Finisher Controller (1/2)
Fig.F02-103-05
•Inputs to and Outputs from the Finisher Controller (2/2)
D. Inputs to and Outputs from the Punch Controller
PCB(option)
•Inputs to and Outputs from the Punch Controller PCB
Fig.F02-104-01
•Outputs from the Punch Controller PCB
Fig.F02-104-02
Finisher controller PCB
CN72A-5
When the stapler is
connected, ‘0’.
connected, ‘0’.
When the cartridge has
staples, ‘0’.
staples, ‘0’.
When the staple is at top
the stapler, ‘0’.
the stapler, ‘0’.
When the stapler is at
stapling home position, ‘0’.
stapling home position, ‘0’.
When the stapler is at home
position, ‘1’.
position, ‘1’.
Stapler unit
Staple home
position sensor
position sensor
Staple top
position sensor
position sensor
Staple empty
sensor
sensor
CN11-2
CN11-7
CN11-1
SHPS
+5 V
+5 V
+5 V
STHPS
SPS
SS
+5 V
HOOK_S
STPL_HP
SLID_HP
STPL_CNCT
Host
machine
Communication line
CN2-1
-3
-4
-5
-7
-6
-4
-5
-7
-6
CN1-1
-2
+24 V
+24 V
+5 V
SELF_P
+5 V
Slide home
position sensor
position sensor
CN11-6
CN11-5
CN11-4
CN11-3
CN72A-4
CN72A-3
CN72A-2
CN72A-6
CN72A-1
CN72A-7
CN72A-5
CN72A-4
CN72A-3
CN72A-2
CN72A-6
CN72A-1
CN72A-7
CN72-5
CN72-4
CN72-3
CN72-2
CN72-6
CN72-1
CN72-7
SLIDMTR_A
SLIDMTR_*A
SLIDMTR_B
SLIDMTR_*B
FSM
CN7-3
CN7-4
CN7-5
CN7-6
CN72B-5
CN72B-4
CN72B-3
CN72B-2
CN72B-5
CN72B-4
CN72B-3
CN72B-2
CN72-10
CN72-11
CN72-12
CN72-13
Switches between ‘1’ and
‘0’ according to the direction
of motor rotation.
‘0’ according to the direction
of motor rotation.
Slide motor
GND
GND
TXD
GND
TXD
RXD
FJM
CN19-
-2
-3
-4
-5
-3
-4
-5
CNFJ5
CN73B-
-6
-5
-5
-6
-4
-3
-2
-2
*A
*B
A
B
+24V
+24V
CN73D-9
-6
-7
-8
-8
-5
-4
-4
CNFJ1-2
-3
-2
-6
-5
-5
-4
-5
-7
-3
-1
CNFJ1-2
-7
-6
-5
-4
-4
-3
CNFJ2-1
+5V
+5V
+5V
LVL_E_S
LVL_P_S
LVL_C_S
-2
-3
CNFJ3-1
-3
-2
CNFJ4-3
-2
-1
CNFJ1-
CNFJ1-
CNFJ1-
-17
-16
-14
-13
-13
-11
-10
CNFJ1-
CNFJ1-
CNFJ1-
-17
-16
-14
-13
-13
-11
-10
-10
CN73C-1
-2
-3
-3
-5
CN73C-4
CN73C-7
-6
-8
CN73D-2
CN73A-8
CN73A-5
CN73A-2
-7
-6
-4
-3
-3
-1
CN73B-8
CN21-
-2
-3
-3
CN21-4
CN21-7
-5
-6
-8
-9
-9
Interface
transport
paper entry
sensor
transport
paper entry
sensor
FJES
Interface
transport
paper exit
sensor
transport
paper exit
sensor
FJOS
Interface
transport
cover sensor
transport
cover sensor
FJCS
Interface
transport
motor
transport
motor
Finisher control PWB
"0" when paper is detected.
"0" when paper is detected.
"0" when the interface
transport cover is open.
transport cover is open.
The pulse signal is
switched depending
on the motor RPM.
switched depending
on the motor RPM.
Punch controller PCB
XXXX
-1
J2008-3
+5 V
PUNCH
PUNCH
-2
-6
J1006-4
-5
SREG1*
SREG2*
SREG3*
SREG2*
SREG3*
-9
-10
-11
J1007-12
-13
SREG4*
-8
PAEND*
-7
Horizontal
registration
home position
sensor
registration
home position
sensor
PE
-1
J2009-3
+5 V
CLOCK
CLOCK
-2
-9
J1006-7
-8
Punch home
position sensor
position sensor
+5 V
+5 V
PT1
PT2
PT3
PT4
PT5
When the hole puncher is
at home position, ‘0’.
at home position, ‘0’.
PSHPS
-1
J2007-3
+5 V
SLIDE
SLIDE
-2
-3
J1006-1
-2
Punch motor
clock sensor
clock sensor
While the punch motor
is rotating, alternates
between ‘0’ and ‘1’.
is rotating, alternates
between ‘0’ and ‘1’.
When the punch slide
unit is at home position,
‘1’.
unit is at home position,
‘1’.
When paper is
detected, ‘0’.
detected, ‘0’.
Photosensor PCB
DUSTLED
When the light is
blocked, ‘0’.
blocked, ‘0’.
Waste full LED PCB
J1005-1
PT131
LED121
DUSTPTR
+5V
4
Waste full photosensor PCB
-2
J1005-3
Punch controller PCB
LED PCB
FPSM
Horizontal
registration
motor
Switches between ‘+’
and ‘–’ according to
the direction of motor
rotation.
and ‘–’ according to
the direction of motor
rotation.
When ‘1’, LED goes ON.
Switches the pulse
signals according to
the rotation of the motor.
signals according to
the rotation of the motor.
B*
A*
B
A
J1001-1
-2
-3
-4
FPNM
Punch motor
J1002-1
J1007-6
-1
-5
-4
-3
-2
-5
-4
-3
-2
LED5
LED4
LED3
LED2
LED1
-2
LEDON5
+5V
LEDON4
LEDON3
LEDON2
LEDON1
LEDON3
LEDON2
LEDON1
[04]OPERATIONALDESCRIPTION.fm 3 ページ 2004年4月19日 月曜日 午後1時37分
AR-F14/PN1 OPERATIONAL DESCRIPTION 4-4
2. Feed/Drive System
A. Outline
The machine performs the following in response to the commands
coming from its host machine on the sheets arriving from the host
coming from its host machine on the sheets arriving from the host
machine for delivery: simple stacking, job offset, and stapling or folding
(in two).
If a punch unit (option) is installed, the sheets are pouched and delivered
If a punch unit (option) is installed, the sheets are pouched and delivered
to the delivery tray.
Sheets may be delivered in either of five ways (including one for the
puncher unit):
puncher unit):
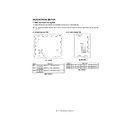
Fig.F02-201-01
(1)Normal Delivery
a.Simple Stacking
The machine pulls in the sheet once to the processing tray and then
delivers it to the delivery tray.
delivers it to the delivery tray.
Fig.F02-201-02
b.Job Offset
The machine pulls the sheet once to the processing tray. It then moves
the sheet to the front or the rear using the aligning plate. When it has
deposited a specific number of sheets, it delivers them in the form of a
aligning plane. When the number of sheets stacked on the processing
aligning plane. When the number of sheets stacked on the processing
tray reaches a specified value, the sheets are delivered in a form of a
stack. Even if the specified value is not reached, stacked sheets are
temporarily delivered when 10 sheets of large-size paper (300 mm or
temporarily delivered when 10 sheets of large-size paper (300 mm or
longer) or 30 sheets of small-size paper (299 mm or shorter) have been
stacked. (5- and STMT-sizes: 10 sheets)
Fig.F02-201-03
c.Stapling
The machine stacks sheets coming from its host machine on the
processing tray. When the number of sheets stacked on the processing
processing tray. When the number of sheets stacked on the processing
tray reaches a specified value, the finisher staples them delivers the
stapled stack to the delivery tray.
Fig.F02-201-04
Punching
Normal
delivery
delivery
Delivery
method
method
Middle 2-point stapling
Job offset
Simple stacking
Stapling
Front 1-point stapling
Rear 1-point stapling
Middle 2-point stapling
Stitching
Saddle delivery
Tray
Paper
4th set
(direction of delivery)
Results of offset delivery (4 jobs)
2nd set
3rd set
1st set
[04]OPERATIONALDESCRIPTION.fm 4 ページ 2004年4月19日 月曜日 午後1時37分

