Sharp AR-C270 (serv.man14) Service Manual ▷ View online
Main
code
Sub
code
Title
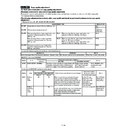
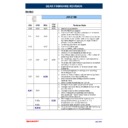
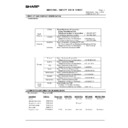
Developing motor trouble (COLOR)
L4
5
Phenomena Display
Lamp
Message
Message
Detail
The motor lock signal is detected for 3.5sec or more when the developing motor is ON.
Section
Developing drive
Operation mode
Warm-up / Copy / Print
Note
Case 1
Trouble
position/cause
position/cause
Developing motor trouble
Remedy
(Check) Check the developing motor operation (SIM 25-1).
(Repair) Replace the developing motor. / Power Source-ON
(After-work)
(Repair) Replace the developing motor. / Power Source-ON
(After-work)
Note
Case 2
Trouble
position/cause
position/cause
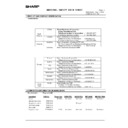
Developing mechanism section trouble
Remedy
(Check) Check the loads of the developing mechanism section.
(Repair) Repair or replace the parts in the developing mechanism section. / Power Source-ON
(After-work)
(Repair) Repair or replace the parts in the developing mechanism section. / Power Source-ON
(After-work)
Note
Case 3
Trouble
position/cause
position/cause
PCU MAIN PWB trouble
Remedy
(Check)
(Repair) Replace the PCU MAIN PWB. / Power Source-ON
(After-work) Re-enter setup values and adjustment values. (Install the EEPROM of the defective PCU
MAIN PWB to a new PCU MAIN PWB.)
(Repair) Replace the PCU MAIN PWB. / Power Source-ON
(After-work) Re-enter setup values and adjustment values. (Install the EEPROM of the defective PCU
MAIN PWB to a new PCU MAIN PWB.)
Note
Case 4
Trouble
position/cause
position/cause
Developing motor power line trouble
Remedy
(Check) Check the fuse (F707).
(Repair) Replace the fuse (F707). / Power Source-ON
(After-work)
(Repair) Replace the fuse (F707). / Power Source-ON
(After-work)
Note
Main
code
Sub
code
Title
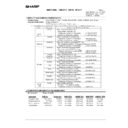
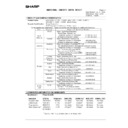
PCU MAIN PWB - ADU communication trouble / Discrepancy of the model
U4 0
Phenomena Display
Lamp
Message
Message
Detail
Communication test error in warm-up / Discrepancy of the model
Section
PCU PWB / Duplex control PWB
Operation mode
Warm-up / Initialize
Note
Case 1
Trouble
position/cause
position/cause
Bad connection of the signal line between the PCU MAIN PWB and the ADU control PWB.
Remedy
(Check) Check connection of the signal line between the PCU MAIN PWB and the ADU control PWB.
(Repair) Repair or replace the cable and the connector between the PCU MAIN PWB and the ADU
control PWB. / Power Source-ON
(After-work)
(Repair) Repair or replace the cable and the connector between the PCU MAIN PWB and the ADU
control PWB. / Power Source-ON
(After-work)
Note
Case 2
Trouble
position/cause
position/cause
PCU MAIN PWB trouble
Remedy
(Check)
(Repair) Replace the PCU MAIN PWB. / Power Source-ON
(After-work) Re-enter setup values and adjustment values. (Install the EEPROM of the defective PCU
MAIN PWB to a new PCU MAIN PWB.)
(Repair) Replace the PCU MAIN PWB. / Power Source-ON
(After-work) Re-enter setup values and adjustment values. (Install the EEPROM of the defective PCU
MAIN PWB to a new PCU MAIN PWB.)
Note
Case 3
Trouble
position/cause
position/cause
ADU control PWB trouble
Remedy
(Check)
(Repair) ADU control PWB replacement / Power Source-ON
(After-work)
(Repair) ADU control PWB replacement / Power Source-ON
(After-work)
Note
Case 4
Trouble
position/cause
position/cause
Discrepancy of the model code (The AR-DU2, instead of the AR-DU2N, is erroneously installed to the
AR-C160/C270.).
AR-C160/C270.).
Remedy
(Check) Check that the AR-DU2N or the AR-DU2 is installed.
(Repair) Install the AR-DU2N or remodel the AR-DU2 into the AR-DU2N. (Replace the AR-DU2 ROM
with the AR-DU2N ROM, and replace the 1A fuse on the ADU control PWB with the 1.25A fuse.)
(After-work)
(Repair) Install the AR-DU2N or remodel the AR-DU2 into the AR-DU2N. (Replace the AR-DU2 ROM
with the AR-DU2N ROM, and replace the 1A fuse on the ADU control PWB with the 1.25A fuse.)
(After-work)
Note
10 – 9A
Main
code
Sub
code
Title
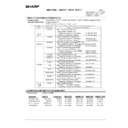
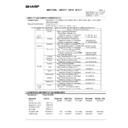
PCU MAIN PWB- Large capacity tray (LCC) communication trouble /
Discrepancy of the model
Discrepancy of the model
U6 20
Phenomena Display
Lamp
Message
Message
Detail
Communication test error in warm-up / Discrepancy of the model
Section
Large capacity tray control PWB / PCU MAIN PWB
Operation mode
Warm-up / Initialize
Note
Case 1
Trouble
position/cause
position/cause
Bad connection of the signal line between the PCU MAIN PWB and the large capacity tray (LCC)
control PWB
control PWB
Remedy
(Check) Check connection of the signal line between the PCU MAIN PWB and the large capacity tray
(LCC) control PWB.
(Repair) Repair or replace the cable and the connector between the PCU MAIN PWB and the large
capacity tray (LCC) control PWB. / Power Source-ON
(After-work)
(LCC) control PWB.
(Repair) Repair or replace the cable and the connector between the PCU MAIN PWB and the large
capacity tray (LCC) control PWB. / Power Source-ON
(After-work)
Note
Case 2
Trouble
position/cause
position/cause
PCU MAIN PWB trouble
Remedy
(Check)
(Repair) Replace the PCU MAIN PWB. / Power Source-ON
(After-work) Re-enter setup values and adjustment values. (Install the EEPROM of the defective PCU
MAIN PWB to a new PCU MAIN PWB.)
(Repair) Replace the PCU MAIN PWB. / Power Source-ON
(After-work) Re-enter setup values and adjustment values. (Install the EEPROM of the defective PCU
MAIN PWB to a new PCU MAIN PWB.)
Note
Case 3
Trouble
position/cause
position/cause
Large capacity tray (LCC) control PWB trouble
Remedy
(Check)
(Repair) Large capacity tray (LCC) control PWB replacement / Power Source-ON
(After-work)
(Repair) Large capacity tray (LCC) control PWB replacement / Power Source-ON
(After-work)
Note
Case 4
Trouble
position/cause
position/cause
Discrepancy of the model code (The AR-LC2, instead of the AR-LC2N, is erroneously installed to the
AR-C160/C270.).
AR-C160/C270.).
Remedy
(Check) Check that the AR-LC2N or the AR-LC2 is installed.
(Repair) Install the AR-LC2N or remodel the AR-LC2 into the AR-LC2N. (Replace the AR-LC2 ROM
with the AR-LC2N ROM, and replace the 1A fuse on the ADU control PWB with the 1.25A fuse.)
(After-work)
(Repair) Install the AR-LC2N or remodel the AR-LC2 into the AR-LC2N. (Replace the AR-LC2 ROM
with the AR-LC2N ROM, and replace the 1A fuse on the ADU control PWB with the 1.25A fuse.)
(After-work)
Note
10 – 10A


