Sharp AR-C270 (serv.man8) Service Manual ▷ View online
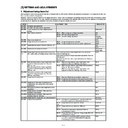
[7] SETTING AND ADJUSTMENTS
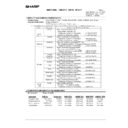
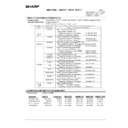
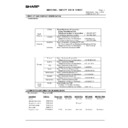
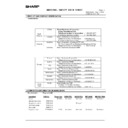
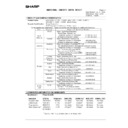
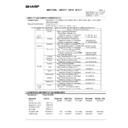
1. Adjustment/setup items list
Each adjustment item in the adjustment item list is indicated with its JOB number. Perform the adjustment procedures in the sequence of Job num-
bers from the smallest to the greatest.
bers from the smallest to the greatest.
However, there is no need to perform all the adjustment items. Perform only the necessary adjustments according to the need. Unnecessary adjust-
ments can be omitted. Even in this case, however, the sequence from the smallest to the greatest JOB number must be observed. If the above pre-
caution should be neglected, the adjustment would not complete normally or a trouble may occur.
ments can be omitted. Even in this case, however, the sequence from the smallest to the greatest JOB number must be observed. If the above pre-
caution should be neglected, the adjustment would not complete normally or a trouble may occur.
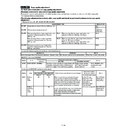
JOB No
ADJUSTMENT ITEM
SIMULATION
ADJ M1
DV doctor gap adjustment
ADJ M2
DV roller main pole position adjustment
ADJ M3
Toner concentration control reference level
setting
setting
25-2/44-27
ADJ M4
High voltage adjustment
ADJ 1
Main charger grid voltage adjustment
8-2
ADJ 2
DV bias voltage adjustment
8-1
ADJ 3
Transfer voltage adjustment
8-6 (Old)
44-30 (New)
44-30 (New)
ADJ M5
Paper skew adjustment
44-2
ADJ M6
Image density sensor adjustment
ADJ 1
Image density sensor calibration
44-13
ADJ 2
Image density sensor sensing position adjustment
44-23
ADJ M7
Image skew adjustment (Scanner (Writing) unit)
64-1
61-4
61-4
ADJ M8
Photoconductor phase adjustment
44-20 (Old)
44-31 (New)
44-31 (New)
ADJ M9A
∗
1
Image registration adjustment (Auto adjustment)
(AR-C250/C160/C270) (New version of AR-C150)
(AR-C250/C160/C270) (New version of AR-C150)
Main scanning direction copy magnification ratio adjustment
(Scanner (Writing) unit)
Main scanning direction image registration adjustment (Scanner
(Writing) unit)
Sub scanning direction color image resist adjustment (Scanner
(Writing) unit)
(Scanner (Writing) unit)
Main scanning direction image registration adjustment (Scanner
(Writing) unit)
Sub scanning direction color image resist adjustment (Scanner
(Writing) unit)
50-22
ADJ M9
∗
2
Main scanning direction copy magnification ratio
adjustment (Manual adjustment) (Scanner
(Writing) unit)
Main scanning direction image registration
adjustment (Manual adjustment) (Scanner
(Writing) unit)
adjustment (Manual adjustment) (Scanner
(Writing) unit)
Main scanning direction image registration
adjustment (Manual adjustment) (Scanner
(Writing) unit)
ADJ 1
Main scanning direction copy magnification ratio
adjustment (Scanner (Writing) unit) (Black)
adjustment (Scanner (Writing) unit) (Black)
50-10
ADJ 2
Main scanning direction color image resist adjustment
(Scanner (Writing) unit) (Color)
Main scanning direction copy magnification ratio
adjustment (Scanner (Writing) unit) (Color)
(Scanner (Writing) unit) (Color)
Main scanning direction copy magnification ratio
adjustment (Scanner (Writing) unit) (Color)
50-20
ADJ M10
∗
3
Sub scanning direction color image resist
adjustment (Manual adjustment) (Scanner
(Writing) unit) (Color)
adjustment (Manual adjustment) (Scanner
(Writing) unit) (Color)
50-21
ADJ M11 Image distortion adjustment
ADJ 1
Scanner (Reading) unit parallelism adjustment
ADJ 2
Image distortion adjustment (Sub scanning direction)
ADJ 3
Image distortion adjustment (Main scanning direction)
ADJ M12 Image focus (Main scanning direction copy
magnification ratio) adjustment (CCD position
adjustment)
adjustment)
48-1
ADJ M13 Sub scanning direction copy magnification ratio
adjustment
48-1
ADJ M14 Image position adjustment (Main scanning
direction) (Print engine)
50-10
ADJ M15 Image position adjustment (Main scanning
direction) (Scanner (Writing)
50-12
ADJ M16 Image position, image loss, void area adjustment
50-1/50-2
ADJ M17 Copy quality adjustment
ADJ 1
63-3 (63-5)
ADJ 2
∗
4
Copy color balance adjustment (Auto)
46-22/24
ADJ 3
∗
5
Copy color balance adjustment (Manual)
46-21
ADJ 4
Low-density area density adjustment (Normall
unnecessary to adjust)
unnecessary to adjust)
46-1/2
ADJ 5
Copy color balance adjustment (Copy mode) (Normall
unnecessary to adjust)
unnecessary to adjust)
46-10 to 19
ADJ 1A CCD gamma adjustment (CCD calibration) (Copy
63-9
7 – 1
JOB No
ADJUSTMENT ITEM
SIMULATION
ADJ M17 Copy quality adjustment
ADJ 6
Black toner component image gamma adjustment (Black
character and black line reproduction adjustment)
(AR-C250/C160/C270) (Normally unnecessary to adjust.)
character and black line reproduction adjustment)
(AR-C250/C160/C270) (Normally unnecessary to adjust.)
46-27
ADJ 7
Copy color balance adjustment (Single color Copy
mode) (Normally unnecessary to adjust.)
(AR-C250/C160/C270)
mode) (Normally unnecessary to adjust.)
(AR-C250/C160/C270)
46-25
ADJ 8
Setup of the gamma characteristic in the color copy
mode (AR-C250/C160/C270)
mode (AR-C250/C160/C270)
26-55
ADJ 9
Fusing capability setting with heavy paper (AR-C150)
26-55
ADJ 10 User auto color calibration (Copy color balance, auto
density adjustment)
26-53
ADJ M18 Document size sensor adjustment
ADJ 1
Original size sensor detection point adjustment
41-2
ADJ 2
Original size sensor sensitivity adjustment
41-2
ADJ M19 Waste toner full detection level adjustment
ADJ M20 Touch panel coordinates setting
65-1
ADJ M21 Transfer belt level adjustment
(Transfer belt traveling adjustment)
ADJ M22 Fusing pressure adjustment
ADJ M23 Power voltage adjustment
(AR-C100/C150/C250/C270)
ADJ 1
3.4 V power voltage adjustment
ADJ 2
5.0 V power voltage adjustment
ADJ 3
24 V power voltage adjustment
ADJ M24 Manual feed paper size sensor adjustment
40-2
ADJ M25 OHP sensor adjustment
40-5
∗
1/
∗
2/
∗
3: ADJ M9A automatically performs the adjustment contents of ADJ M9/ADJ M10. If satisfactory results are obtained by ADJ M9A, there is
no need to execute manual adjustments of ADJ M9/ADJ M10.
∗
4/
∗
5:
ADJ M17/ADJ 2 automatically perform the adjustment contents of ADJ M17/ADJ 3. If satisfactory results are obtained by ADJ M17/ADJ 2,
there is no need to execute manual adjustments of ADJ M17/ADJ 3.
there is no need to execute manual adjustments of ADJ M17/ADJ 3.
ADJ M1
DV doctor gap adjustment
This adjustment must be performed in the following cases:
•
When the developing unit is disassembled.
•
When the print density is low.
•
When there is a lot of toner dispersion abnormally.
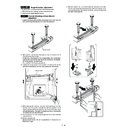
1) Remove the developing unit from the copier, and remove the de-
veloping unit cover and the blade cover.
2) Loosen the DV doctor fixing screw A.
3) Insert a 0.525 thickness gauge at the point of 40mm – 70mm from
the DV doctor edge.
4) Push the DV doctor in the arrow direction and tighten the DV doc-
tor fixing screw.
(Perform the same procedure for the front and the rear frame si-
multaneously.)
(Perform the same procedure for the front and the rear frame si-
multaneously.)
5) Check that the clearance is 0.525
±
0.03mm at two positions
which are 40mm – 70mm from the both sides of the DV doctor.
∗
When inserting the thickness gauge, be careful not to scratch the
DV doctor and the MG roller.
DV doctor and the MG roller.
ADJ M2
DV roller main pole position
adjustment
adjustment
This adjustment must be performed in the following cases:
•
When the developing unit is disassembled.
•
When the print density is low.
•
When there is a lot of toner dispersion abnormally.
1) Remove the developing unit cover and the blade cover, and place
the developing unit on a flat surface.
2) Tie a string to a needle or a pin.
3) Hold the string and put the needle horizontally and move it toward
the MG roller. (Do not use a clip which is too big to have a correct
position.)
position.)
4) With the needle tip at 2 – 3mm from the MG roller surface, mark
the point on the surface which is on the extended line of the nee-
dle tip. (Do not make contact between the needle tip and the MG
roller.)
dle tip. (Do not make contact between the needle tip and the MG
roller.)
40mm
30mm
40mm
30mm
7 – 2
5) Measure the distance between the marking position and surface P
of the developing unit, and check that the black unit is 13mm,
color unit 24mm.
color unit 24mm.
If the distance is not as specified above, loosen the fixing screw A
of the main pole adjustment plate, and move the adjustment plate
in the arrow direction to adjust.
of the main pole adjustment plate, and move the adjustment plate
in the arrow direction to adjust.
ADJ M3
Toner concentration control reference
level setting
level setting
This adjustment must be performed in the following case:
•
When the developer is replaced.
1) With the front cabinet open, enter the SIM 25-2 mode.
2) Close the front cabinet.
3) Select the developing unit to be adjusted.
4) When the [EXECUTE] key is pressed, it is highlighted. The OPC
drum drive motor rotates and the toner concentration sensor de-
tects toner concentration and the output value is displayed.
tects toner concentration and the output value is displayed.
After stirring for 3 min, the average value of toner concentration sen-
sor detection level is set (stored) as the reference toner concentration
control value.
sor detection level is set (stored) as the reference toner concentration
control value.
NOTE: When the operation is stopped in 3 min, the adjustment re-
sult is not registered.
When the [EXECUTE] key is pressed during rotation of the
motor, it is stopped and the [EXECUTE] key returns to the
normal display.
If "EE-EU" or "EE-EL" is displayed, it means that the refer-
ence toner concentration control value is not set normally.
EE-EL: Less than 79 (1.59V)
EE-EU: More than 177 (3.41V)
5) Execute SIM 24-5 to clear the developer counter.
6) Execute SIM 44-27 to reset the half tone correction data (correc-
tion conditions) to the default.
NOTE: 1) When replacing the color developer, replace the yellow,
Magenta, and Cyan developers at the same time.
If only one developer is replaced, the color balance may
be abnormal.
The black developer can be replaced alone.
If only one developer is replaced, the color balance may
be abnormal.
The black developer can be replaced alone.
2) After replacement of developers and the photoconductor,
be sure to execute SIM 44-27 to reset the half tone
correction data (correction conditions) to the default level.
If the above procedure is ignored, half tone correction
may not be performed properly.
correction data (correction conditions) to the default level.
If the above procedure is ignored, half tone correction
may not be performed properly.
ADJ M4
High voltage adjustment
(Note) For adjustment of the output voltage, use internal impedance
of 1000Mohm or more and whose effective value can be
measured (Recommend: FLUKE87 FLUKE80K-40). Use a
high voltage probe.
measured (Recommend: FLUKE87 FLUKE80K-40). Use a
high voltage probe.
ADJ 1
Main charger grid voltage adjustment
This adjustment must be performed in the following cases:
•
When the high voltage power (MC/DV) PWB is replaced.
•
When a U2 trouble occurs.
•
When the PCU main PWB is replaced.
•
When the EEPROM of the PCU main PWB is replaced.
1) Enter SIM 8-2 mode.
2) Select the color mode to be adjusted with the scroll key and press
the [EXECUTE] key.
3) Check the output voltage with the high voltage probe, and adjust
the value of each color so that the specification in the table below
is satisfied.
is satisfied.
Color
Normal mode adjustment spec
Check pin
AR-C100/C150
AR-C250
AR-C160/C270
K
– 525
±
5V
– 545
±
5V
– 545
±
5V
(5)
C
– 525
±
5V
– 545
±
5V
– 555
±
5V
(6)
M
– 525
±
5V
– 545
±
5V
– 555
±
5V
(7)
Y
– 525
±
5V
– 545
±
5V
– 555
±
5V
(8)
Enter the adjustment value with the 10-key and press the [OK] key.
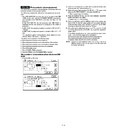
2 ~ 3mm
P
A
2 ~ 3mm
13.0mm
black
A
2 ~ 3mm
24.0mm
color
7 – 3
∗
With all the OPC drums removed from the machine, bring the high
voltage probe into contact with the high voltage PWB GB pin to
check the adjustment value.
voltage probe into contact with the high voltage PWB GB pin to
check the adjustment value.
If an effective value meter and a high voltage probe are not available,
refer to the table below to enter the adjustment value.
refer to the table below to enter the adjustment value.
This allows to make a simple adjustment.
Main charger grid voltage adjustment value
Color
SIM 8-2 adjustment value
AR-C100/C150
AR-C250
AR-C160/C270
K
A
525
545
545
C
B
525
545
555
M
C
525
545
555
Y
D
525
545
555
ADJ 2
DV bias voltage adjustment
This adjustment must be performed in the following cases:
•
When the high voltage power (MC/DV) PWB is replaced.
•
When a U2 trouble occurs.
•
When the PCU main PWB is replaced.
•
When the EEPROM of the PCU main PWB is replaced.
1) Enter the SIM 8-1 mode.
2) Select the color mode to be adjusted with the scroll key and press
the [EXECUTE] key.
3) Check the output voltage with the high voltage probe, and adjust
the value of each color so that the specification in the table below
is satisfied.
Enter the adjustment value with the 10-key and press the [OK]
key.
is satisfied.
Enter the adjustment value with the 10-key and press the [OK]
key.
Color
Normal mode adjustment spec
Check pin
K
– 325
±
5V
(1)
C
– 325
±
5V
(2)
M
– 325
±
5V
(3)
Y
– 325
±
5V
(4)
∗
Set the developing unit (K, C, M, Y), bring the high voltage probe
into contact with the high voltage PWB GB pin to check the
adjustment value.
into contact with the high voltage PWB GB pin to check the
adjustment value.
If an effective value meter and a high voltage probe are not available,
refer to the table below to enter the adjustment value.
refer to the table below to enter the adjustment value.
This allows to make a simple adjustment.
Developing bias voltage adjustment value
Color
SIM 8-1 adjustment value
K
A
325
C
B
325
M
C
325
Y
D
325
ADJ 3
Transfer voltage adjustment
This adjustment must be performed in the following cases:
•
When the high voltage power (TC) PWB is replaced.
•
When a U2 trouble occurs.
•
When the PCU main PWB is replaced.
•
When the EEPROM of the PCU main PWB is replaced.
1) Enter the SIM 44-30 mode, enter the following value for each
mode and each color, and enter the [OK] key. (AR-C250/C160/
C270) (New version of AR-C150)
Enter the SIM 8-6 mode and enter the following values for each
color and press the [OK] key. (Old version of AR-C150)
C270) (New version of AR-C150)
Enter the SIM 8-6 mode and enter the following values for each
color and press the [OK] key. (Old version of AR-C150)
Transfer voltage input values
Display
BK
C
M
Y
Normal paper mode
A: SPX
178
164
123
123
ADU mode
B: DPX
178
164
123
123
OHP mode
C: TRANSPARENCY
204
209
167
182
Thick paper mode
D: HEAVY PAPER
204
187
138
138
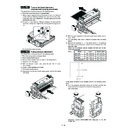
(5)
(6)
(7)
(8)
GND
(1)
(2)
(3)
(4)
GND
7 – 4
Display

