Sharp AR-C270 (serv.man13) Service Manual ▷ View online
FSM (L): The smaller the set value is, the slower the speed is.
±
1 for about 0.1% change
FSM (S): The smaller the set value is, the slower the speed is.
±
1 for about 0.1% change
DM(BK): The smaller the set value is, the higher the speed is.
±
1 for about 0.15% change
DM(CL):
The smaller the set value is, the higher the speed is.
±
1 for about 0.15% change
PFM:
The smaller the set value is, the higher the speed is.
±
1 for about 0.1% change
DVKM:
The smaller the set value is, the higher the speed is.
±
1 for about 0.1% change
DVCM:
The smaller the set value is, the higher the speed is.
±
1 for about 0.1% change
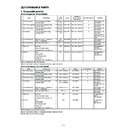
Item
Default
AR-C100/C150
AR-C250
AR-C160/C270
A. RRM
55
55
55
B. BELTM
51
51
51
C. FSM(L)
45
(JAPAN:50
EX JAPAN:40)
(JAPAN:55
EX JAPAN:50)
D. FSM(S)
40
(JAPAN:45
EX JAPAN:40)
(JAPAN:60
EX JAPAN:55)
E. DM(BK)
42
42
42
F. DM(CL)
37
37
37
G. PFM
—
—
50
H. DVKM
—
—
50
I. DVCM
—
—
50
(AR-C160/C270)
51
51 - 2
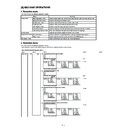
Purpose
Adjustment
Function
(Purpose)
(Purpose)
Used to adjust the contact pressure of paper on the re-
sist roller of each section (each paper feed and duplex
feed of the copier). (This adjustment is required when
the print image position variations are considerably
great or when paper jams occur frequently.)
sist roller of each section (each paper feed and duplex
feed of the copier). (This adjustment is required when
the print image position variations are considerably
great or when paper jams occur frequently.)
Section
Paper transport (Discharge/Switchback/Transport)
Item
Operation
Operation/
Procedure
Procedure
1. Select the adjustment mode with [
↑
],[
↓
]keys.
2. Enter the adjustment value with the 10-key.
3. Press the [OK] key. (The value entered in procedure 2 is set.)
Used to set the resist roller clutch (RRC) ON timing.
When the set value is increased, the timing is delayed and the
paper pressure onto the resist roller is increased. When the set
value is changed by 1, the timing is changed by about 1.0msec.
The set range is 0 – 99 for all.
When the set value is increased, the timing is delayed and the
paper pressure onto the resist roller is increased. When the set
value is changed by 1, the timing is changed by about 1.0msec.
The set range is 0 – 99 for all.
MANUAL Resist quantity adjustment in manual paper feed
(Default: 40)
Resist quantity in the machine tray paper feed
Adjustment (Default: 60)
Resist quantity in the machine tray paper feed
Adjustment (Default: 60)
TRAY
Resist quantity in high speed transport in the copier
and the desk paper feed.
and the desk paper feed.
LCC
Resist quantity adjustment in high speed transport in
LCC paper feed. (Default: 70)
LCC paper feed. (Default: 70)
ADU
Resist quantity adjustment in ADU paper feed.
(Default: 70)
(Default: 70)
64
64 - 3
Purpose
Operation test/check
Function
(Purpose)
(Purpose)
Used to check the operation (self print) of the printer
section. (The print pattern, the paper feed mode, the
print mode, the print quantity, and the density can be
set optionally.) (monochrome) (AR-C160/C270)
section. (The print pattern, the paper feed mode, the
print mode, the print quantity, and the density can be
set optionally.) (monochrome) (AR-C160/C270)
Section
Printer
Item
Operation
Operation/
Procedure
Procedure
1. Select the item with [
↑
], [
↓
] keys.
2. Enter the print conditions with the 10-key.
3. Press the [EXECUTE] Key.
The self print pattern is printed.
The print color can be specified: [K] black, [C] cyan, [M] magenta,
[Y] yellow.
[Y] yellow.
8 – 33
Item
Display item
Low
High
Default
value
Description
A
PRINT PATTERN
1
21
1
Self print pattern
= 1
Gradation sub scanning direction (input process)
= 2
Gradation main scanning direction (input process)
= 3
Grid (input process)
= 4
Gradation pattern: 255, 0 – 254, increment of 1 gradation
= 5
Grid (Half tone)
= 6
Gradation sub scanning direction (Half tone): 16 steps, 16 intervals, 15 start
= 7
Gradation main scanning direction (Half tone): 16 steps, 16 intervals, 15 start
= 8
Equal pitch pattern sub scanning direction 1 by 4
= 9
Equal pitch pattern main scanning direction 1 by 4
=10
Equal pitch pattern sub scanning direction 2 by 6
=11
Equal pitch pattern main scanning direction 2 by 6
=12
Gradation sub scanning direction (Half tone): 16 steps 2 intervals
=13
All surface (HT)
=14
Cross pattern (sub scanning direction)
=15
Cross pattern (main scanning direction)
=16
Black color print main scanning direction
=17
Black color 10% (A4, A4R) density print
=18
Dot print (input process)
=19
Gradation pattern: 255, 0 – 254, increment of 1 gradation, (Text 1
×
1)
=20
=21
For ICU monitor software setup PG (with input DMA start) (Not operating)
=22
Print lattice pattern (25 MHz)
B
DENSITY
1
255
255
Gradation level
C
MULTI COUNT
1
999
1
Self print quantity setting
D
EXPO:
1
11
1
Density mode
= 1
THROUGH
No process (through)
= 2
CHAR/PIC AUTO
Test/Printed Photo Auto
= 3
CHAR/PIC MANUAL
Text/Printed Photo Manual
= 4
CHAR/PRPIC AUTO
Text/Photo Auto
= 5
CHAR/PRPIC MANU
Text/Photo Manual
= 6
CHAR AUTO
Text Auto
= 7
CHAR MANUAL
Text manual
= 8
PRINT PIC
Printed Photo
= 9
PRINT PAPER
Photo
= 10
MAP
Map
= 11
STANDARD DITHA
E
PAPER:
1
6
3
Cassette selection
= 1
MANUAL
Manual paper feed
= 2
CAS1
Cassette 1
= 3
CAS2
Cassette 2 (Default)
= 4
CAS3
Cassette 3
= 5
CAS4
Cassette 4
= 6
LCC
LCC
F
DUPLEX
1
2
1
Duplex print select
= 1
NO
Single
= 2
YES
Duplex
8 – 34

