Sharp AR-C262M (serv.man3) Service Manual ▷ View online
AR-C262M SETTING AND ADJUSTMENTS 8 - 18
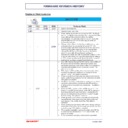
1) Make a test chart on A3 (11" x 17") paper as shown below.
(Draw a rectangle with four right angles.)
2) Set the test chart made in procedure 1) on the document
table. With the document cover open, make a copy on A3 (11"
x 17").
x 17").
3) Check for distortion in the main scanning direction.
If the four angles of the rectangle on the copy are right angles,
there is no distortion. (Completion of the adjustment)
there is no distortion. (Completion of the adjustment)
If there is some distortion in the main scanning direction, perform
the following procedures
the following procedures
4) Check the difference (distortion balance) of left and right
images distortions.
If Lc = Ld, the distortion on the left is equal to that on the right.
(The distortions are balanced.)
(The distortions are balanced.)
If the above condition is satisfied, go to procedure 6).
If the above condition is not satisfied, perform the following proce-
dure.
dure.
5) Change the height balance of the front frame side scanner rail.
[Rail adjustment]
1) Make a copy from the table glass, and check the copy out-
put.
In this case, set the test chart correctly. If it is set inclined,
the adjustment cannot be made correctly.
the adjustment cannot be made correctly.
2) If the check result is outside the specified range, perform
the following procedure.
3) Remove the front cabinet on the scanner side, and check
the installing position of the MB rail.
4) Loosen the screw on the right side of the MB rail.
Repeat procedures 2) to 5) until the image distortions are bal-
anced.
anced.
6) Without changing the balance between the front frame side
scanner rail, change the overall height.
7) Set the test chart made in procedure 1) on the document
table, and make a copy on A3 (11" x 17") paper. Check that
the main scanning distortion is within the specified range.
the main scanning distortion is within the specified range.
Perform procedures 7) to 8) until the main scanning direction
distortion is in the specified range.
distortion is in the specified range.
If this adjustment cannot remove the sub scanning direction distor-
tion, perform ADJ 6D, Scan image distortion adjustment.
tion, perform ADJ 6D, Scan image distortion adjustment.
If scan image distortion cannot be removed with ADJ 6A, ADJ 6B,
and ADJ 6C, perform this adjustment.
and ADJ 6C, perform this adjustment.
Change the position of the scanner unit distortion adjustment plate
on the right side of the scanner unit so that the scanner image dis-
tortion becomes minimum. The scan image distortion is adjusted
by adjusting the overall mechanical distortion of the scanner unit.
on the right side of the scanner unit so that the scanner image dis-
tortion becomes minimum. The scan image distortion is adjusted
by adjusting the overall mechanical distortion of the scanner unit.
ADJ 6C
Copy image main scanning direction
distortion adjustment
distortion adjustment
L
L
L
L
L = 10mm
Lc
Ld
Lc
Ld
Copy A
Copy B
There is no difference
between the distortion on
the right and that on the left.
Lc = Ld
There is some difference
between the distortion on
the right and that on the left.
Lc
≠
Ld
ADJ 6D
Scan image distortion adjustment
A
A
B
C
Scanner adjustment plate WH
B
C
AR-C262M SETTING AND ADJUSTMENTS 8 - 19
This adjustment must be performed in the following cases:
• When the CCD unit is removed from the machine.
• When the CCD unit is replaced.
• When the copy image focus is improper.
• When the copy magnification ratio in the copy image main scan-
ning direction is not proper.
• When the MFP main PWB is replaced.
• When the EEPROM of the MFP main PWB is replaced.
• When a U2 trouble occurs.
1) Enter the SIM 48-1 mode.
2) Set the set item B to 50 (initial value).
3) As shown in the figure below, place a scale on the original
table.
4) Make a normal copy on A4 paper.
5) Compare the scale image length and the actual scale length.
6) Obtain the main scanning direction copy magnification ratio
according to the following formula.
Main scanning direction copy magnification ratio
=
x 100 [%]
(Example) Fit 10mm of the scale with 10mm of the copied scale
and compare them.
Main scanning direction copy magnification ration
=
x 100 = 1
If the copy magnification ratio is not satisfactory, perform the
following procedure.
following procedure.
7) Remove the original guide L and R, and remove the table
glass.
8) Remove the dark box cover.
9) Loosen the CCD unit fixing screws.
Draw a marking line on the CCD unit base as shown below in
order to avoid a shift in the optical axis of the CCD unit.
order to avoid a shift in the optical axis of the CCD unit.
At that time, fix the CCD unit so that it is in parallel with the
marked line in procedure 9).
marked line in procedure 9).
∗
Never loosen the screws marked with "
✕
."
If one of these screws is loosened, the CCD unit base posi-
tion and angle may be changed. If so, it cannot be adjusted
in the market, and therefore the whole scanner unit must be
replaced.
tion and angle may be changed. If so, it cannot be adjusted
in the market, and therefore the whole scanner unit must be
replaced.
10) Slide the CCD unit in the arrow direction (CCD sub scanning
direction) to change the installing position.
When the copy image is longer than the original, move in the
direction of B.
direction of B.
When the copy image is shorter than the original, move in the
direction of A.
direction of A.
One scale of scribe line corresponds to 0.2%.
At that time, fix so that the CCD unit is in parallel with the
scales on the front frame side and on the rear frame side of
the CCD unit base.
scales on the front frame side and on the rear frame side of
the CCD unit base.
At that time, fix the CCD unit so that it is in parallel with the
marked line in procedure 9).
marked line in procedure 9).
ADJ 7
Copy image focus
(main scanning direction copy
magnification ratio) adjustment
(CCD unit position adjustment)
(main scanning direction copy
magnification ratio) adjustment
(CCD unit position adjustment)
10
20
30
40
50
60
70
80
90
50
100110
120130140
(Original dimension – Copy dimension)
Original dimension
100 – 99
100
10
20
90
100
110
10
20
90
100
110
100mm scale
(Original)
(Original)
Copy image
(1mm (1%)
shorter than
the original)
(1mm (1%)
shorter than
the original)
1.0mm
A
B
AR-C262M SETTING AND ADJUSTMENTS 8 - 20
11) Make a copy, and check the copy magnification ratio.
If the copy magnification ratio is outside the range of 100% ± 1%,
repeat procedures 9) to 11) until it is in the range.
repeat procedures 9) to 11) until it is in the range.
unit fixing position is changed with SIM 48-1 set to 50, the
copy magnification ratio is adjusted to the specified level
(100 ± 1.0%) and the specified resolution is provided.
copy magnification ratio is adjusted to the specified level
(100 ± 1.0%) and the specified resolution is provided.
This adjustment must be performed in the following cases:
• When the copy magnification ratio in the copy image sub scan-
ning direction is improper.
• When the scanner motor is replaced.
• When a U2 trouble occurs.
• When the MFP main PWB is replaced.
• When the EEPROM of the MFP main PWB is replaced.
Before this adjustment, perform the focus adjustment (CCD unit
installing position adjustment).
installing position adjustment).
1) Place a scale on the original table as shown below.
2) Enter the SIM 48-1 mode.
3) Make a normal copy and obtain the copy magnification ratios.
Copy magnification ratio
=
x 100 [%]
4) Check that the copy magnification ratio is within the specified
range (100 ± 1.0%).
If the copy magnification ratio is within the specified range
(100 ± 1.0%), the adjustment is completed.
(100 ± 1.0%), the adjustment is completed.
If not, perform the following procedure.
5) Change the scan mode adjustment value of SIM 48-1.
When the adjustment value is increased, the sub scanning
direction copy magnification ratio is increased.
direction copy magnification ratio is increased.
A change in the adjustment value by 1 corresponds to a
change in the copy magnification ratio by about 0.1%.
change in the copy magnification ratio by about 0.1%.
Repeat procedures 3) to 5) until the coy magnification ratio is
within the specified range (100 ± 0.28%).
within the specified range (100 ± 0.28%).
Note: Fix the adjustment value of SIM 48-1 adjustment mode (F –
R) to 50.
This adjustment must be performed in the following cases:
When the scanner (reading) section is disassembled.
When the scanner (reading) unit is replaced.
When the RADF section is disassembled.
When the RADF unit is installed.
When the RADF unit is replaced.
When a U2 trouble occurs.
When the MFP main PWB is replaced.
When the EEPROM of the MFP main PWB is replaced.
1) Make a copy in the adjustment chart adjustment mode. (Docu-
ment table or RADF)
2) Check the copy image center position.
If A – B = ± 4.0mm, there is no need to adjust.
If the above condition is not satisfied, perform the following
procedures.
procedures.
3) Enter the SIM 50-12 mode.
4) Select the adjustment mode with the scroll key.
5) Enter the adjustment value with the 10-key and press the [OK]
key.
The entered value is set.
∗
When the set value is increased, the image is shifted to the rear
side. When the set value is decreased, the image is shifted to
the front side.
side. When the set value is decreased, the image is shifted to
the front side.
When the set value is change by 1, the image is shifted by about
0.4mm.
0.4mm.
Repeat procedures 2) to 5) until the above condition is satisfied.
ADJ 8
Sub scanning direction copy
magnification ratio adjustment
magnification ratio adjustment
10 20 30 40 50 60 70 80 90 50 100 110 120130 140
(Original dimension – Copy dimension)
Original dimension
10
20
90
100
110
10
20
90
100
110
10
20
90
100
110
(Example 2)
Copy B
(Longer than
the original)
Copy B
(Longer than
the original)
(Example 1)
Copy A
(Shorter than
the original)
Copy A
(Shorter than
the original)
Scale
(Original)
(Original)
ADJ 9
Main scanning direction copy
image position adjustment
(Scanner (reading) section)
image position adjustment
(Scanner (reading) section)
A
B
A – B = 4.0mm
(400%)
AR-C262M SETTING AND ADJUSTMENTS 8 - 21
This adjustment must be performed in the following cases:
• When the scanner (reading) section is disassembled.
• When the scanner (reading) unit is replaced.
• When the resist roller section is disassembled.
• When a U2 trouble occurs.
• When the MFP main PWB is replaced.
• When the EEPROM of the MFP main PWB is replaced.
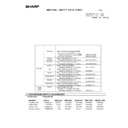
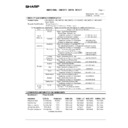
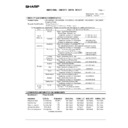
This adjustment uses SIM 50-2 and SIM 50-1.
The above two simulations are used in the following manner.
SIM 50-2: Rough adjustment
SIM 50-1: Fine adjustment
If the desired value is obtained by SIM 50-2, there is no need to
perform SIM 50-1.
perform SIM 50-1.
(Adjustment item)
Adjustment items 1 to 3 can be adjusted either with SIM 50-1 or
with SIM 50-2.
with SIM 50-2.
The adjustment values 6 and 7 will affect the adjustment items 4
and 5 automatically.
and 5 automatically.
Therefore, adjusting the items 6 and 7 will lead to the same result
as adjusting the items 4 and 5 directly.
as adjusting the items 4 and 5 directly.
1) Place a scale on the original table as shown below.
Note that the scale must be placed in parallel with the scan-
ning direction and that the scale lead edge must be in close
contact with the original guide plate.
ning direction and that the scale lead edge must be in close
contact with the original guide plate.
2) Enter the SIM 50-2 mode.
3) Set IMAGE LOSS and DEN-A to "20".
4) Set all the set items of L1 and L2 to "0".
5) Make a copy at 400%. (Original table mode)
6) Measure the copied image dimensions X and Y.
X: Distance between the copy image lead edge and the scale
of 10mm.
Y: Distance between the paper lead edge and the copy image
lead edge.
7) Multiply X, Y, and Z (unit: mm) by 10 to obtain L1, L2 respec-
tively. Enter the values of L1 and L2.
L1 = X x 10
L2 = Y x 10
8) Cancel the simulation, make a copy, and check that the lead
edge image loss and void area are within the specified range
shown below.
shown below.
Lead edge image loss: 4.0 ± 1.0mm
Lead edge void area: 4.0 ± 1.0mm
If the above specifications are not satisfied, perform the following
procedures.
procedures.
9) Enter the SIM 50-1 mode.
10) Set a scale in the same manner as procedure 3), and make a
copy at 50% and at 400% in the original table mode.
11) Measure the distance between the paper lead edge and the
copy image lead edge of 50% copy and of 400% copy.
12) Check that there is no difference between the above distance
of 50% copy and that of 400% copy.
If there is a difference of 1.5mm or above, change the adjust-
ment value of RRC-A.
ment value of RRC-A.
Repeat procedures 10) to 12) until the above specification is satis-
fied.
fied.
13) If the lead edge void area is not within the specified range,
change the DEN-A value.
14) If the lead edge void area is not within the specified range,
change the IMAGE LOSS value.
15) If the rear edge void area is not within the specified range,
change the DEN-B value.
ADJ 10
Copy image position/image
loss/void area adjustment
loss/void area adjustment
No.
Adjustment item
SIM 50-2
set item
SIM 50-1
set item
Adjustment
value
1
Lead edge image loss
IMAGE
LOSS
LOSS
IMAGE
LOSS
LOSS
4.0 ± 1.0mm
2
Lead edge void area
DEN-A
DEN-A
4.0 ± 1.0mm
3
Rear edge void area
DEN-B
DEN-B
4.0 ± 1.0mm
4
Image reference position
RRC-A
5
Paper timing
RRC-B
6
Distance between image lead
edge position and scale of
10mm x 10
edge position and scale of
10mm x 10
L1
7
Distance between paper lead
edge and image lead edge x 10
edge and image lead edge x 10
L2
10 20 30 40 50 60 70 80 90 50 100110120130140
10
20
30
40
50
X
Y
Paper lead
edge
edge
400% enlarged copy
Image loss
Lead edge void area
Rear edge void area

