|
|
AR-200 (serv.man5)
AR200 Service Manual
Service Manual
|
23
|
153.55 KB
|
|
|
AR-200 (serv.man10)
AR200 Operation Manual-Part 2
User Manual / Operation Manual
|
10
|
406.13 KB
|
|
|
AR-200 (serv.man11)
AR200 Operation Manual-Part 3
User Manual / Operation Manual
|
18
|
216.41 KB
|
|
|
AR-200 (serv.man12)
AR200 Operation Manual-Part 4
User Manual / Operation Manual
|
28
|
487.6 KB
|
|
|
AR-200 (serv.man6)
Information of parts change
Service Manual / Parts Guide
|
2
|
28.25 KB
|
|
|
AR-200 (serv.man7)
Information of parts change To improve productivity, the L pulley has been changed.
Service Manual / Parts Guide
|
2
|
20.3 KB
|
|
|
AR-200 (serv.man8)
AR200 Parts Guide
Service Manual / Parts Guide
|
12
|
400 KB
|
|
|
AR-200 (serv.man2)
Strength increase of the grid mounting area on the MC holder rear side
Service Manual / Specification
|
2
|
574.94 KB
|
|
|
AR-200 (serv.man3)
Disuse of the fusing front transport sheet due to change of the side door inner frame
Service Manual / Specification
|
2
|
892.31 KB
|
|
|
AR-200 (serv.man4)
AR200 Specifications
Service Manual / Specification
|
3
|
154.91 KB
|
|
|
AR-200 (serv.man20)
Manual paper feed roller material change.
Service Manual / Technical Bulletin
|
5
|
342.3 KB
|
|
|
AR-200 (serv.man21)
MODIFICATION OF PAPER FEED ROLLER HOLDER ETC. TO IMPROVE PRODUCTIVITY
Service Manual / Technical Bulletin
|
5
|
290.28 KB
|
|
|
AR-200 (serv.man22)
MATERIAL CHANGE PAPER FEED SHEET
Service Manual / Technical Bulletin
|
4
|
354.66 KB
|
|
|
AR-200 (serv.man23)
Information of parts change (Righthand Door Assembly).
Service Manual / Technical Bulletin
|
1
|
100.72 KB
|
|
|
AR-200 (serv.man24)
Information of parts change (Duplex drive idle plate Copy lamp unit).
Service Manual / Technical Bulletin
|
2
|
80.54 KB
|
|
|
AR-200 (serv.man25)
Strength increase of the fusing lower frame.
Service Manual / Technical Bulletin
|
2
|
57.91 KB
|
|
|
AR-200 (serv.man26)
Strength increase of the boss for mounting the manual paper feeding latch pawl B.
Service Manual / Technical Bulletin
|
3
|
934.83 KB
|
|
|
AR-200 (serv.man27)
Parts Changes.
Service Manual / Technical Bulletin
|
1
|
21.62 KB
|
|
|
AR-200 (serv.man28)
Parts Change.
Service Manual / Technical Bulletin
|
2
|
30.21 KB
|
|
|
AR-200 (serv.man29)
Parts Change, Main Motor.
Service Manual / Technical Bulletin
|
1
|
21.81 KB
|
|
|
AR-200 (serv.man30)
Countermeasure against wrinkles on the copy paper or paper jam due to shrinkage of the FU felt.
Service Manual / Technical Bulletin
|
2
|
26.84 KB
|
|
|
AR-200 (serv.man31)
Attachment of a high temperature Caution Label.
Service Manual / Technical Bulletin
|
2
|
106.9 KB
|
|
|
AR-200 (serv.man32)
Change due to production stoppage of rubber for the manual paper feed roller (repeat due to incorrect information)
Service Manual / Technical Bulletin
|
2
|
84.65 KB
|
|
|
AR-200 (serv.man33)
Change due to production stoppage of rubber for the manual paper feed roller.
Service Manual / Technical Bulletin
|
2
|
122.55 KB
|
|
|
AR-200 (serv.man34)
1. Change of the MX roller, 2. Material change of the roller arm, 3. Shape change of the delivery upper guide 20, 4. Change of the fusing connecting plate, 5. Standardisation of the parts code for the ATC sensor.
Service Manual / Technical Bulletin
|
5
|
112.48 KB
|
|
|
AR-200 (serv.man35)
1. Multi frame change, 2. Shape change of the fusing cover.
Service Manual / Technical Bulletin
|
2
|
16.54 KB
|
|
|
AR-200 (serv.man36)
1. Multi frame change, 2. Shape change of the fusing cover.
Service Manual / Technical Bulletin
|
2
|
38.6 KB
|
|
|
AR-200 (serv.man37)
Countermeasure against wideningof the screw hole of fixing the fuser unit to the intermediate frame.
Service Manual / Technical Bulletin
|
2
|
483.51 KB
|
|
|
AR-200 (serv.man38)
Information of parts change. 1 Fusing front PG change. 2 Cleaning blade change. 3 Roller pawl change. 4 Change of the AC switch to comply with RoHS. 5 Change of the line cable to comply with RoHS.
Service Manual / Technical Bulletin
|
4
|
308.83 KB
|
|
|
AR-200 (serv.man39)
Change of parts for the fusing unit.
Service Manual / Technical Bulletin
|
2
|
35.61 KB
|
|
|
AR-200 (serv.man40)
Replacement procedure for the polygon motor in the LSU unit.
Service Manual / Technical Bulletin
|
4
|
310.83 KB
|
|
|
AR-200 (serv.man41)
Information of parts change. (MF Sensor Spring, Delivery Pulley 34T)
Service Manual / Technical Bulletin
|
2
|
359.14 KB
|
|
|
AR-200 (serv.man42)
128-Information of parts change.
Service Manual / Technical Bulletin
|
1
|
9.71 KB
|
|
|
AR-200 (serv.man43)
Correction to illustration of optical unit in parts guide.
Service Manual / Technical Bulletin
|
1
|
80.77 KB
|
|
|
AR-200 (serv.man44)
Countermeasure against paper jam when ejecting
Service Manual / Technical Bulletin
|
2
|
92.81 KB
|
|
|
AR-200 (serv.man45)
CHANGE OF PARTS (Base Plate Unit 2 Delivery Frame Unit MCU PWB)
Service Manual / Technical Bulletin
|
1
|
26.04 KB
|
|
|
AR-200 (serv.man46)
Countermeasure against paper jam due to deformation of the fusing upper paper guide sheet.
Service Manual / Technical Bulletin
|
2
|
47.77 KB
|
|
|
AR-200 (serv.man47)
Countermeasure against skewing due to gap in Tray Guide R
Service Manual / Technical Bulletin
|
2
|
185.54 KB
|
|
|
AR-200 (serv.man48)
Information of parts change
Service Manual / Technical Bulletin
|
2
|
791.3 KB
|
|
|
AR-200 (serv.man49)
Part number for Panther-series Power Switch
Service Manual / Technical Bulletin
|
1
|
11.11 KB
|
|
|
AR-200 (serv.man50)
Countermeasure against U2-40 trouble due to power supply noise
Service Manual / Technical Bulletin
|
1
|
1.08 MB
|
|
|
AR-200 (serv.man51)
New supply of EEPROM for service
Service Manual / Technical Bulletin
|
1
|
7.2 KB
|
|
|
AR-200 (serv.man52)
Change to shape of rear plate to prevent dislocation
Service Manual / Technical Bulletin
|
1
|
183.13 KB
|
|
|
AR-200 (serv.man53)
Countermeasure against manual feed paper jams, due to contamination of drive section
Service Manual / Technical Bulletin
|
2
|
277.55 KB
|
|
|
AR-200 (serv.man54)
Improved durability of cam transmission arm in manual paper feed unit
Service Manual / Technical Bulletin
|
1
|
13 KB
|
|
|
AR-200 (serv.man55)
Countermeasure against breakage of the fusing rear paper guide rib
Service Manual / Technical Bulletin
|
1
|
115.9 KB
|
|
|
AR-200 (serv.man56)
Countermeasure against breakage of the discharge holder claw
Service Manual / Technical Bulletin
|
1
|
93.75 KB
|
|
|
AR-200 (serv.man57)
Countermeasure against paper jam when ejecting paper
Service Manual / Technical Bulletin
|
1
|
70.94 KB
|
|
|
AR-200 (serv.man58)
Countermeasure against F1-06 errors
Service Manual / Technical Bulletin
|
1
|
54.35 KB
|
|
|
AR-200 (serv.man59)
Countermeasure against fall of DMC actuator
Service Manual / Technical Bulletin
|
1
|
14.47 KB
|
|
|
AR-200 (serv.man60)
Parts change information for PS transport roller
Service Manual / Technical Bulletin
|
1
|
13.27 KB
|
|
|
AR-200 (serv.man61)
Countermeasure for black stripes when using SPF, and for occurrence of E7-04 error message
Service Manual / Technical Bulletin
|
2
|
37.56 KB
|
|
|
AR-200 (serv.man62)
Countermeasure against skewing when feeding from cassette
Service Manual / Technical Bulletin
|
1
|
20.88 KB
|
|
|
AR-200 (serv.man63)
Design of feeding rollers is changed to improve quality of paper feeding
Service Manual / Technical Bulletin
|
2
|
52.56 KB
|
|
|
AR-200 (serv.man64)
Reprogramming service for ARFX2 facsimile option for panther - series machines
Service Manual / Technical Bulletin
|
1
|
12.64 KB
|
|
|
AR-200 (serv.man65)
Information of parts change (MCU PWB)
Service Manual / Technical Bulletin
|
1
|
15.65 KB
|
|
|
AR-200 (serv.man66)
Information of parts change (document feed)
Service Manual / Technical Bulletin
|
1
|
13.25 KB
|
|
|
AR-200 (serv.man67)
Correction of E7-04 error
Service Manual / Technical Bulletin
|
1
|
12.56 KB
|
|
|
AR-200 (serv.man68)
Parts change information (paper feeding unit process unit side door unit)
Service Manual / Technical Bulletin
|
2
|
53.53 KB
|
|
|
AR-200 (serv.man69)
Countermeasure against right door detection error
Service Manual / Technical Bulletin
|
1
|
950.17 KB
|
|
|
AR-200 (serv.man70)
Parts change information (feeding frame rollers)
Service Manual / Technical Bulletin
|
1
|
14.07 KB
|
|
|
AR-200 (serv.man71)
New supply of a service part (paper feed roller rubber)
Service Manual / Technical Bulletin
|
1
|
12.43 KB
|
|
|
AR-200 (serv.man72)
Countermeasure against abnormal noise from the 2nd transport clutch
Service Manual / Technical Bulletin
|
1
|
33.05 KB
|
|
|
AR-200 (serv.man73)
Version change of the maintenance (firmware download) software
Service Manual / Technical Bulletin
|
1
|
13.34 KB
|
|
|
AR-200 (serv.man74)
Parts change information (MCU PWB)
Service Manual / Technical Bulletin
|
1
|
12.86 KB
|
|
|
AR-200 (serv.man75)
Change of cassette lock claws
Service Manual / Technical Bulletin
|
1
|
23.34 KB
|
|
|
AR-200 (serv.man76)
New supply of service part
Service Manual / Technical Bulletin
|
1
|
23.99 KB
|
|
|
AR-200 (serv.man77)
Reducing white stripes on the CRU unit
Service Manual / Technical Bulletin
|
1
|
21.38 KB
|
|
|
AR-200 (serv.man78)
Parts change information
Service Manual / Technical Bulletin
|
2
|
530.64 KB
|
|
|
AR-200 (serv.man79)
New supply of fusing unit adding a cleaning felt AS
Service Manual / Technical Bulletin
|
1
|
21.92 KB
|
|
|
AR-200 (serv.man80)
Information about the part code of the delivery frame
Service Manual / Technical Bulletin
|
1
|
21.9 KB
|
|
|
AR-200 (serv.man81)
Parts change information
Service Manual / Technical Bulletin
|
2
|
205.2 KB
|
|
|
AR-200 (serv.man82)
New supply of fusing unit adding a cleaning felt AS
Service Manual / Technical Bulletin
|
1
|
21.58 KB
|
|
|
AR-200 (serv.man83)
Parts change (lens unit)
Service Manual / Technical Bulletin
|
1
|
21.48 KB
|
|
|
AR-200 (serv.man84)
New supply of a service parts described in AR161 200 ref 079
Service Manual / Technical Bulletin
|
1
|
23.39 KB
|
|
|
AR-200 (serv.man85)
Software version upgrade of the main ROM for simplex models (Correction of jam detection error in special conditions)
Service Manual / Technical Bulletin
|
1
|
22.59 KB
|
|
|
AR-200 (serv.man86)
Countermeasure against folding of the corner of copying paper on duplex print
Service Manual / Technical Bulletin
|
1
|
40.57 KB
|
|
|
AR-200 (serv.man87)
Countermeasure against oblique feed of the cassette
Service Manual / Technical Bulletin
|
1
|
33.04 KB
|
|
|
AR-200 (serv.man88)
Countermeasure against soiling of upper heat roller.
Service Manual / Technical Bulletin
|
2
|
111.83 KB
|
|
|
AR-200 (serv.man89)
Parts change.
Service Manual / Technical Bulletin
|
3
|
117.2 KB
|
|
|
AR-200 (serv.man90)
Support of double feed during cassette paper feed and document double feed.
Service Manual / Technical Bulletin
|
4
|
204 KB
|
|
|
AR-200 (serv.man91)
Countermeasure against L4-01 (main motor lock) and paper jam.
Service Manual / Technical Bulletin
|
2
|
345.83 KB
|
|
|
AR-200 (serv.man92)
Change of the tonor motor.(Toner not supplied)
Service Manual / Technical Bulletin
|
1
|
64.45 KB
|
|
|
AR-200 (serv.man93)
Countermeasure against job separator home position detection error.
Service Manual / Technical Bulletin
|
2
|
99.39 KB
|
|
|
AR-200 (serv.man94)
Improvement of the manual paper feeding tray lock.
Service Manual / Technical Bulletin
|
1
|
101.77 KB
|
|
|
AR-200 (serv.man95)
Application of grease to the paper feed cassette rail.
Service Manual / Technical Bulletin
|
1
|
100.39 KB
|
|
|
AR-200 (serv.man96)
Countermeasure against breakage of the 2nd joint gear teeth. (WHITE)
Service Manual / Technical Bulletin
|
2
|
87.92 KB
|
|
|
AR-200 (serv.man97)
Parts change for the productivity improvement. (WHITE)
Service Manual / Technical Bulletin
|
2
|
84.18 KB
|
|
|
AR-200 (serv.man98)
Caution when replacing the MCU. (WHITE)
Service Manual / Technical Bulletin
|
1
|
60.59 KB
|
|
|
AR-200 (serv.man99)
Version upgrade of main body software. (Update of ref.068)(WHITE)
Service Manual / Technical Bulletin
|
1
|
63.35 KB
|
|
|
AR-200 (serv.man100)
Change of the operation instruction label. (WHITE)
Service Manual / Technical Bulletin
|
2
|
102.41 KB
|
|
|
AR-200 (serv.man101)
Version upgrade of the main body software. (WHITE)
Service Manual / Technical Bulletin
|
1
|
36.58 KB
|
|
|
AR-200 (serv.man102)
Change of the operation instruction label. (WHITE)
Service Manual / Technical Bulletin
|
2
|
72.22 KB
|
|
|
AR-200 (serv.man103)
Change of the shifter gear (50T). (WHITE)
Service Manual / Technical Bulletin
|
2
|
62.9 KB
|
|
|
AR-200 (serv.man104)
Change of the LSU unit. (WHITE)
Service Manual / Technical Bulletin
|
1
|
36.42 KB
|
|
|
AR-200 (serv.man105)
Parts change of the fusing unit. (WHITE)
Service Manual / Technical Bulletin
|
1
|
49.79 KB
|
|
|
AR-200 (serv.man106)
Supply of the paper feed roller as a service part. (WHITE)
Service Manual / Technical Bulletin
|
1
|
126.6 KB
|
|
|
AR-200 (serv.man107)
Material change of the fusing gear (45T). (WHITE)
Service Manual / Technical Bulletin
|
1
|
128.41 KB
|
|
|
AR-200 (serv.man108)
Version upgrade of the software of the main body. (WHITE)
Service Manual / Technical Bulletin
|
1
|
102.46 KB
|
|
|
AR-200 (serv.man109)
Parts change. (WHITE)
Service Manual / Technical Bulletin
|
19
|
714.79 KB
|
|
|
AR-200 (serv.man110)
Developer Unit Improvement To Correct Clearance Between MX Roller Shaft And Shaft Bearing. (WHITE)
Service Manual / Technical Bulletin
|
2
|
89.23 KB
|
|
|
AR-200 (serv.man111)
Change Of The Photoconductor. (WHITE)
Service Manual / Technical Bulletin
|
1
|
61.61 KB
|
|
|
AR-200 (serv.man112)
Fax Kit Problems. (WHITE)
Service Manual / Technical Bulletin
|
2
|
68.58 KB
|
|
|
AR-200 (serv.man113)
1.Change Of The LSU Unit. 2.Change Of The Lamp Base Plate. 3.Change Of The LCD Spacer. (WHITE)
Service Manual / Technical Bulletin
|
2
|
69.68 KB
|
|
|
AR-200 (serv.man114)
1.Earth Wire Treatment Of The 2nd Cassette Interface Harness. 2.Setting Change Of The Default Value Of The Preheat Transition Time Of AR200 For Europe. 3.Information About The Rear Exterior Mounting Procedure. 4.Default Setting Change Of SIM26-51 Copy Stop Setting . (WHITE)
Service Manual / Technical Bulletin
|
3
|
140.35 KB
|
|
|
AR-200 (serv.man115)
Satisfaction Of Energy Star. (WHITE)
Service Manual / Technical Bulletin
|
2
|
70.51 KB
|
|
|
AR-200 (serv.man116)
1.Version Upgrade Of The CDROM. 2.Version Upgrade Of The PCL Firmware. 3.Release Of The Fax Program. 4.Parts Change For Better Productivity. 5.Supply Of Expanded Memory For The PCL PWB. (WHITE)
Service Manual / Technical Bulletin
|
3
|
74.48 KB
|
|
|
AR-200 (serv.man117)
Noisy Laser Unit. (WHITE)
Service Manual / Technical Bulletin
|
1
|
58.08 KB
|
|
|
AR-200 (serv.man118)
Correction To The Parts Guide. (WHITE)
Service Manual / Technical Bulletin
|
2
|
79.58 KB
|
|
|
AR-200 (serv.man119)
(Revision to reference 041)1.Change Of The Fusing Lower Frame. 2.Change Of The SPF Rack Cover. 3.Countermeasure Against Poor Insertion Of The Motherboard Connector. 4.Change Of The Rubber Cushion. (WHITE)
Service Manual / Technical Bulletin
|
3
|
85.32 KB
|
|
|
AR-200 (serv.man120)
Change Of The DV Side Sheet. (WHITE)
Service Manual / Technical Bulletin
|
1
|
75.23 KB
|
|
|
AR-200 (serv.man121)
Change Of The Default Values. (WHITE)
Service Manual / Technical Bulletin
|
1
|
66.6 KB
|
|
|
AR-200 (serv.man122)
1.Addition Of Installation Procedure Manual And Protection Sheet. 2.Addition Of Maintenance Card. (WHITE)
Service Manual / Technical Bulletin
|
2
|
65.93 KB
|
|
|
AR-200 (serv.man123)
Satisfaction Of Energy Star. (WHITE)
Service Manual / Technical Bulletin
|
2
|
70.73 KB
|
|
|
AR-200 (serv.man124)
1.Change Of The PSF Glass Sheet R. 2.Dimensions Change Of The PS Transport Roller. 3.Material Change Of The Copy Operation PWB. (WHITE)
Service Manual / Technical Bulletin
|
3
|
92.52 KB
|
|
|
AR-200 (serv.man125)
1.Shape Change Of The OP PWB Shield And Addition Of A Shield Plate Card. 2.Shape Change Of The Copy Lamp Unit. 3.Disuse Of the Sub Blade Earth Plate. (WHITE)
Service Manual / Technical Bulletin
|
2
|
67.58 KB
|
|
|
AR-200 (serv.man126)
Version Upgrade Of The Main Body Software. (WHITE)
Service Manual / Technical Bulletin
|
1
|
61.43 KB
|
|
|
AR-200 (serv.man127)
Parts Change For Better Productivity. (WHITE)
Service Manual / Technical Bulletin
|
2
|
68.56 KB
|
|
|
AR-200 (serv.man128)
1.Change Of The Fusing Lower Frame. 2.Change Of the PSF Rack Cover. 3.Countermeasure Against Poor Insertion Of The Motherboard Connector. 4.Change Of The Rubber Cushion. (WHITE)
Service Manual / Technical Bulletin
|
3
|
85.19 KB
|
|
|
AR-200 (serv.man129)
Correction To The Parts Guide. (WHITE)
Service Manual / Technical Bulletin
|
1
|
123.76 KB
|
|
|
AR-200 (serv.man130)
1.Countermeasure Against Abnormal Noise. 2.Countermeasure Against Shifter Operation. 3.Shape Change Of The Cooling Fan Duct. (WHITE)
Service Manual / Technical Bulletin
|
3
|
79.41 KB
|
|
|
AR-200 (serv.man131)
1.Change Of The Operation Panel Exterior. 2.Screw Change. (WHITE)
Service Manual / Technical Bulletin
|
2
|
70.13 KB
|
|
|
AR-200 (serv.man132)
Software Version Upgrade Of The Main Body. (WHITE)
Service Manual / Technical Bulletin
|
1
|
61.73 KB
|
|
|
AR-200 (serv.man133)
Parts Change For Better Productivity. (WHITE)
Service Manual / Technical Bulletin
|
2
|
71.48 KB
|
|
|
AR-200 (serv.man134)
1.Change Of The Discharge Holder. 2.Shape Change Of The Copy Key. 3.Addition Of The Harness Protection Sheet. (WHITE)
Service Manual / Technical Bulletin
|
2
|
85.08 KB
|
|
|
AR-200 (serv.man135)
Parts Change For Better Productivity. (WHITE)
Service Manual / Technical Bulletin
|
2
|
70.17 KB
|
|
|
AR-200 (serv.man136)
Addition To The Service Manual. (WHITE)
Service Manual / Technical Bulletin
|
1
|
65.17 KB
|
|
|
AR-200 (serv.man137)
Correction To The Parts Guide. (WHITE)
Service Manual / Technical Bulletin
|
1
|
65.82 KB
|
|
|
AR-200 (serv.man138)
1.Shape Change Of Fusing Cover. 2.Countermeasure Against Abnormal Noise. (WHITE)
Service Manual / Technical Bulletin
|
2
|
79.7 KB
|
|
|
AR-200 (serv.man139)
1.Change Of Harness Treating Method. 2.Shape Change Of Separator Lever F. (WHITE)
Service Manual / Technical Bulletin
|
2
|
114.22 KB
|
|
|
AR-200 (serv.man140)
Parts Change For Better Productivity. (WHITE)
Service Manual / Technical Bulletin
|
2
|
81.99 KB
|
|
|
AR-200 (serv.man141)
1.Shape Change Of Rear Exterior. 2.Shape Change Of MCU Fixing Plate. 3.Shape Change Of Sensor Fixing Plate And Optical Base Plate. (WHITE)
Service Manual / Technical Bulletin
|
2
|
71.73 KB
|
|
|
AR-200 (serv.man142)
1.Change Of 3-Terminal Regulator. 2.Change Of Corner Frame R Re-inforce Plate. 3.Shape Change Of Delivery Tray. (WHITE)
Service Manual / Technical Bulletin
|
2
|
70.9 KB
|
|
|
AR-200 (serv.man143)
Corrections To The Service Manual. (WHITE)
Service Manual / Technical Bulletin
|
2
|
280.47 KB
|
|
|
AR-200 (serv.man144)
1.Change Of Delivery Earth Spring A. 2.Disuse Of Fusing Front PG Adjusting Shaft. 3.Shape Change Of Base Plate Rail R. (WHITE)
Service Manual / Technical Bulletin
|
2
|
71.6 KB
|
|
|
AR-200 (serv.man145)
1.Shape Change Of DMC Actuator. 2.Change Of Fron Cabinet. 3.Disuse Of Screws. (WHITE)
Service Manual / Technical Bulletin
|
4
|
557.37 KB
|
|
|
AR-200 (serv.man146)
New Supply Of Process Sub-unit. (WHITE)
Service Manual / Technical Bulletin
|
2
|
65.11 KB
|
|
|
AR-200 (serv.man147)
Countermeasure For Envelopes Postcards Feeding Failure Problem. (WHITE)
Service Manual / Technical Bulletin
|
2
|
79.75 KB
|
|
|
AR-200 (serv.man148)
Shape Change Of Pipe Shutter. (WHITE)
Service Manual / Technical Bulletin
|
1
|
36.68 KB
|
|
|
AR-200 (serv.man149)
Correction To The Parts Guide. (WHITE)
Service Manual / Technical Bulletin
|
1
|
76.03 KB
|
|
|
AR-200 (serv.man150)
Countermeasure Against Jam By Catching Thin Paper In The Drum. (WHITE)
Service Manual / Technical Bulletin
|
2
|
61.84 KB
|
|
|
AR-200 (serv.man151)
Countermeasure Against The Improper Movement Of ARTR2 (Job Separator). (WHITE)
Service Manual / Technical Bulletin
|
2
|
95.25 KB
|
|
|
AR-200 (serv.man152)
1.Change Of TC BC Interface Electrode Spring. 2.Change Of MCU PWB Parts. 3.Change Of Mirror Motor. (WHITE)
Service Manual / Technical Bulletin
|
2
|
27.21 KB
|
|
|
AR-200 (serv.man153)
1.Correspondence To EMI. 2.Change Of PS Roller Shaft. 3.Shape Change Of DMC Actuator. 4.Addition Of Front Cover Label. (WHITE)
Service Manual / Technical Bulletin
|
1
|
25.54 KB
|
|
|
AR-200 (serv.man154)
Change Of Reverse Gate. (WHITE)
Service Manual / Technical Bulletin
|
1
|
23.5 KB
|
|
|
AR-200 (serv.man155)
1.Prevention Against Vibration Of Job Separator. 2.Shape Change Of Separator Lever R. 3.Shape Change Of Full Detection Lever. (WHITE)
Service Manual / Technical Bulletin
|
1
|
26.12 KB
|
|
|
AR-200 (serv.man156)
1.Countermeasure Against Vertical Stripes. 2.Dry Heater Change. 3.Prevention Against Disengagement Of Bearing Due To Deformation Of Delivery Earth Plate. 4.Countermeasure Against White Stripes In The Halftone Mode. 5.Change Of LED On The Operation PWB. (WHITE)
Service Manual / Technical Bulletin
|
2
|
41.14 KB
|
|
|
AR-200 (serv.man157)
F5-02 Change Of Connector To That With Slider. (WHITE)
Service Manual / Technical Bulletin
|
1
|
22.94 KB
|
|
|
AR-200 (serv.man158)
Parts Guide Correction. (WHITE)
Service Manual / Technical Bulletin
|
1
|
23.02 KB
|
|
|
AR-200 (serv.man159)
Supply Of Service Unit For The Process Unit. (WHITE)
Service Manual / Technical Bulletin
|
2
|
57.81 KB
|
|
|
AR-200 (serv.man160)
Correction Of Flash ROM Version Update (Issue Of No.2.03). (WHITE)
Service Manual / Technical Bulletin
|
3
|
470.4 KB
|
|
|
AR-200 (serv.man161)
Update Of The Software Version Due To Release Of The Option Electronic Sort Board. (WHITE)
Service Manual / Technical Bulletin
|
3
|
473.83 KB
|
|
|
AR-200 (serv.man162)
Update Of The Software Version Due To Release Of The Option Printer Board. (WHITE)
Service Manual / Technical Bulletin
|
3
|
688.27 KB
|
|
|
AR-200 (serv.man163)
Supply Of Individual Parts Of Copy Lamp Unit. (WHITE)
Service Manual / Technical Bulletin
|
2
|
61.58 KB
|
|
|
AR-200 (serv.man164)
Correction Of Flash ROM Version Upgrade. (WHITE)
Service Manual / Technical Bulletin
|
3
|
684.88 KB
|
|
|
AR-200 (serv.man165)
Correction To The Parts Guide. (WHITE)
Service Manual / Technical Bulletin
|
1
|
18.52 KB
|
|
|
AR-200 (serv.man166)
Version 4.10 Firmware (Sent out as Fast Fact 89).
Service Manual / Technical Bulletin
|
1
|
10.36 KB
|
|
|
AR-200 (serv.man167)
Flash Upgrade Procedure (Sent out as Fast Facts 085)
Service Manual / Technical Bulletin
|
3
|
325.04 KB
|

|
AR-200 (serv.man171)
Countermeasure against peeling of the fusing front PG sheet
Service Manual / Technical Bulletin
|
|
43.55 KB
|

|
AR-200 (serv.man16)
AR161 200 Firmware (version 5.32)
Driver / Update
|
|
240.77 KB
|

|
AR-200 (serv.man17)
AR161 200 DM2000-Firmware for coin vendor Ver7.05
Driver / Update
|
|
243.42 KB
|

|
AR-200 (serv.man18)
AR161 200 Firmware (version 5.29)
Driver / Update
|
|
236.8 KB
|

|
AR-200 (serv.man19)
AR161 200-Firmware for coin vendor Ver7.02
Driver / Update
|
|
238.96 KB
|
|
|
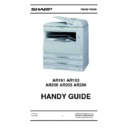
AR-200
December 2002
Handy Guide
|
35
|
1.83 MB
|
|
|
AR-200 (serv.man13)
Panther firmware history table (FEB-04), including details of AR-PB8 firmware.
FAQ
|
5
|
77.93 KB
|
|
|
AR-200 (serv.man14)
Details of Fast Facts 100 Damage to ARSP2 ARRP1
FAQ
|
1
|
100.4 KB
|
|
|
AR-200 (serv.man15)
AR-161,200,205 Caution in connecting AR-SP2
FAQ
|
1
|
2.75 KB
|
|
|
AR-200 (serv.man168)
MSDS F-00841
Regulatory Data
|
2
|
12.59 KB
|
|
|
AR-200 (serv.man169)
MSDS F-30841
Regulatory Data
|
2
|
11.41 KB
|
|
|
AR-200 (serv.man170)
Environmental Data Sheet
Regulatory Data
|
1
|
8.71 KB
|

