Sharp VENTA HANDHELD (serv.man6) Service Manual ▷ View online
Sharp Electronics (UK) Ltd
Page 20 of 23
Venta
+
Supplementary Manual – April 2007 – Version 4.4.0
1
1
4
4
.
.
D
D
I
I
S
S
C
C
O
O
U
U
N
N
T
T
S
S
Item and Subtotal discounts that are set-up within VPM can now be activated at the HHT. Simply
assign the Macro for the promotion to a List that is available on the Handheld.
1
1
5
5
.
.
R
R
E
E
F
F
U
U
N
N
D
D
S
S
The Refund function can now be used on the HHT. The Refund function on the HHT is stay down.
Press the More button and select the Refund Start option. To indicate that Refund mode is active
a red “R” will be displayed on the screen. Items that have been “refunded” will be displayed as
shown with an “*R”. To turn off “Refunds” Press the “More” tab and select “Refund End”.
shown with an “*R”. To turn off “Refunds” Press the “More” tab and select “Refund End”.
Sharp Electronics (UK) Ltd
Page 21 of 23
Venta
+
Supplementary Manual – April 2007 – Version 4.4.0
The following items are included from V4.4.0
1
1
6
6
.
.
A
A
U
U
T
T
O
O
M
M
A
A
T
T
I
I
C
C
R
R
E
E
S
S
T
T
O
O
R
R
E
E
A
A
F
F
T
T
E
E
R
R
B
B
A
A
T
T
T
T
E
E
R
R
Y
Y
P
P
O
O
W
W
E
E
R
R
L
L
O
O
S
S
S
S
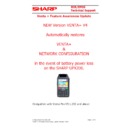
It is now possible to configure the Venta+ V4 application and Network configuration to automatically
restore In the event of battery power loss on the SHARP UPX200.
restore In the event of battery power loss on the SHARP UPX200.
P
P
R
R
O
O
G
G
R
R
A
A
M
M
M
M
I
I
N
N
G
G
1.
Configure the network using the \windows\Evmon program prior to installing the Venta +
software. (see Venta+ Operation & Programming Manual) for details on setting up the
network and access points).
2.
When Upgrading from previous version of Venta + it is recommended to clear the registry
from the system menu (See “UP-X200 Resetting procedure” section at the end of this
document) . Also delete all the folders on the Flashdisk from within “My computer”, Prior
document) . Also delete all the folders on the Flashdisk from within “My computer”, Prior
to installing the new version.
3.
Ensure that the Windows date and time are correct on the UP-X200.
4.
Download the Venta+ V4 install zip file from the technical website and extract the file
“VentaPlus4_1_0.CAB” to your memory stick.
“VentaPlus4_1_0.CAB” to your memory stick.
5.
Download the latest Venta+ V4 Patch zip file from the technical website and extract the
file “VentaPlus4_n_n.CAB” to your memory stick. Where n_n relates to the latest version
number.
6.
Copy the two files above from the memory stick to “My Computer” on the UP-X200.
7.
Double click the file Install VentaPlus4_1_0
8.
When prompted for the install folder select OK.
9.
The program will then continue to install.
10.
Double click the update Patch file VentaPlus4_n_n
11.
When prompted for the install folder select OK.
12.
The program will then continue to install.
13.
After installation, it is recommended to power the device off/on using the blue button.
This ensures that the registry is saved to flashdisk.
14.
To start the Venta + V4 program either start the file VPstartup from within “My computer”
or Depress the “Reset button” on the back of the UP-X200 and Venta + will load on
startup.
Sharp Electronics (UK) Ltd
Page 22 of 23
Venta
+
Supplementary Manual – April 2007 – Version 4.4.0
15.
When battery power is lost, the contents of the FlashDisk are protected (this includes the
Registry).
When power is restored (cold reset) the operating system attempts to start Venta+ (the
command to do this is stored in the (protected) registry).
The Venta+ start-up program (VPStartup.exe, in Flash) determines that Venta+ is no
longer installed and re-installs it from the CAB file stored in flashdisk
(\FlashDisk\VentaPlus.CAB).
It will then also re-install the most recent patch CAB from flashdisk, if available
(\FlashDisk\VentaPlusPatch.CAB).
It then copies back data (including configuration) from Flashdisk to the active program.
16.
After battery power loss, the UPX200 loses its date/time settings. These must be restored
when battery power is available. Before Venta+ is re-installed from Flash following
battery power loss, the user will be prompted for the date and time.
R
R
E
E
G
G
I
I
S
S
T
T
R
R
A
A
T
T
I
I
O
O
N
N
1.
The registration unlock code has now changed. If you are upgrading to Venta+ V4 from
an already registered (older version of Venta+) you will need to supply us with the “Lock
code” previously registered.
2.
After confirming this with our records you will be supplied with the new Venta+ V4
“Unlock Code”.
“Unlock Code”.
U
U
P
P
X
X
2
2
0
0
0
0
R
R
E
E
S
S
E
E
T
T
T
T
I
I
N
N
G
G
P
P
R
R
O
O
C
C
E
E
D
D
U
U
R
R
E
E
It may be necessary as a result of Battery Failure or Low Charge OR Application corruption to
carry out a FULL reset on the UPX200. This will effectively return the unit to factory default. The
procedure is a s follows: -
1. Whilst depressing the green on/off switch insert and depress gently the stylus pen into
the reset switch on the rear of the UPX200.
2. When the unit has switched off press the numeric 5 key and whilst holding it down press
the blue on/off switch, after a few seconds (approx 3) the unit will restart with a System
Menu displayed.
Menu displayed.
3. Select Option 8 and press enter DOC Delete will be displayed with a percentage complete.
4. Press any key followed by “0”. The unit will reboot and load the default Operating System
followed by the screen calibration utility.
Sharp Electronics (UK) Ltd
Page 23 of 23
Venta
+
Supplementary Manual – April 2007 – Version 4.4.0
F
F
U
U
R
R
T
T
H
H
E
E
R
R
I
I
N
N
F
F
O
O
R
R
M
M
A
A
T
T
I
I
O
O
N
N
If the registry is cleared after the installation of Venta+, the command to execute Venta+
after start-up is not available.
It is recommended that the program \FlashDisk\VentaJPDA\VPStartup.exe be executed
manually. It will then perform the re-installation.
manually. It will then perform the re-installation.
Note that IN THIS CASE all device configuration data (network etc) must be re-entered.
1
1
7
7
.
.
N
N
U
U
M
M
E
E
R
R
I
I
C
C
E
E
N
N
T
T
R
R
Y
Y
It is now possible to create a list that contains Numeric buttons and the PLU # button for fast entry
of items. You need to configure a list as explained below.
of items. You need to configure a list as explained below.
1. Ensure that macros 50-59 are set for '0' - '9'
2. Create a list that contains a button with text 'NUMINPUT' will act as the 'input area' for
numeric entry, i.e. the entered number will appear in this button as data is entered.
3. Create a macro for the PLU# button 0F3
4. Create a macro backspace this is D8
A sample list available on the technical Web-site. List100

