Sharp DV-HR350H (serv.man4) User Manual / Operation Manual ▷ View online
73
VIDEO Plus+
ERASE SCENE
CHANGE TITLE NAME
CHANGE TITLE NAME
CHANGE THUMBNAIL
DIVIDE CHAPTER
SELECT SCENE FOR
THUMBNAIL
THUMBNAIL
8
2
:
0
1
2
1
/
5
2
EDIT(HDD ORIGINAL)
00
00
1
00 : 00 : 00
0
1
/
N
O
M
4
E
L
3
3
T
I
T
R
P
:
O
F
N
I
:
E
L
T
I
T
E
N
I
F
9
0
4
1
:
0
2
:
0
2
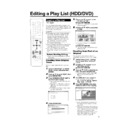
Editing an Original Title (HDD/DVD)
Changing Thumbnail
(CHANGE THUMBNAIL)
(CHANGE THUMBNAIL)
HDD
VR MODE
DVD-RW
Changes the still frame picture displayed at
the Thumbnail screen of the REC LIST to your
favorite scene within the title.
the Thumbnail screen of the REC LIST to your
favorite scene within the title.
Before Starting Editing
• Switch to the drive (HDD or DVD) to
be edited.
1
Press START MENU.
2
Press ' / " / \ / | to select “EDIT/
ERASE”, then press SET/
ENTER.
ERASE”, then press SET/
ENTER.
3
Press ' / " to select “EDIT”,
then press SET/ENTER.
then press SET/ENTER.
• The Original Edit Title List Screen
appears.
4
Press ' / " / \ / | to select the
title to edit, then press Yellow
(D) (EDIT MENU).
title to edit, then press Yellow
(D) (EDIT MENU).
• Edit Menu screen appears.
REC LIST
TIMER
PROGRAM/
CHECK
INITIALIZE/
FINALIZE
OTHER
SETTINGS 1
OTHER
SETTINGS 2
EDIT/
ERASE
DUBBING
INFORMATION
EDITS/ERASES RECORDED TITLES
START MENU[EDIT/ERASE]
8
2
:
0
1
2
1
/
5
2
ENTER
SELECT
ENTER
RETURN
n
EDIT/ERASE
SELECT
ENTER
RETURN
ENTER
n
EDIT
DELETES SCENE,
CREATES/EDITS PLAYLIST.
ERASES ALL TITLES ON DISC
(EXCEPT PROTECTED TITLES).
ERASES SELECTED TITLES.
DISABLES EDIT/ERASE TITLES.
ERASE ALL TITLES
ERASE TITLES
TITLE PROTECT/OFF
8
2
:
0
1
2
1
/
5
2
1
2
6
5
4
3
8
2
:
0
1
2
1
/
5
2
EDIT(HDD ORIGINAL)
ENTER
SELECT
TITLE LIST
CHAPTER
EDIT MENU
ENTER
RETURN
n
0
1
/
N
O
M
4
E
L
3
3
T
I
T
R
P
:
O
F
N
I
:
E
L
T
I
T
E
N
I
F
9
0
4
1
:
0
2
:
0
2
SCENE ERASE
CHANGE TITLE NAME
CHANGE TITLE NAME
CHANGE THUMBNAIL
DIVIDE CHAPTERS
SELECT SCENE FOR
THUMBNAIL
THUMBNAIL
8
2
:
0
1
2
1
/
5
2
EDIT(HDD ORIGINAL)
01
14
1
00 : 00 : 12
0
1
/
N
O
M
4
E
L
3
3
T
I
T
R
P
:
O
F
N
I
:
E
L
T
I
T
E
N
I
F
9
0
4
1
:
0
2
:
0
2
ERASE SCENE
CHANGE TITLE NAME
CHANGE TITLE NAME
CHANGE THUMBNAIL
DIVIDE CHAPTER
PUT THIS
SCENE IN THE
THUMBNAIL?
SCENE IN THE
THUMBNAIL?
8
2
:
0
1
2
1
/
5
2
EDIT(HDD ORIGINAL)
01
12
1
00 : 00: 41
0
1
/
N
O
M
4
E
L
3
3
T
I
T
R
P
:
O
F
N
I
:
E
L
T
I
T
E
N
I
F
9
0
4
1
:
0
2
:
0
2
5
1
1
1
1
1
Press ' / " to select
“CHANGE THUMBNAIL”.
“CHANGE THUMBNAIL”.
2
2
2
2
2
Press SET/ENTER.
6
Press |PLAY to start playback.
• Find the scene you want to use as a
thumbnail using
J
FWD,
G
REV,
F
STILL/PAUSE,
K
,
L
, or
SLOW.
7
Press SET/ENTER when you
reach the scene you want to use
as a thumbnail.
reach the scene you want to use
as a thumbnail.
• Playback is paused.
8
1
1
1
1
1
If this is the screen you want,
select “YES” by pressing \ / |.
select “YES” by pressing \ / |.
• If you select “NO”, you can return to
step 5 and select the scene again.
2
2
2
2
2
Press SET/ENTER.
• The new Thumbnail screen is set, and
the system returns to the screen in
step 5.
step 5.
Press Green (C) (UNDO) to
return to the previously set
thumbnail.
return to the previously set
thumbnail.
• Operate according to the instructions
of the screen.
9
Press EXIT to quit Thumbnail
edit.
edit.
• Edit mode will terminate.
DV-HR350H/300H-070-076
2004.4.8, 1:00 PM
73
74
Editing an Original Title (HDD/DVD)
VIDEO Plus+
ERASE SCENE
CHANGE TITLE NAME
CHANGE THUMBNAIL
CHANGE TITLE NAME
CHANGE THUMBNAIL
DIVIDE CHAPTER
SELECT POSITION
TO DIVIDE
THIS CHAPTER
TO DIVIDE
THIS CHAPTER
8
2
:
0
1
2
1
/
5
2
EDIT(HDD ORIGINAL)
01
04
2
00 : 00: 00
0
1
/
N
O
M
4
E
L
3
3
T
I
T
R
P
:
O
F
N
I
:
E
L
T
I
T
E
N
I
F
9
0
4
1
:
0
2
:
0
2
Making Sections in a Title
(DIVIDE CHAPTER)
(DIVIDE CHAPTER)
HDD
VR MODE
DVD-RW
Divides a title into multiple chapters and
make editing and dubbing of chapter as unit
easier.
make editing and dubbing of chapter as unit
easier.
• You can set chapter divisions by pressing
CHAPTER MARK (under the cover)
during recording or playback.
during recording or playback.
Before Starting Editing
• Switch to the drive (HDD or DVD) to
be edited.
1
Press START MENU.
2
Press ' / " / \ / | to select “EDIT/
ERASE”, then press SET/
ENTER.
ERASE”, then press SET/
ENTER.
3
Press ' / " to select “EDIT”, then
press SET/ENTER.
press SET/ENTER.
4
Press ' / " / \ / | to select the
title to edit, then press Yellow
(D) (EDIT MENU).
title to edit, then press Yellow
(D) (EDIT MENU).
5
Press ' / " to select “DIVIDE
CHAPTER”, then press SET/
ENTER.
CHAPTER”, then press SET/
ENTER.
REC LIST
TIMER
PROGRAM/
CHECK
INITIALIZE/
FINALIZE
OTHER
SETTINGS 1
OTHER
SETTINGS 2
EDIT/
ERASE
DUBBING
INFORMATION
EDITS/ERASES RECORDED TITLES
START MENU[EDIT/ERASE]
8
2
:
0
1
2
1
/
5
2
EDIT/ERASE
EDIT
DELETES SCENE,
CREATES/EDITS PLAYLIST.
ERASES ALL TITLES ON DISC
(EXCEPT PROTECTED TITLES).
ERASES SELECTED TITLES.
DISABLES EDIT/ERASE TITLES.
ERASE ALL TITLES
ERASE TITLES
TITLE PROTECT/OFF
8
2
:
0
1
2
1
/
5
2
1
2
6
5
4
3
8
2
:
0
1
2
1
/
5
2
EDIT(HDD ORIGINAL)
0
1
/
N
O
M
4
E
L
3
3
T
I
T
R
P
:
O
F
N
I
:
E
L
T
I
T
E
N
I
F
9
0
4
1
:
0
2
:
0
2
6
Press |PLAY to start playback.
• Find the scene to erase using
J
FWD,
G
REV,
F
STILL/PAUSE,
K
,
L
, or SLOW on the
remote comtrol.
7
Press SET/ENTER at the point
where you want to divide.
where you want to divide.
8
Press \ / | to select “YES”, then
press SET/ENTER.
press SET/ENTER.
• To continue dividing, repeat steps 5
to 7.
To cancel a chapter division,
press Green (C) (UNDO).
press Green (C) (UNDO).
• Operate according to the instructions
on the screen.
9
Press EXIT to quit editing.
• Edit mode will terminate.
NOTE
• Divide a chapter to make it 3 or more
seconds. You cannot divide a chapter into a
section which is less than 3 seconds.
section which is less than 3 seconds.
ERASE SCENE
CHANGE TITLE NAME
CHANGE THUMBNAIL
CHANGE TITLE NAME
CHANGE THUMBNAIL
DIVIDE CHAPTER
DIVIDE CHAPTER?
8
2
:
0
1
2
1
/
5
2
EDIT(HDD ORIGINAL)
01
04
1
00 : 00: 12
YES
NO
0
1
/
N
O
M
4
E
L
3
3
T
I
T
R
P
:
O
F
N
I
:
E
L
T
I
T
E
N
I
F
9
0
4
1
:
0
2
:
0
2
ERASE SCENE
CHANGE TITLE NAME
CHANGE THUMBNAIL
CHANGE TITLE NAME
CHANGE THUMBNAIL
DIVIDE CHAPTER
SELECT POSITION
TO DIVIDE
THIS CHAPTER
TO DIVIDE
THIS CHAPTER
8
2
:
0
1
2
1
/
5
2
EDIT(HDD ORIGINAL)
01
04
2
00 : 00 : 01
0
1
/
N
O
M
4
E
L
3
3
T
I
T
R
P
:
O
F
N
I
:
E
L
T
I
T
E
N
I
F
9
0
4
1
:
0
2
:
0
2
DV-HR350H/300H-070-076
2004.4.8, 1:00 PM
74
75
Editing an Original Title (HDD/DVD)
VIDEO Plus+
Combining Chapters
Together
(COMBINE CHAPTERS)
Together
(COMBINE CHAPTERS)
HDD
VR MODE
DVD-RW
Combines two adjacent chapters into a single
chapter.
chapter.
NOTE
• You cannot combine chapters automati-
cally recorded when a scene was erased.
Before Starting Editing
• Switch to the drive (HDD or DVD) to
be edited.
1
Select “EDIT/ERASE” in “START
MENU” screen, then press SET/
ENTER.
MENU” screen, then press SET/
ENTER.
2
Press ' / " to select “EDIT”,
then press SET/ENTER.
then press SET/ENTER.
3
Press ' / " / \ / | to select the
title you wish to edit.
title you wish to edit.
4
Press Red (B) (CHAPTER) to
select Chapter Thumbnail screen.
select Chapter Thumbnail screen.
5
Press ' / " / \ / | to select the
chapter to combine, then press
Yellow (D) (EDIT MENU).
chapter to combine, then press
Yellow (D) (EDIT MENU).
6
Press SET/ENTER.
7
Press ' / " to select combine
procedure you prefer, then press
SET/ENTER.
procedure you prefer, then press
SET/ENTER.
• Select from: “COMBINE W/PREV”,
“COMBINE W/NEXT” or “DON’T
COMBINE”.
COMBINE”.
• If you select “COMBINE W/PREV” or
“COMBINE W/NEXT”, the two
chapters will join, and Chapter
Thumbnail screen is displayed.
chapters will join, and Chapter
Thumbnail screen is displayed.
• If you select “DON’T COMBINE”, the
previous screen displays.
Disabling Title Edit and
Erase (TITLE PROTECT)
Erase (TITLE PROTECT)
HDD
VR MODE
DVD-RW
Disables edit and erase so you cannot
mistakenly change or erase the content of a
title.
Lets you safely save a disc for which editing
is in progress.
• This operation will not work with Video
mistakenly change or erase the content of a
title.
Lets you safely save a disc for which editing
is in progress.
• This operation will not work with Video
mode discs.
• Titles created with Play List (page 77)
cannot be protected.
Before Starting Editing
• Switch to the drive (HDD or DVD) to
be edited.
1
Select “EDIT/ERASE” in “START
MENU” screen, then press SET/
ENTER.
MENU” screen, then press SET/
ENTER.
2
Press ' / " to select “TITLE
PROTECT/OFF”, then press SET/
ENTER.
PROTECT/OFF”, then press SET/
ENTER.
3
Press ' / " / \ / | to select the
title to protect, then press SET/
ENTER.
title to protect, then press SET/
ENTER.
• Each time the button is pressed, the
setting toggles between “PROTECT”
and “UNPROTECT”.
and “UNPROTECT”.
• The protect mark
is attached to
protected titles.
(The protect mark can be confirmed
at either the “REC LIST” screen or
“EDIT” screen.)
(The protect mark can be confirmed
at either the “REC LIST” screen or
“EDIT” screen.)
4
Press EXIT to exit from Edit
mode.
mode.
To Cancel Title Protect
1
Select the title protected in step 3
above, and press SET/ENTER.
above, and press SET/ENTER.
• Title protect is cancelled, and the
protect mark disappears.
NOTE
• If “DVD DISC PROTECTION” is set for a
DVD-RW (VR mode) disc, protection cannot
be cancelled for individual titles. Cancel
“DVD DISC PROTECTION” (page 93).
be cancelled for individual titles. Cancel
“DVD DISC PROTECTION” (page 93).
2
Press EXIT to exit from Edit
mode.
mode.
1
2
6
5
4
3
ENTER
SELECT
EDIT MENU
ENTER
RETURN
n
TITLE
COMBINE CHAPTERS
EDIT(HDD ORIGINAL)
COMBINE W/PREV
COMBINE W/PREV CHAP
DO NOT COMBINE CHAPS.
DON'T COMBINE
COMBINE W/NEXT CHAP
COMBINE W/NEXT
8
2
:
0
1
2
1
/
5
2
0
1
/
N
O
M
4
E
L
3
3
T
I
T
R
P
:
O
F
N
I
:
E
L
T
I
T
E
N
I
F
0
0
0
1
:
6
1
:
6
1
1
2
6
5
4
3
8
2
:
0
1
2
1
/
5
2
TITLE PROTECT OR NOT(HDD ORIGINAL)
0
1
/
3
D
E
W
1
E
L
3
3
T
I
T
R
P
:
O
F
N
I
:
E
L
T
I
T
E
N
I
F
0
0
0
1
:
6
1
:
6
1
8
Press EXIT to exit from Edit
mode.
mode.
DV-HR350H/300H-070-076
2004.4.8, 1:00 PM
75
76
ERASE ALL TITLES
HDD (ORIGINAL)
HDD (PLAYLIST)
DVD (ORIGINAL)
DVD (PLAY LIST)
SELECT AN ITEM BELOW TO ERASE ALL TITLES.
8
2
:
0
1
2
1
/
5
2
Editing an Original Title (HDD/DVD)
Erasing All Titles
HDD
VR MODE
DVD-RW
VIDEO MODE
DVD-RW
DVD-R
This erases the entire contents of a HDD or
DVD-RW. (Except titles for which title protect
has been set.)
DVD-RW. (Except titles for which title protect
has been set.)
You can erase the following:
• HDD (ORIGINAL):
• HDD (ORIGINAL):
Erases all titles recorded on the HDD.
When originals are erased, play lists are
also erased.
When originals are erased, play lists are
also erased.
• HDD (PLAY LIST):
Erases all play lists created on the HDD.
Even if play lists are erased, the original
titles are not erased.
Even if play lists are erased, the original
titles are not erased.
• DVD (ORIGINAL):
Erases all titles recorded on DVD. When
originals are erased, play lists are also
erased.
originals are erased, play lists are also
erased.
• DVD (PLAY LIST):
Erases all play lists created on DVD. Even if
play lists are erased, the original titles are
not erased.
play lists are erased, the original titles are
not erased.
NOTE
• When a Video mode disc is finalized, you
can no longer erase all titles.
Before Starting Editing
• Switch to the drive (HDD or DVD) to
be edited.
1
Select “EDIT/ERASE” in “START
MENU” screen, then press SET/
ENTER.
MENU” screen, then press SET/
ENTER.
2
Press ' / " to select “ERASE
ALL TITLES”, then press SET/
ENTER.
ALL TITLES”, then press SET/
ENTER.
3
Press ' / " to select what you
want to erase, then press SET/
ENTER.
want to erase, then press SET/
ENTER.
4
Press \ / | to select “YES”, then
press SET/ENTER.
press SET/ENTER.
• Carefully confirm before executing
erase.
• If you select “NO” and enter, the
screen in step 3 appears.
5
Press SET/ENTER.
• All titles (or play lists) are erased, and
the screen in step 3 appears.
To restore the erased content, press
Green (C) (CNL ERASE). Operate
according to the instructions on the
screen. (Note: You can only undo
once, to the state immediately before
the last erase.)
To restore the erased content, press
Green (C) (CNL ERASE). Operate
according to the instructions on the
screen. (Note: You can only undo
once, to the state immediately before
the last erase.)
6
Press EXIT to exit from Edit
mode.
mode.
VIDEO Plus+
Erasing by Selecting a
Title (or Chapter)
Title (or Chapter)
HDD
VR MODE
DVD-RW
VIDEO MODE
DVD-RW
DVD-R
Allows you to select titles to erase, and erase
them in a batch.
them in a batch.
• When erasing original titles:
If original titles are erased, those titles will
also be erased from play lists.
also be erased from play lists.
• When erasing play lists:
Even if play lists are erased, the original
titles will not be erased.
titles will not be erased.
NOTE
• Up to a maximum of 20 titles (chapters)
can be selected at one time.
• When a Video mode disc is finalized, you
can no longer select and erase titles.
• You cannot erase chapters in DVD-RW/R
discs (Video mode).
Before Starting Editing
• Switch to the drive (HDD or DVD) to
be edited.
1
Select “EDIT/ERASE” in “START
MENU” screen, then press SET/
ENTER.
MENU” screen, then press SET/
ENTER.
2
Press ' / " to select “ERASE
TITLES”, then press SET/ENTER.
TITLES”, then press SET/ENTER.
3
Press ' / " / \ / | to select titles
to erase.
to erase.
• If you press Red (B) (CHAPTER), the
screen will switch to the chapter
thumbnail display so you can select
and erase chapters.
thumbnail display so you can select
and erase chapters.
4
Press SET/ENTER.
• If there are other titles (chapters) you
wish to erase, select with '
'
'
'
' / "
"
"
"
" / \
\
\
\
\ / |
|
|
|
|
and press SET/ENTER.
5
Press Yellow (D) (ERASE).
6
Press \ / | to select “YES”.
• Once a title (chapter) has been erased,
• If you select “NO” and enter, operate
from step 4 again.
7
Press SET/ENTER.
• All selected titles (chapters) are erased.
• To cancel erase, press Green (C)
• To cancel erase, press Green (C)
(CNL ERASE).
• Operate according to the instructions
on the screen.
8
Press EXIT to exit from Edit mode.
DV-HR350H/300H-070-076
2004.4.8, 1:00 PM
76

