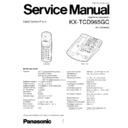
Panasonic KX-TCD965GC Service Manual ▷ View online
KX-TCD965GC
5
DISASSEMBLY INSTRUCTION
Fig. 3
Fig. 4
Fig. 5
(A)
Press Plastic Tab.
Remove the P.C. Board
Fig. 6
Fig. 9
Fig. 7
Fig. 8
(C)
(D)
(E)
Ref No.
Procedure
Shown in Fig.
To Remove
Remove
1
1, 2
3
3, 4
3~6
3~7
3~8
Lower Cabinet
P.C. Board
Battery Cover
Rear Cabinet
Screws (2.6
~
14) ........................... (A)
~
4
Remove the P.C. Board
Remove the Battery Cover
Screws (2.6
~
10) ........................... (B)
~
2
Screws (2.6
~
10) ........................... (C)
~
2
Pull the Connector Locks ............... (D)
~
2
Pull the LCD Lead ......................... (E)
~
1
1
2
2
3
4
5
6
7
3
4
9
6
P.C. Board
LCD Lead
8
5
When removing the rear cabinet of handset, attach the belt clip and press it as shown in Fig. 7.
6
KX-TCD965GC
SETTINGS
INSTALLING THE BATTERIES IN THE HANDSET
Install the batteries as shown. Then install the handset cover.
•
If the rechargeable batteries are not inserted correctly, the handset will not work.
CONNECTIONS
Plug in the AC adaptor and the telephone line cord to the bottom of the unit. Then connect the cords as shown.
•
USE ONLY WITH Panasonic AC ADAPTOR KX-TCA11CE.
•
Be careful not to confuse the telephone line jack with the AC adaptor jack on the base unit. If connected improperly, the base
unit will not work and damage may occur.
•
The AC adaptor must remain connected at all times. (It is normal for the adaptor to feel warm during use.)
•
This telephone has a single terminal which must be connected to an analog telephone line with a TAE-F connector.
•
The telephone will not work during a power failure. We therefore recommend you use a standard telephone and automatic
change-over switch to connect this Digital Cordless Phone to the line.Your Panasonic sales shop can offer you more
information about connection possibilities.
•
If your unit is connected to a PBX which does not support Caller ID services, you cannot access those services.
CONNECTION OF POWER SUPPLY
This apparatus is intended for use when powered by the KX-TCA11CE.
Using other power supplies will invalidate any approval given to this apparatus.
Fig. 10
Fig. 11
8V
9V
Telephone
Line Cord
Line Cord
AC
Adaptor
Adaptor
Fasten the cords to prevent them from
being disconnected.
being disconnected.
Hooks
N F
Telephone Line Cord
AC Adaptor
KX-TCA11CE
KX-TCA11CE
To Power Outlet
(AC 230 V, 50 Hz)
(AC 230 V, 50 Hz)
To Single-Line
Telephone Jack
Telephone Jack
KX-TCD965GC
7
BATTERY CHARGE
At the time of shipment, the batteries are not charged. To charge, place
the handset on the base unit. Please charge the batteries for about
4 hours before initial use.
the handset on the base unit. Please charge the batteries for about
4 hours before initial use.
•
The charge indicator (
) lights.
Battery strength
You can check the present battery strength on the display.
Recharge
When "
" flashes or the unit beeps every 15 seconds, recharge the batteries.
Battery information
After your Panasonic batteries are fully charged:
Operation
Approx. Ni-Cd battery life (Included)
While in use (Talk)
Up to about 6 hours
While not in use (Stand-By)
Up to about 65 hours
• Battery life may be shortened depending on usage conditions, such as:
— when viewing the Caller ID Caller List or phonebook, and
— ambient temperature.
— ambient temperature.
• Clean the handset and the base unit charge contacts with a soft, dry cloth. Clean if the unit is subject to grease, dust
or high humidity. Otherwise the batteries may not charge properly.
• If the batteries are fully charged, you do not have to place the handset on the base unit until "
" flashes. This will
maximise the battery life.
• The batteries cannot be overcharged.
• Nickel metal hydride (Ni-MH) rechargeable batteries (AAA size) are available.
• Nickel metal hydride (Ni-MH) rechargeable batteries (AAA size) are available.
Fig. 12
Fig. 13
3 New Calls
Base 1
Approx. Ni-MH battery life (Optional)
Up to about 12 hours
Up to about 130 hours
Battery strength
Battery icon
(Flashing)
Fully charged
No power
Low
Medium
OR
Charge Indicator (
)
8
KX-TCD965GC
USING THE BELT CLIP
You can hang the handset on your belt or pocket using the belt clip.
To remove the belt clip
SELECTING THE DIALING MODE
You can program the dialling mode to tone or pulse. If you have touch tone service, set to tone. If rotary or pulse service is
used, set to pulse. The factory preset is tone.
Make sure that the power is ON and the unit is in the stand-by mode.
used, set to pulse. The factory preset is tone.
Make sure that the power is ON and the unit is in the stand-by mode.
Fig. 14
Fig. 15
1
Press
F
.
2
Press
or
until the arrow points to “
Program
”.
3
Press OK
.
4
Press
or
until the arrow points to “
Setting Base
”.
5
Press OK
.
• “
Input Command
” is displayed.
6
Press
3
.
7
Enter the base unit password.
• The factory preset is 0000.
8
Press
1
.
• The current mode is displayed.
1: Tone
2: Pulse
Ex. Tone is selected.
9
To select Pulse, press
2
.
OR
To select Tone, press
To select Tone, press
1
.
10
Press OK
.
• A confirmation tone sounds.
• The display will return to “
• The display will return to “
Setting Base
”.
To return to the stand-by mode, press
C
or wait
for 60 seconds.
• If 5 beeps sound in step 7, the entered password is
incorrect. Enter the correct password.
• You can exit the programming mode any time by
pressing
C
.
Input Command
3 ----
Input Command
31 1
Click on the first or last page to see other KX-TCD965GC service manuals if exist.

