Sharp PZ-43MR2E (serv.man4) Service Manual ▷ View online
6
PZ-43MR2E
PZ-50MR2E
PZ-50MR2E
Preparation
P
B
(C
B
)
COMPONENT
P
R
(C
R
)
Y
R - AUDIO - L
INPUT 3
INPUT 2
INPUT 1
RS-232C
DISPLAY OUTPUT-1
DISPLAY OUTPUT-2
AC INPUT
220–240V
220–240V
AV OUTPUT
S-VIDEO
VIDEO
System cable
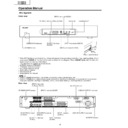
AVC System (rear view)
Power cord
Plasma Display TV (Panel Unit) (rear view)
Power cord
System cable
(bottom view)
(GRAY)
(WHITE)
(GRAY)
(WHITE)
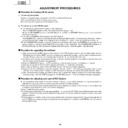
Setting the system
1.
Connecting the system cable, the power cord and the speaker cables to the Plasma Display TV (Panel
Unit)
2.
Connecting the system cable and the power cord to the AVC System
L
• TO PREVENT RISK OF ELECTRIC SHOCK, DO NOT TOUCH UN-INSULATED PARTS OF ANY CABLES WITH THE
POWER CORD CONNECTED.
Speaker cables
(GRAYeGRAY with white stripe)
Speaker cable
Speaker cable
As you apply pressure to this part,
insert the speaker cable. It is
important to match polarity when
connecting the speaker cables to the
terminals.
insert the speaker cable. It is
important to match polarity when
connecting the speaker cables to the
terminals.
Insert the speaker cable
Lift up the snap clip.
Insert the wire into
the hole of the
connector.
the hole of the
connector.
Lower the snap clip
to grip the wire in
place.
to grip the wire in
place.
Black
Red
Black
Red
A
• Two speaker cables of different lengths are supplied. As
• Two speaker cables of different lengths are supplied. As
shown in the diagram, connect the longer speaker cable
to the left speaker and the shorter to the right.
to the left speaker and the shorter to the right.
7
PZ-43MR2E
PZ-50MR2E
PZ-50MR2E
preparation
As viewed from the rear of the display.
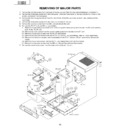
How to route cables
A system cable clamp and five speaker cable clamps are included with the system for cable management. Follow the
diagram below for correct cable management.
diagram below for correct cable management.
System cable
Wedge the power cord and the
system cable into the groove on the
stand.
system cable into the groove on the
stand.
Power cord
Speaker cable
Stick the speaker cable clamps
(2 – 4) to the surface as shown.
(2 – 4) to the surface as shown.
System cable clamp
Speaker cable clamp
Speaker cable clamp
System cable
System cable clamp
8
PZ-43MR2E
PZ-50MR2E
PZ-50MR2E
preparation
+
+
_
_
Using the remote control unit
Use the remote control unit by pointing it towards the remote sensor window.
Objects between the remote control unit and sensor window may prevent proper
operation.
Objects between the remote control unit and sensor window may prevent proper
operation.
Cautions regarding remote control unit
• Do not expose the remote control unit to shock.
In addition, do not expose the remote control unit to liquids, and do not place
in an area with high humidity.
in an area with high humidity.
• Do not install or place the remote control unit under direct sunlight.
The heat may cause deformation of the unit.
• The remote control unit may not work properly if the remote sensor window of
the Plasma Display TV (Panel Unit) is under direct sunlight or strong lighting.
In such case, change the angle of the lighting or Plasma Display TV, or operate
the remote control unit closer to the remote sensor window.
In such case, change the angle of the lighting or Plasma Display TV, or operate
the remote control unit closer to the remote sensor window.
1
Open the battery cover.
2
Insert batteries (two AA size
batteries, supplied with product).
batteries, supplied with product).
• Place batteries with their terminals
corresponding to the (e) and (f)
indications in the battery compartment.
indications in the battery compartment.
3
Close the battery cover.
Cautions regarding batteries
Improper use of batteries can result in chemical leakage or explosion. Be sure to follow the instructions below.
• Do not use manganese batteries. When you replace the batteries, use alkaline ones.
• Place the batteries with their terminals corresponding to the (e) and (f) indications.
• Do not mix batteries of different types. Different types of batteries have different characteristics.
• Do not mix old and new batteries. Mixing old and new batteries can shorten the life of new batteries or cause
chemical leakage in old batteries.
• Remove batteries as soon as they have worn out. Chemicals that leak from batteries can cause a rash. If you
find any chemical leakage, wipe thoroughly with a cloth.
• The batteries supplied with this product may have a shorter life expectancy due to storage conditions.
• If you will not be using the remote control unit for an extended period of time, remove the batteries from it.
• If you will not be using the remote control unit for an extended period of time, remove the batteries from it.
L
• WHEN DISPOSING OF USED BATTERIES, PLEASE COMPLY WITH GOVERNMENTAL REGULATIONS OR
ENVIRONMENTAL PUBLIC INSTRUCTION'S RULES THAT APPLY IN YOUR COUNTRY/AREA.
Inserting the batteries
If the remote control unit fails to operate Plasma Display TV functions, replace the batteries in the remote control
unit.
unit.
9
PZ-43MR2E
PZ-50MR2E
PZ-50MR2E
Using external equipment
P
B
(C
B
)
COMPONENT
P
R
(C
R
)
Y
R - AUDIO - L
INPUT 3
INPUT 2
INPUT 1
RS-232C
DISPLAY OUTPUT-1
DISPLAY OUTPUT-2
AC INPUT
220–240V
220–240V
AV OUTPUT
S-VIDEO
VIDEO
Plasma Display TV
(Panel Unit)
(rear view)
(Panel Unit)
(rear view)
(bottom view)
DVD player
AVC System
(rear view)
(rear view)
AVC System
(front view)
(front view)
AV Receiver
(Built-in Tuner Amp)
(Built-in Tuner Amp)
VCR
Decoder
Game console/Camcorder
Computer
Power cord
Power cord
You can connect many types of external equipment to your Plasma Display TV, like a decoder, VCR, DVD player,
computer, game console and camcorder. To view external source images, select the input source from b on
the remote control unit or
computer, game console and camcorder. To view external source images, select the input source from b on
the remote control unit or
INPUT
on the Plasma Display TV (Panel Unit).
L
• To protect all equipment, always turn off the AVC System before connecting to a decoder, VCR, DVD player, computer,
game console, camcorder or other external equipment.
• The S-video signal only outputs when “Input 2” or “Input 3” is selected for “Y/C”, or when from the INPUT 4 terminal (S-
VIDEO). Only the S-video signal can output from the INPUT 4 terminal (S-VIDEO).
A
• Please refer to the relevant operation manual (DVD player, computer, etc.) carefully before making connections.
• Please refer to the relevant operation manual (DVD player, computer, etc.) carefully before making connections.
Display

