Sharp LC-15L1E (serv.man6) Service Manual ▷ View online
13
LC-15L1E
Ë
Wireless center Section
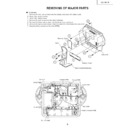
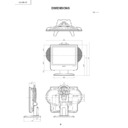
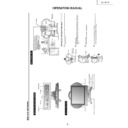
1. Removing the top cabinet
1-1. Remove the four rubber legs from the bottom cabinet, and the four lock screws from the top cabinet.
1-2. Remove the three lock screws from the terminal block on the rear terminal cabinet, and detach the rear
1-2. Remove the three lock screws from the terminal block on the rear terminal cabinet, and detach the rear
terminal cabinet.
1-3. Undo the three arrow-marked hooks from the front panel. Slide the top cabinet backward and detach it.
1-3
1-3
1-3
1-3
1-1
1-2
Bottom Cabinet
Rubber Leg
Rear Terminal Cover
Top Cabinet
Front Cabinet
2. Removing the front cabinet
2-1. Remove the five lock screws from the shielding case, and
detach the shielding case.
2-2. Disconnect the cables from between the switch, LED PWB and
the wireless center PWB.
2-3. Remove the two lock screws from the front cabinet, undo the
three arrow-marked hooks, and detach the front cabinet.
2-4. Remove the two lock screws from the switch, LED PWB and
separate the switch, LED PWB from the front cabinet.
2-3
2-3
2-3
2-4
2-3
2-1
2-2
Switch, LED PWB
Shielding Case
Wireless Center PWB
Front Cabinet
14
LC-15L1E
»
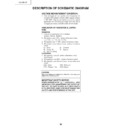
Precautions in reassembling the SS unit
1. Do not touch by hand the antennas that are on the antenna PWBs to be coupled to the SS unit. Place these
PWBs in position with enough care to keep the antennas in the original shape.
(If by any chance the antenna gets bent or deformed, do not reshape it by hand, nor use the PWB again.
Otherwise communication failure may result.)
2. Insert the connectors of the antenna PWBs from just above tightly to their counterparts on the SS unit. (Do
not insert them slantwise.)
To disconnect the antenna connectors from the SS unit, hold and pull them out vertically. Do not hold the
cables to disconnect. (Otherwise the cables may get broken or the connectors damaged.)
3. Handling the SS unit RF cable
With the SS unit fit in position, dress and secure the RF cable, free of extra load, in its original route.
3. Removing the SS (TX) antenna PWBs
3-1. Disconnect the cables from between the SS (TX)
PWB and the wireless center PWB.
3-2. Remove the lock screws one each from the wire
holders.
3-3. Remove the lock screws one each from the SS (TX)
antenna PWBs, disconnect the cables from the SS
(TX) PWB, and detach the SS (TX) ANTENNA
PWBs.
(TX) PWB, and detach the SS (TX) ANTENNA
PWBs.
4. Remove the four lock screws from the SS (TX) PWB,
and detach the SS (TX) PWB.
5. Remove the lock screw from the wireless center
PWB, and separate the wireless center PWB and
the shield from the bottom cabinet.
the shield from the bottom cabinet.
3-3
3-3
4
3-2
3-1
3-1
3-2
SS(RX) Antenna PWB
SS(RX) Antenna PWB
SS(RX) PWB
Wire
Holder
Holder
Wire Holder
5
Bottom Cabinet
Shield
Wireless Center PWB
Display

