Sharp PG-M20S (serv.man10) Service Manual ▷ View online
25
PG-M20S
PG-M20X
PG-M20X
Group
Sub Group
Subject
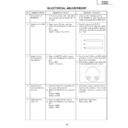
Adjust PC Image
A/D
R-BRIGHT
G-BRIGHT
B-BRIGHT
R-D
G-BRIGHT
B-BRIGHT
R-D
B-D
G-D
AD-AUTO
G-D
AD-AUTO
Adjust DLP Image
DLP
R1-BLK
R1-GAIN
G1-BLK
R1-GAIN
G1-BLK
G1-GAIN
B1-GAIN
CW-INDEX
S-R1-GAIN
S-G1-GAIN
S-B1-GAIN
B1-GAIN
CW-INDEX
S-R1-GAIN
S-G1-GAIN
S-B1-GAIN
C-R1-GAIN
C-B1-GAIN
V-R1-GAIN
V-B1-GAIN
C-B1-GAIN
V-R1-GAIN
V-B1-GAIN
Adjust VIDEO Image
VIDEO
PICTURE
BRIGHT
BRIGHT
TINT
N-COLOR
P-COLOR
S-COLOR
STAT-GAIN
VIDEO-AUTO
N-COLOR
P-COLOR
S-COLOR
STAT-GAIN
VIDEO-AUTO
Adjust Component Image
DTV
G-BRIGHT
CB-OFFSET
CR-OFFSET
COMPO-AUTO
CB-OFFSET
CR-OFFSET
COMPO-AUTO
Process mode
LINE
L1
L2
L2
L3
OFF
TEMP OFF
SENSOR CHECK
OFF
TEMP OFF
SENSOR CHECK
INTIAL SETTING
SSS
TIME
S1
S1
S2
S3
S4
S5
S3
S4
S5
»
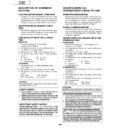
Adjustment mode process menu
»
Entering the adjustment process mode
There are follwing two methods.
»
Press the SW2001 on the KEY PWB unit.
»
Press the follwing keys in this order.
AV MUTE
→
AV MUTE
→
Adj up
→
Adj down
→
ENTER
→
ENTER
→
MENU
26
PG-M20S
PG-M20X
PG-M20X
Group
Sub Group
Subject
Sample Pattern
PATTERN
RGB
RGB(50)
CROSS
FOCUS
RGB(50)
CROSS
FOCUS
SETP
COLOR
CHR
COLOR
CHR
Adjust CVIC
CVIC-PROGRSSIVE
MODE
IP
MDSW
IP
MDSW
PTGSW
C-TESTSW
C-ILG-LY
C-MOD-LY
C-VE-LV
C-TESTSW
C-ILG-LY
C-MOD-LY
C-VE-LV
CVIC-ENHANCE-VIDE
ENH-PLUS
ENH-MINUS
DFC
DFC
CVIC-ENHANCE-HTTV
ENH-PLUS
ENH-MINUS
DFC
ENH-MINUS
DFC
CVIC-ENHANCE-RGB
MODE
ENH-GAIN
ENH-PLUS
ENH-PLUS
CVIC-SCREEN
CUBIC-RGB
CUBIC-VEDEO
CUBIC-VEDEO
CVIC-NR
YNR-LEVEL
YNR-K
YNR-K
YNR-FSEL
CNR-LEVEL
CNR-K
CNR-FSEL
CNR-FILSW
CNR-LEVEL
CNR-K
CNR-FSEL
CNR-FILSW
CVIC-PTG
TESTSW
ENABLE
MV-F
VDDTP
MV-F
VDDTP
CVIC-CMS
RED
YELLOW
GREEN
YELLOW
GREEN
CYAN
BLUE
MAGENTA
BLUE
MAGENTA
CVIC-DEGAMMA
TABLE
Version Check etc
Special
IPL
IPL2
IPL2
E2PROM
ADR RD/WR
USB-MODE
ADR RD/WR
USB-MODE
27
PG-M20S
PG-M20X
PG-M20X
How to write in a Serial number
Install the new program for the software into your PC
a.This software is downloaded from home page of SHARP intranet.
http://172.24.145.13/tcg-qrc/prj/prj-e.asp
NAME:USB to Sirial Driver program.
STEP 1
Set-up for USB Serial Driver
(Refer to "Installation Process and advice.doc" file.)
STEP 2
Call the adjustment process mode, and select the sub-group "SPECIAL" and the adjustment item
"USB-MODE". Change the USB MODE value from 0 to 1.
(With this change, input of a 232C command becomes possible.)
STEP 3
Please connect the USB cable between the PC and the projector.
STEP 4
Please execute the program "TeraTerm".
(configuration file is to use attached Teraterm.ini.)
STEP 5
You write it by using the attached macro-file (serial_write.ttl).
A serial number is described in this macro-file. Enter this number.
STEP 6
Message will be appear as follows,
STEP 7
Please finish TeraTerm.
STEP 8
Please change the value from 1 to 0 for USB MODE in Special (Factory mode).
(For this change, input of a 232C command becomes invalid.)
<Attention >
After the installation for USB to 232C driver, select the 232C with SW2002 on the KEY unit.
Connect the USB cable, and change COM2 for teraterm(setup-serial port) then push "Enter" key
and confirm "ERR" message comes back.
If "ERR" comes back setting is correct. In case of "ERR" does not come back, COM2 is incorrect.
Please try COM3, COM4 by turn, and find correct COM port.
Display

