Sharp AR-C172M (serv.man4) Service Manual ▷ View online
AR-C172M SETTING AND ADJUSTMENTS 8 - 32
4) Cancel the simulation mode, and make a copy in the normal
mode to check the copy density in the white area and the low-
density area by using the test chart (UKOG-0283FCZZ).
density area by using the test chart (UKOG-0283FCZZ).
In this simulation mode, press CLOSE key to jump to the normal
copy mode and make actual copies of the service chart and user
documents. In this manner, the adjustment result can be checked.
copy mode and make actual copies of the service chart and user
documents. In this manner, the adjustment result can be checked.
The adjustment can be performed also by switching between the
simulation mode and the normal copy mode alternately and check-
ing the adjustment result with actual copies.
simulation mode and the normal copy mode alternately and check-
ing the adjustment result with actual copies.
This adjustment must be performed in the following cases:
∗
When a U2 trouble occurs.
∗
When the MFP PWB is replaced.
∗
When the EEPROM of the MFP PWB is replaced.
Used to adjust the gamma and the density in each copy mode individually. The adjustment in each copy mode is not required normally, but
is performed when the user requests it.
is performed when the user requests it.
1) Enter either of SIM 46-10 to 46-16 modes.
(Select the simulation according to the copy mode to be
adjusted.)
adjusted.)
Serviceman chart (Color patch section)
Check the copy density in the low-density area
and the white area of the color patch section.
and the white area of the color patch section.
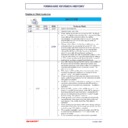
ADJ 11E
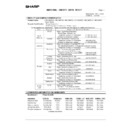
Copy color balance density adjustment (each copy mode) (Normally unnecessary to adjust.)
Copy mode
Adjustment (Simulation)
Color balance/
density
adjustment of
each copy mode
Collective color
balance/density
adjustment of all
copy modes
Low-density
area color
balance/density
adjustment
Main
Sub
Main
Sub
Main
Sub
Full color
AUTO
Auto
Text/printed
photo
photo
46
12
46
21/20/
24
46
1
TEXT
NORMAL
Text
Normal
11
COLOR TONE ENHANCEMENT
Color emphasis
COPT TO COPY
Copy document
10
MAP
NORMAL
Map
Normal
11
COLOR TONE ENHANCEMENT
Color emphasis
PRINTED
PHOTO
PHOTO
NORMAL
Printed photo
Normal
12
COLOR TONE ENHANCEMENT
Color emphasis
COPT TO COPY
Copy document
10
TEXT/PRINTED
PHOTO
PHOTO
NORMAL
Text/printed
photo
photo
Normal
12
COLOR TONE ENHANCEMENT
Color emphasis
COPT TO COPY
Copy document
10
PHOTOGRAPH NORMAL
Photograph
Normal
13
COLOR TONE ENHANCEMENT
Color emphasis
TEXT/PHOTO
NORMAL
Text/Photograph Normal
14
COLOR TONE ENHANCEMENT
Color emphasis
Single color
(Affected by
the adjustment
result of full
color mode)
(Affected by
the adjustment
result of full
color mode)
TEXT
NORMAL
Text
Normal
25/(26)
COPT TO COPY
Copy document
MAP
NORMAL
Map
Normal
PRINTED
PHOTO
PHOTO
NORMAL
Printed photo
Normal
COPT TO COPY
Copy document
TEXT/PRINTED
PHOTO
PHOTO
NORMAL
Text/printed
photo
photo
Normal
COPT TO COPY
Copy document
PHOTOGRAPH NORMAL
Photograph
Normal
TEXT/PHOTO
NORMAL
Text/Photograph Normal
AR-C172M SETTING AND ADJUSTMENTS 8 - 33
∗
The copy color balance and the density in the color enhancement mode are automatically determined by the adjustment result of the
color normal mode. The adjustment unique to this mode cannot be made.
color normal mode. The adjustment unique to this mode cannot be made.
∗
1: Select either one. The default setting differs depending on the destination.
2) Select the color to be adjusted with the color select key, and select the adjustment point with the scroll key.
3) Enter the adjustment value with the 10-key, and press the [OK] key.
The adjustment value can be selected in the range of 245 to 755. When the automatic color balance and the density are adjusted with
SIM 46-24, all the set values of this simulation are set to 500.
SIM 46-24, all the set values of this simulation are set to 500.
To increase the density, increase the adjustment value. To decrease the density, decrease the adjustment value.
This adjustment is the CCD gamma adjustment (CCD calibration)
for the copy document copy mode, and is different from the CCD
gamma adjustment (CCD calibration) in the normal document
copy mode (ADJ 11A). There are above two kinds of the CCD
gamma adjustment (CCD calibration), and both adjustments are
required.
for the copy document copy mode, and is different from the CCD
gamma adjustment (CCD calibration) in the normal document
copy mode (ADJ 11A). There are above two kinds of the CCD
gamma adjustment (CCD calibration), and both adjustments are
required.
This adjustment is required in the following cases:
• After execution of the CCD gamma adjustment (CCD calibra-
tion) (normal document copy mode) (ADJ 11A) and when the
copy color balance is customized with SIM46-21.
copy color balance is customized with SIM46-21.
(1) Note before adjustment
∗
Check that the table glass, No. 1/2/3 mirrors, and the lens sur-
face are free from dirt and dust.
(If dirt or dust is found, clean with alcohol.)
face are free from dirt and dust.
(If dirt or dust is found, clean with alcohol.)
∗
Check that the patches of BK1 and BK2 of the SIT chart
(UKOG-0280 FCZZ are free from dirt or dust.
If dirt or dust is found, clean with alcohol.
If any damage is found, replace with a new one.
(UKOG-0280 FCZZ are free from dirt or dust.
If dirt or dust is found, clean with alcohol.
If any damage is found, replace with a new one.
∗
Since this adjustment is based on the normal document copy
mode CCD gamma adjustment (CCD calibration) (ADJ 11A),
the said adjustment must have been completed before execu-
tion of this adjustment.
The copy color balance must also have been adjusted properly.
mode CCD gamma adjustment (CCD calibration) (ADJ 11A),
the said adjustment must have been completed before execu-
tion of this adjustment.
The copy color balance must also have been adjusted properly.
(2) Adjustment procedure
1) Place the SIT chart (UKOG-0280FCZZ) on the left edge of the
document table, and fit the center of the SIT chart with the
center of the glass holder.
center of the glass holder.
Note: Check that the SIT chart (UKOG-0280FCZZ) is in close
contact with the document table.
2) Close the document cover without shifting the SIT chart
(UKOG-0280FCZZ).
3) Make a copy in the Manual Photo mode.
(Be sure to use the specified copy paper.)
4) Set the copy made in procedure 3) on the document table so
that the center of the copy paper comes to the center of the
left edge of the document table.
left edge of the document table.
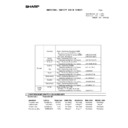
Monochrome
AUTO1 (
∗
1)
Auto 1 (Japan)
46
15/(16)
46
21/20/
24
46
2
AUTO2 (
∗
1)
Auto 2 (Except Japan)
TEXT
NORMAL
Text
Normal
COPT TO COPY
Copy document
MAP
Map
PRINTED
PHOTO
PHOTO
NORMAL
Printed photo
Normal
COPT TO COPY
Copy document
TEXT/PRINTED
PHOTO
PHOTO
NORMAL
Text/printed
photo
photo
Normal
COPT TO COPY
Copy document
PHOTOGRAPH
Photograph
TEXT/PHOTO
Text/Photograph
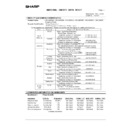
Copy mode
Adjustment (Simulation)
Color balance/
density
adjustment of
each copy mode
Collective color
balance/density
adjustment of all
copy modes
Low-density
area color
balance/density
adjustment
Main
Sub
Main
Sub
Main
Sub
ADJ 11F
CCD gamma adjustment
(CCD calibration)
(Copy document copy mode)
(CCD calibration)
(Copy document copy mode)
AR-C172M SETTING AND ADJUSTMENTS 8 - 34
5) Enter the SIM 63-09 mode and press the [EXECUTE] key.
The automatic adjustment is performed. During the adjustment,
the [EXECUTE] key is highlighted. When the adjustment is com-
pleted, the [EXECUTE] key returns to the normal display.
the [EXECUTE] key is highlighted. When the adjustment is com-
pleted, the [EXECUTE] key returns to the normal display.
6) Cancel the simulation mode.
Note: The SIT chart (UKOG-0280FCZZ) is affected by lights
(especially ultra-violet rays) and temperature and humidity.
Store it in a clear file (nylon file) in a dark place.
Store it in a clear file (nylon file) in a dark place.
The gamma or density of black toner component images is
changed to adjust the reproduction of the profile of the black char-
acter and line optionally. Especially the thickness of fine black
character and line is changed.
changed to adjust the reproduction of the profile of the black char-
acter and line optionally. Especially the thickness of fine black
character and line is changed.
Since the black toner component image quantity differs depending
on each copy mode, be careful to selection of the copy mode
when checking the result of this adjustment. Check in the Text/
Printed photo copy mode.
on each copy mode, be careful to selection of the copy mode
when checking the result of this adjustment. Check in the Text/
Printed photo copy mode.
This adjustment is valid only in the Text mode, the Text/Printed
photo mode, and the Text/Photograph mode.
photo mode, and the Text/Photograph mode.
When the adjustment value different from the default value is
used, this adjustment must be performed in the following cases:
used, this adjustment must be performed in the following cases:
• When U2 trouble occurs.
• When the MFP PWB is replaced.
• When the EEPROM of the MFP PWB is replaced.
1) Enter the SIM 46-27 mode.
2) Enter the adjustment value with the 10-key.
When the adjustment value is increased, the black toner com-
ponent image contrast becomes greater, and vice versa.
ponent image contrast becomes greater, and vice versa.
The greater the adjustment value is, the greater the density is,
and vice versa.
and vice versa.
Normally set to the default (50).
3) Press the [OK] key.
4) Cancel the simulation, and make a copy in the Text/Printed
Photo mode to check the reproduction of fine black character
and line.
and line.
Use a document with black characters and lines on it for
checking.
checking.
This adjustment is used to adjust color balance and the density
according to the user's demand.
according to the user's demand.
The adjustment is made by setting the max. density level of Y, M
and C in each color.
and C in each color.
This adjustment is required in the following cases when the default
was changed:
was changed:
• When a consumable part (developer, photoconductor drum,
transfer belt) is replaced.
• When the CCD unit is replaced.
• When the scanner (reading) section is cleaned.
• When U2 trouble occurs.
• When the MFP PWB is replaced.
• When the EEPROM of the MFP PWB is replaced.
a. Note for the adjustment
∗
This adjustment is not required in the normal state, but executed
only when the user requests for.
only when the user requests for.
b. Adjustment procedure
1) Enter the SIM 46-25 mode.
2) Select the color to be adjusted with the scroll key.
3) Select the color with the color key.
4) Enter the adjustment value of each toner color with the 10-key.
(Default)
5) Cancel the simulation mode and make a copy in the single
color copy mode to check.
a. Outline
The user can perform the copy color balance and auto density
adjustment in the user program mode.
adjustment in the user program mode.
SIIM 26-53 is used to Enable or Disable this operation.
Note: This setup is performed only when the user understands the
copy color balance and the auto density adjustment and is
capable of performing the operation.
capable of performing the operation.
Full explanations on the operating procedure, notes, and
operations must be given to the user.
operations must be given to the user.
ADJ 11G
Image edge section gamma/density
adjustment (Black text and black line
reproduction adjustment)
(Normally unnecessary to adjust.)
adjustment (Black text and black line
reproduction adjustment)
(Normally unnecessary to adjust.)
BLACK TEXT
(SLOPE):
(SLOPE):
Black image edge section gamma (tilt) adjust-
ment (Black text and black line reproduction
adjustment)
ment (Black text and black line reproduction
adjustment)
BLACK TEXT
(INTERCEPT):
(INTERCEPT):
Black image edge section density (overall
level) adjustment (Black txt and black line
reproduction adjustment)
level) adjustment (Black txt and black line
reproduction adjustment)
ADJ 11H
Copy color balance adjustment
(Single color Copy mode)
(Normally unnecessary to adjust.)
(Single color Copy mode)
(Normally unnecessary to adjust.)
Display
Min
value
Max
value
Default value
C
M
Y
A
RED
0
255
0
255
255
B
GREEN
0
255
255
0
255
C
BLUE
0
255
255
255
0
D
YELLOW
0
255
255
0
0
E
MAGENTA
0
255
0
255
0
F
CYAN
0
255
0
0
255
ADJ 11I
Auto color balance adjustment by
user (Copy color balance auto
adjustment enable setting and
adjustment)
user (Copy color balance auto
adjustment enable setting and
adjustment)
AR-C172M SETTING AND ADJUSTMENTS 8 - 35
This setting is required in the following cases:
∗
When a U2 trouble occurs.
∗
When the PCU main PWB is replaced.
∗
When the EEPROM on the PCU main PWB is replaced.
b. Setup procedure
1) Enter the SIM 26-53 mode.
2) Select Enable/Disable with the 10-key.
Disabling = 0: YES
Enabling = 1: NO
Enabling = 1: NO
3) Press the [OK] key.
When "0: YES" (Disabling) is selected, the user auto color cal-
ibration (copy color balance, auto density adjustment) menu is
not displayed in the user program mode.
ibration (copy color balance, auto density adjustment) menu is
not displayed in the user program mode.
(Auto color calibration by the user (Auto color balance
adjustment))
adjustment))
Note: This adjustment is based on the service target color balance
set with SIM 63-7 or 63-8. If, therefore, the above simulation
is not completed normally, this adjustment will not be com-
pleted normally.
is not completed normally, this adjustment will not be com-
pleted normally.
1) Enter the user program mode.
2) Enter the copy mode.
3) Press the auto color calibration key.
4) Press the [EXECUTE] key.
The color patch image (adjustment pattern) is printed.
5) Set the color patch image (adjustment pattern) printed in pro-
cedure 4) on the original table so that the darker density side
comes to the left side. Place 5 sheets of white paper on the
color patch image (adjustment pattern) paper.
comes to the left side. Place 5 sheets of white paper on the
color patch image (adjustment pattern) paper.
6) Press the [EXECUTE] key. The copy color balance adjustment
(step 2) is automatically performed. After completion of the
adjustment, the display returns to the original menu.
adjustment, the display returns to the original menu.
This adjustment must be performed in the following cases:
• When the fusing section is disassembled.
• When a fusing trouble occurs.
• When wrinkles are generated on paper in the fusing section.
1) Select A4 (8.5 x 11) paper.
2) With the document cover open, press the start key of mono-
chrome copy.
3) A copy of black background is made.
4) Open the left door.
5) Insert paper into the pre-transfer paper guide, and turn the fus-
ing roller knob.
6) With the paper squeezed in the pre-transfer paper guide, wait
for about 10sec.
7) Turn the fusing roller knob to remove the paper from the fusing
section.
8) Measure the dimension (L) of the center section of the glitter-
ing line made by the fusing roller. Check that the dimension is
in the specified range.
in the specified range.
Check that the pressure balance between the front and the
rear frame sides is proper.
rear frame sides is proper.
Value L = About 5.5mm
Black
Yellow
Red
Blue
ADJ 12
Fusing pressure adjustment
LR
L (Center)
LF
LR = LF

