Sharp AR-651 (serv.man15) Service Manual ▷ View online
AR-651/810 DEVELOPER UNIT 12 - 17
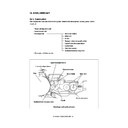
[I] Scattered toner recovery roller/Developer
sleeves (magnetic roller)
(1) Remove 3 screws and take off the front side
plate.
(2) Remove the scattered toner recovery roller.
(3) Remove 2 screws of the front side developer
sleeve holder.
(4) Remove the bearing and E-ring and take off
the gear and parallel pin.
(5) Remove 2 screws of the rear side developer
sleeve holder.
(6) Remove both the upper and lower developer
sleeves with the holders.
Front side plate
Scattered toner recovery roller
Developer sleeve holder
Bearing, E-ring,
Gear, Parallel pin
Developer sleeve holder
(7) Take off 2 pole position fixing bushings and
remove 2 E-rings.
Pole position fixing bushing
AR-651/810 DEVELOPER UNIT 12 - 18
(8) Remove 4 E-rings and take off 2 gears.
(9) Take off the developer sleeve holders at both
the front and rear sides.
(10) Remove 2 seals, 4 shield bushings and the
scraper and take off both the upper and lower
side developer sleeves.
(11) If necessary, replace the oil seals that are
pressed in 2 rear side shield bushings.
* Procedure for replacing an oil seal:
Page 12-20
[J] Transport sleeve
(1) Remove 1 screw and take off the rear side
pole position fixing bushing.
Developer sleeve holder
Gear
Seal
Shielded bushing
Scraper
Pole position fixing bushing
(2) Remove the front side gear, E-ring and
bearing and pull out the transport sleeve.
(3) If necessary, replace the oil seal that is
pressed in the front side of the frame.
* Procedure for replacing an oil seal:
Page 12-20
Bearing
E-ring
Gear
AR-651/810 DEVELOPER UNIT 12 - 19
[K] Mixer
(1) Remove the auto toner sensor.
(2) Remove 2 E-rings and take off 2 rear side
gears.
(3) If necessary, remove 2 bearings and replace
2 oil seals that is pressed in the frame.
Note: When installing the bearing, install it after
spreading the grease (Albania No.2) all round
the mixer shaft.
(4) Remove 2 E-rings and 2 screws and take off
the front side mixer nozzle.
(5) Pull out 2 mixers.
(6) If necessary, replace the oil seal that is
pressed in the mixer nozzle.
* Procedure for replacing an oil seal:
Page 12-20
[L] Paddle
(1) Remove 1 E-ring and take off the rear side
gear and parallel pin.
Gear
E-ring
Mixer nozzle
E-ring
E-ring
Gear
(2) Remove 1 E-ring and pull out the rear side
paddle bushing.
(3) If necessary, replace the oil seal that is
pressed in the paddle bushing.
E-ring
Paddle bushing
AR-651/810 DEVELOPER UNIT 12 - 20
(4) Remove the gear and 1 E-ring and take off the
front side paddle bushing.
(5) If necessary, replace the oil seal that is
pressed in the paddle bushing.
(6) Pull out the paddle.
* Procedure for replacing an oil seal:
Page 12-20
<<Procedure for replacing an oil seal>>
In the developer unit, the oil seals are used at the
following 9 places.
• Rear side of the upper and lower developer
sleeves (1pc. for each)
• Front side transport sleeve (1pc.)
• Rear and front sides of the mixer (2pcs. for
each)
• Rear and front sides of the paddle (1pc. for
each)
An oil seal is replaced by the following steps.
1. Take off the oil seal by hooking out its inside
with a fine driver and such.
2. Push in a new oil seal parallel to the frame,
bushing and so on with paying attention to its
direction (as shown by the right figure).
3. Spread the grease (Albania No.2; about
2-rice-grain’s amount) all round the inside
diameter.
Note: Wipe off the grease which has run off to the
inner side of the oil seal.
E-ring
Paddle bushing
Inside
Outside
Grease
Oil seal
Click on the first or last page to see other AR-651 (serv.man15) service manuals if exist.

