Sharp AL-1566 (serv.man11) Service Manual ▷ View online
AL-1556/1566 DISASSEMBLY AND ASSEMBLY 8 - 5
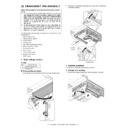
4. Fusing section
A. List
B. Disassembly procedure
1) Remove the connectors (3 pcs.) of the rear cabinet.
2) Open the side cover, remove two screws, and remove the fusing
unit.
3) Cut the binding band, remove the screw, and remove the ther-
mistor.
4) Remove the screw and remove the U-turn guide.
Pressure roller section disassembly
5) Remove the three screws, remove the fusing cover lower on the
right side, and open the heat roller section.
6) Remove the screw and remove the PPD2 sensor.
No.
Part name Ref.
1
Thermistor
2
PPD2 sensor
3
Heater lamp
4
Pressure roller
5
Heat roller
1)
2)
3)
2)
1)
2)
3)
Thermistor
1)
2)
1)
5)
5)
6)
6)
4)
3)
2)
1)
2)
PPD2 sensor
AL-1556/1566 DISASSEMBLY AND ASSEMBLY 8 - 6
7) Remove the plate spring on the right and remove the heater lamp.
8) Remove the spring and remove the separation pawls (3 pcs.).
9) Remove the E-ring and remove the reverse gate.
10) Remove the pressure release levers on the right and the left sides.
11) Remove the pressure roller, the pressure bearing, and the spring.
Note: Apply grease to the sections specified with an asterisk (*).
Grease: “JFE552” UKOG-0235FCZZ
Heat roller disassembly
(Continued from procedure (4).)
5) Remove screws, remove the fusing cover, and open the heat roller
section.
1)
2)
Heater lamp
3)
1)
2)
2)
1)
3)
1)
1)
1)
2)
2)
1)
3)
3)
Pressure roller
1)
2)
2)
3)
3)
AL-1556/1566 DISASSEMBLY AND ASSEMBLY 8 - 7
6) Remove the C-ring and the fusing bearing, and remove the heat
roller.
7) Remove the parts from the heat roller.
Note: Apply grease to the sections specified with
∗
1.
Grease: “JFE552” UKOG-0235FCZZ
8) Remove two screws and remove the thermo unit.
C. Assembly procedure
For assembly, reverse the disassembly procedure.
5. Tray paper feed/transport section
A. List
B. Disassembly procedure
1) Remove the paper holding arm.
Remove the arm holder from the main unit, and remove the holder
from the arm.
from the arm.
2) Remove the two screws, and remove the hinge guide R.
3) Remove the fan duct and disconnect the connector. (2 positions)
4) Remove the six screws, and remove the scanner unit.
1)
2)
3)
Heat roller
3)
2)
1)
1
1
2
Apply grease "GU-2" (UKOG-0255FCZZ)
to the fusing gear surface
to the fusing gear surface
∗
2.
1)
2)
3)
No.
Part name Ref.
1
Paper holding arm
2
PPD1 sensor PWB
3
LSU unit
4
Intermediate frame unit
5
Paper feed roller
3)
1)
2)
2)
4)
5)
5)
5)
5)
5)
2)
1)
6)
3)
4)
4)
1)
5)
AL-1556/1566 DISASSEMBLY AND ASSEMBLY 8 - 8
5) Disconnect the connector from the MCU PWB.
6) Disengage the pawls (2 positions), and remove the sensor PWB.
7) Remove the screw, and open the upper paper guide.
8) Remove the roller, and remove the belt.
9) Disengage the pawl, and remove the roller knob.
10) Disengage the pawl, and shift the pulley and the bearing.
11) Remove the paper exit roller, and remove the belt, the pulley, and
the bearing.
12) Remove the connector and the screw, and remove the speaker
unit.
1)
2)
3)
1)
1)
2)
1)
2)
1)
2)
3)
4)
1)
2)
2)
1)
3)
Click on the first or last page to see other AL-1566 (serv.man11) service manuals if exist.

