Sharp AL-1000 / AL-1010 (serv.man12) Service Manual ▷ View online
Main code
Sub code
Contents
50
1
Lead edge position and paper lead edge/rear edge void adjustment
Used to adjust the copy image position on copy paper and the lead edge/rear edge void amounts. Performed by
adjusting the scanning start position and print start position (resist roller ON timing) in 100%.
(Operation/Procedure)
1. When this simulation is executed, the current set value is displayed in two digits. (Center value: 50)
2. When the copy mode select key is pressed, the setting mode and the setting display are changed sequentially.
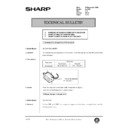
* The selected adjustment mode is indicated by the lamps as follows.
3. Enter the adjustment value with the 10-key and press the START key. Then the set value is stored and copy is
made. (An increase of 1 in the set value corresponds to 0.1mm shift.)
4. Press the clear key to store the set value and exit the simulation.
Adjustment mode
Lamps ON
Print start position
AE lamp
Image lead edge void amount
TEXT lamp
Image scanning start position (Scanner)
PHOTO lamp
Image rear edge void amount
AE, TEXT, PHOTO lamps
10
Center offset adjustment
(Outline)
Used to adjust the copy image position on copy paper and the center offset position in scanning an original.
Performed by changing the set values of the SCAN LEFT MARGIN register and the PRINT LEFT MARGIN
register of ASIC.
(Operation/Procedure)
1. When this simulation is executed, the current set value is displayed.
2. In a machine with the multi paper feed unit installed, press the copy mode select key, and each setting mode
and display are changed sequentially.
In a machine with the single paper feed unit installed, press the copy mode select key, and each setting mode
and display are changed sequentially.
* The selected adjustment mode is indicated by the lamps as follows:
3. Enter the adjustment value with the 10-key and press the SORT key. Then the set value is stored and a copy
is made. (An increase of 1 in the set value corresponds to 0.1mm shift.)
4. Press the clear key to store the set value and exit the simulation.
* Machine with the multi manual paper feed unit installed
Adjustment mode
Lamps ON
Print center offset (main cassette paper feed)
AE, main cassette lamp
Print center offset (2nd cassette paper feed)
AE, 2nd cassette lamp
Print center offset (Manual paper feed)
AE, manual feed lamp
OC/original center offset
AE, TEXT lamp
SPF/Original center offset
AE, TEXT, PHOTO lamp
* Machine with the single manual paper feed unit installed
Adjustment mode
Lamps ON
Print center offset (main cassette paper feed)
AE, main cassette lamp
Print center offset (Manual paper feed)
AE (Blink)
OC/original center offset
AE, TEXT lamp
SPF/Original center offset
AE, TEXT, PHOTO lamp
51
2
Resist amount adjustment
(Outline)
Used to adjust the contact pressure of paper onto the copier resist roller and the SPF resist roller.
(Operation/Procedure)
1. When this simulation is executed, the currently set value is displayed.
2. In a machine with the multi paper feed unit installed, press the copy mode select key, and each setting mode
and display are changed sequentially.
In a machine with the single paper feed unit installed, press the copy mode select key, and each setting mode
and display are changed sequentially.
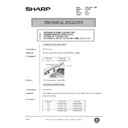
* The selected adjustment mode is indicated by the lamps as follows:
3. Enter the adjustment value with the 10-key and press the SORT key. Then the set value is stored and a copy
is made.
4. Press the clear key to store the set value and exit the simulation.
AL-1000/1010
10-9
Main code
Sub code
Contents
51
2
* Machine with the multi manual paper feed unit installed
Adjustment mode
Lamps ON
Main cassette paper feed
AE, main cassette lamp
2nd cassette paper feed
AE, 2nd cassette lamp
Manual paper feed
AE, manual feed lamp
SPF/Resist
AE, TEXT, PHOTO lamp
* Machine with the single manual paper feed unit installed
Adjustment mode
Lamps ON
Main cassette paper feed
AE, main cassette lamp
Manual paper feed
AE (Blink)
SPF/Resist
AE, TEXT, PHOTO lamp
61
3
Polygon motor (HSYNC output) check
(Operation/Procedure)
When the START key is pressed, HSYNC is performed and the polygon motor is rotated for 30 sec.
At that time, the Zoom lamp is lighted for 100msec e3very time when HSYNC is detected.
(Operation/Procedure)
When the START key is pressed, HSYNC is performed and the polygon motor is rotated for 30 sec.
At that time, the Zoom lamp is lighted for 100msec e3very time when HSYNC is detected.
63
1
Shading check
(Outline)
Used to display the detection level of the white plate for shading. (Vref of AD conversion IC is fixed.)
(Operation/Procedure)
When the START key is pressed, the mirror base unit moves to the white plate for shading and Vref+ voltage of
AD conversion IC is set to 4.5V and Vref- voltage to 0.5V, and the copy lamp is lighted.
This state is kept for 10 sec, and the level of one pixel at the center is detected every second to display on the
value display section.
64
1
Self print by engine only (1 by 2 mode)
(Outline)
Used to print the set quantity in 1 by 2 mode ignoring the optical system state.
(Operation/Procedure)
1. When this simulation is executed, warming up is performed and the ready lamp is lighted.
2. Enter the copy quantity with the 10-key, select the cassette with the cassette select key, and press the START
key. Paper is fed from the cassette and printing is performed.
In 1 by 2 print mode, one line is printed and the following two lines are not printed.
AL-1000/1010
10-10
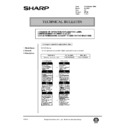
4. Trouble Codes
Main code
Sub code
Trouble content
Detail of trouble
E7
03
HSYNC cannot be
detected.
detected.
LSU (laser diode, reception element, APC circuit) trouble
LSU drive circuit (ASIC) trouble
LSU drive circuit (ASIC) trouble
E7
04
CCD white level trouble
CCD drive circuit (CCD PWB, ASIC harness) trouble
Copy lamp lighting trouble (Copy lamp, invertor PWB)
Copy lamp lighting trouble (Copy lamp, invertor PWB)
E7
05
CD black level trouble
CCD drive circuit (CCD PWB, ASIC, harness) trouble
E7
12
Shading trouble
(white correction)
(white correction)
Dirt on white plate for scanning white level
E7
14
ASIC connection trouble
Improper connection between CPU and ASIC (pattern cut, improper connection
of lead pin)
of lead pin)
E7
15
Copy lamp OFF trouble
Copy lamp or copy lamp drive circuit (invertor PWB) trouble Copy lamp
disconnection
disconnection
L1
00
Feed is not completed
within the specified time.
within the specified time.
When the mirror base is returned for the specified time (6 sec) in mirror initializing
after turning on the power, the mirror home position sensor (MHPS) does not
turn OFF. Or when the mirror base is fed for the specified time (about 6 sec)
after start of copy return, the mirror home position sensor (MHPS) does not turn
OFF.
after turning on the power, the mirror home position sensor (MHPS) does not
turn OFF. Or when the mirror base is fed for the specified time (about 6 sec)
after start of copy return, the mirror home position sensor (MHPS) does not turn
OFF.
L3
00
Return is not completed
within the specified time.
within the specified time.
When the mirror base is returned for the specified time (6 sec) in mirror
initializing after turning on the power, the mirror home position sensor (MHPS)
does not turn ON.Or when the mirror base is returned for the specified time
(about 6 sec) after start of copy return, the mirror home position sensor (MHPS)
does not turn ON.
initializing after turning on the power, the mirror home position sensor (MHPS)
does not turn ON.Or when the mirror base is returned for the specified time
(about 6 sec) after start of copy return, the mirror home position sensor (MHPS)
does not turn ON.
L4
01
Main motor lock
When the main motor encoder pulse is not detected for 100msec.
L6
10
Polygon motor lock
The lock signal (specified rpm signal) does not return within a certain time (about
20sec) from starting the polygon motor rotation
20sec) from starting the polygon motor rotation
H2
00
Thermistor open detection
The fusing thermistor is open.
H3
00
Heat roller abnormally high
temperature
temperature
The fusing temperature rises above 240°C.
H4
00
Heat roller abnormally low
temperature
temperature
The fusing temperature does not reach 185°C within 27 sec of turning on the
power, or the fusing temperature keeps at 140°C.
power, or the fusing temperature keeps at 140°C.
U2
01
Counter sum check error
U2
04
EEPROM serial
communication error
communication error
When a communication trouble occurs with the EEPROM.
CH
(Blinking)
-
TD cartridge not installed
Check if TD cartridge is installed.
AL-1000/1010
10-11

