Sharp PN-655RE Handy Guide ▷ View online
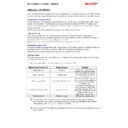
IDP Repair – Checklist
Unit received in a working condition
If the unit has power, capture the “Log” details using the model specific application – Service Tool
If you are unfamiliar with the application or have not yet installed the program, please refer to the
operation manual provided with the “Service Tool” application.
Read and extract the “Get All Reports” operation log of the display
Run – InfoDisp Report
Run – InfoDisp Report
Read and note in a text file the “Usage Time” of the display
Run – Usage Time
Run – Usage Time
Read and save the “White balance” settings for the display
Run – White Balance
Run – White Balance
If available, read and save the “Gamma” settings for the display
Run – Gamma
Run – Gamma
For PN-L units, check and save the “LED and sensor check” data
Run – LED/Sensor
Run – LED/Sensor
Read and note in a text file the “Serial Number” of the display
Run – Serial Number
Run – Serial Number
Store all files locally and compress (ZIP) all of the files
All of the data needs to be held locally by the service contractor should this be required in
the future
All of the data needs to be held locally by the service contractor should this be required in
the future
Send the ZIP file and model / fault details to –
Preparation for despatch
After the unit has been tested and confirmed as working, you need to load the model specific
application – Service Tool
If you are unfamiliar with the application or have not yet installed the program, please refer to the
operation manual provided with the “Service Tool” application.
Only if you have replaced the I/F PWB or the EEPROM, you will need to re-write ALL data (O).
Write the “Firmware” to the display
Run – Main Firmware
Run – Main Firmware
If the unit has an OPTION BOARD fitted, write the “PN-ZBxx Firmware”
Run – PN-ZBxx Firmware
Run – PN-ZBxx Firmware
For PN-L units, write the “Touch Panel Firmware” to the display
Run – TouchPanel FIrmware
Run – TouchPanel FIrmware
Reset the unit
Check the service manual and perform a factory reset
Check the service manual and perform a factory reset
Write the “Usage Time” of the display
Run – Usage Time
Run – Usage Time
For PN-V units, reset the “Bright Reset” settings on the unit
Run – Panel Data Reset
Run – Panel Data Reset
If required, write the “White balance” settings for the display (O)
Run – White Balance
Run – White Balance
For PN-L units If required, write the “Gamma” settings for the display (O)
Run – Gamma
Run – Gamma
If required, write the “Serial Number” of the display (O)
Run – Serial Number
Run – Serial Number
If required, write the “Monitor Temperature” of the display (O)
Run – Temp Watch
Run – Temp Watch
If required perform “Flicker Adjustment” (O)
Run – Flicker Adjustment
Run – Flicker Adjustment
Display


