Sharp R-890SLM (serv.man3) User Manual / Operation Manual ▷ View online
2
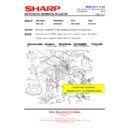
YOUR OVEN AND ACCESSORIES
OVEN:
1. Control panel
2. Oven lamp
3. Door opening handle
4. Waveguide cover (DO NOT REMOVE)
5. Bottom grill heating element
6. Turntable motor shaft
7. Oven cavity
8. Door seals and sealing surfaces
9. Door latches
10. Top grill heating element
11. Ventilation openings
12. Outer cabinet
13. Power cord
1. Control panel
2. Oven lamp
3. Door opening handle
4. Waveguide cover (DO NOT REMOVE)
5. Bottom grill heating element
6. Turntable motor shaft
7. Oven cavity
8. Door seals and sealing surfaces
9. Door latches
10. Top grill heating element
11. Ventilation openings
12. Outer cabinet
13. Power cord
ACCESSORIES:
Check to make sure the following accessories
are provided:
14. Turntable
Check to make sure the following accessories
are provided:
14. Turntable
15. High rack
16. Low rack
• Place the turntable on to the turntable motor
• Place the turntable on to the turntable motor
shaft, ensuring it is located firmly.
• To avoid turntable damage, ensure dishes or
containers are lifted clear of the turntable rim
when removing them from the oven.
when removing them from the oven.
• For use of the racks, refer to the grill, convection
and combi cooking sections on pages 10 to 14.
Never touch the grills when they are hot.
NOTES:
• The waveguide cover is fragile. Care should be taken when cleaning inside the oven to ensure that
• The waveguide cover is fragile. Care should be taken when cleaning inside the oven to ensure that
it is not damaged.
• After cooking fatty foods without a cover, always clean the cavity and especially the grill heating
elements thoroughly, these must be dry and free from grease. Built-up grease may overheat and
begin to smoke or catch fire.
begin to smoke or catch fire.
• Always operate the oven with the turntable fitted correctly. This promotes thorough, even cooking.
A badly fitted turntable may rattle, may not rotate properly and could cause damage to the oven.
• The turntable rotates clockwise or anti-clockwise. The rotary direction may change each time you
start the oven. This does not affect cooking performance.
• When you order accessories, please quote both the
PART NAME
and
MODEL NUMBER
to your dealer
or SHARP approved service facility. The model number is located at the bottom of
the control panel.
Warning:
The door, outer cabinet, oven cavity, accessories, dishes and especially the grills will
become very hot during operation. To prevent burns, always use thick oven gloves.
become very hot during operation. To prevent burns, always use thick oven gloves.
11
13
12
14
15
16
4
7
8
9
6 5
10
1
2
2
3
R-890SLM_EN.indd 2
R-890SLM_EN.indd 2
2/25/09 9:37:15 AM
2/25/09 9:37:15 AM
3
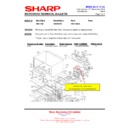
CONTROL PANEL
DIGITAL DISPLAY
INDICATORS:
1. LESS/MORE indicator
2. INFO indicator
3. COOK indicator
4. MICROWAVE indicator
5. CONVECTION indicator
6. BOTTOM GRILL indicator
7. TOP GRILL indicator
INDICATORS:
1. LESS/MORE indicator
2. INFO indicator
3. COOK indicator
4. MICROWAVE indicator
5. CONVECTION indicator
6. BOTTOM GRILL indicator
7. TOP GRILL indicator
1
3
2
4
5
6
7
Operating keys:
8. EXPRESS
8. EXPRESS
DEFROST key
Press to select defrosting 4 menus.
9. ENTER
BUTTON
Press to confi rm selected menu and weight.
10. MICROWAVE POWER LEVEL key
Press to change the microwave power setting.
11. CONVECTION (°C) key
Press to change the convection setting.
12. SHORT CUTS key
13. AUTO COOK key
13. AUTO COOK key
Press to select 10 popular menus.
14. AUTO MINUTE key
15. KITCHEN TIMER key
16. START key
17. STOP/CLEAR key
18. INFO key
19. QUICK&EASY key
20. GRILL MODE key:
1
15. KITCHEN TIMER key
16. START key
17. STOP/CLEAR key
18. INFO key
19. QUICK&EASY key
20. GRILL MODE key:
1
PRESS =
TOP
GRILL
2
PRESSES
=
BOTTOM
GRILL
3 PRESSES = TOP & BOTTOM GRILL
21. COMBI MODE key:
1
1
PRESS =
MICROWAVE
&
CONVECTION
2
2
PRESSES
=
MICROWAVE
&
TOP GRILL
3
3
PRESSES
=
MICROWAVE
&
BOTTOM
GRILL
22. ENTER KNOB
Rotate to enter the cooking time, kitchen timer,
Rotate to enter the cooking time, kitchen timer,
weight and select menu.
23. EXPRESS COOK key
Press to select cooking 6 popular menus.
24. MENUS LIST
Press to select cooking 6 popular menus.
24. MENUS LIST
Indicate of internal menus Express Cook &
Express
Defrost.
17
18
19
20
21
22
23
24
11
8
12
9
10
14
13
15
16
R-890SLM_EN.indd 3
R-890SLM_EN.indd 3
2/24/09 4:06:13 PM
2/24/09 4:06:13 PM
4
IMPORTANT SAFETY INSTRUCTIONS
Oven Use:
• The oven is for domestic food use only.
• Never operate when empty, except as directed in the
• Never operate when empty, except as directed in the
“Grill cooking” section on page 10.
• Do not leave or store anything inside the oven when
not in use.
• Never attempt to use the oven with the door open.
It is important not to force or tamper with the door
safety latches.
safety latches.
• Never operate the oven with any object caught in
the door.
• Do not insert fingers or objects in the holes of the door
latches or air-vent openings as this may damage the
oven and cause an electric shock.
oven and cause an electric shock.
• If water or food drops inside the air vent openings
switch the oven off immediately, unplug it and call a
SHARP approved service facility. (See page 38).
SHARP approved service facility. (See page 38).
• Never move the oven while it is operating.
• The door, outer cabinet, oven cavity, turntable, dishes,
• The door, outer cabinet, oven cavity, turntable, dishes,
accessories and especially the grill will become
very hot during operation. Care should be taken
to avoid touching these areas.
very hot during operation. Care should be taken
to avoid touching these areas.
To prevent burns, always use thick oven gloves.
Before cleaning make sure they are not hot.
Pacemaker: If you have a heart pacemaker, consult
your doctor or the pacemaker manufacturer prior to
oven use.
your doctor or the pacemaker manufacturer prior to
oven use.
FIRE: If smoke is observed, switch off and
unplug the appliance and keep the door
closed in order to stifl e any fl ames.
unplug the appliance and keep the door
closed in order to stifl e any fl ames.
PLEASE READ CAREFULLY AND KEEP FOR FUTURE REFERENCE
PLEASE READ CAREFULLY AND KEEP FOR FUTURE REFERENCE
WARNING: Only allow children to use the
oven without supervision when adequate
instructions have been given so that the child
is able to use the oven in a safe way and
understands the hazards of improper use.
This appliance is not intended for use by
persons (including children) with reduced
physical, sensory or mental capabilities, or
lack of experience and knowledge, unless
they have been given supervision or
instruction concerning use of the appliance
by a person responsible for their safety.
Children should be supervised to ensure
that they do not play with the appliance.
When the appliance is operated in the
GRILL, CONVECTION, COMBI, EXPRESS COOK
QUICK & EASY and AUTO COOK modes,
children should only use the oven under
adult supervision due to the temperature
generated.
Accessible parts may become hot during
use. Young children should be kept away.
WARNING: Liquids and other foods must not
be heated in sealed containers since they
are liable to explode. Microwave heating
of beverages can result in delayed eruptive
boiling, therefore care has to be taken when
handling the container. Stir the liquid prior
to and during heating/ reheating, let liquid
stand for at least 20 seconds in the oven
after cooking.
INSTALLATION
1. Remove all packing materials including the feature
sticker (if applicable). The waveguide cover prevents
food and grease from entering the waveguide area
where it could cause damage. DO NOT REMOVE
THE WAVEGUIDE COVER.
food and grease from entering the waveguide area
where it could cause damage. DO NOT REMOVE
THE WAVEGUIDE COVER.
2. The oven door will become hot during cooking. Place
or mount the oven so that the bottom of the oven is
85 cm or more above the floor. Ensure the surface or
mounting position is strong enough to take the oven
weight, plus the heaviest item likely to be cooked in
the oven.
85 cm or more above the floor. Ensure the surface or
mounting position is strong enough to take the oven
weight, plus the heaviest item likely to be cooked in
the oven.
IMPORTANT:
If any damage is apparent, do not operate
the oven in any way, until it has been
repaired by a SHARP trained engineer.
the oven in any way, until it has been
repaired by a SHARP trained engineer.
WARNING
Inspect the Oven:
• Check the oven carefully for damage
• Check the oven carefully for damage
before and regularly after installation.
• Make sure the door closes properly, that it
is not misaligned or warped.
• Check the hinges and door safety latches
are not broken or loose.
• Ensure the door seal and sealing surfaces
are not damaged. If the door or door
seals are damaged, the oven must not be
operated until it has been repaired by a
competent person.
seals are damaged, the oven must not be
operated until it has been repaired by a
competent person.
• Inspect the oven interior and door for dents.
R-890SLM_EN.indd 4
R-890SLM_EN.indd 4
2/24/09 4:06:15 PM
2/24/09 4:06:15 PM
5
INSTALLATION
3. The minimum height
of free space
necessary above
the top surface of
the oven is 19cm.
necessary above
the top surface of
the oven is 19cm.
4. Do not place the
oven where heat, moisture or high humidity are
generated, (for example, near or above a
conventional oven) or near combustible
materials (for example, curtains). Do not block
or obstruct air vent openings. Do not place
objects on top of the oven.
generated, (for example, near or above a
conventional oven) or near combustible
materials (for example, curtains). Do not block
or obstruct air vent openings. Do not place
objects on top of the oven.
5. Make sure the power supply cord is undamaged
(See “ELECTRICAL CONNECTION” below).
Do not allow the power supply cord
to run over any hot or sharp surfaces,
such as the hot air vent area at the
top rear of the oven.
such as the hot air vent area at the
top rear of the oven.
6. The socket must be readily accessible so that
it can be easily unplugged in an emergency.
7. Do not use the oven outdoors.
BUILDING-IN-KIT.
This oven is designed for counter top or built-in use.
Do not place the oven in a cabinet.
An installation frame is available which enables
the microwave oven to be integrated within a
kitchen unit.
The microwave oven is not designed to be built
above or near a conventional oven.
SHARP recommend the use of the build in kit
EBR-5000, available from your SHARP dealer.
Only the use of this frame will guarantee the
quality and safety of the oven.
ELECTRICAL CONNECTION.
• Do not allow water to come into contact with
• Do not allow water to come into contact with
the power supply cord or plug.
• Insert the plug properly into the socket.
• Do not connect other appliances to the same
• Do not connect other appliances to the same
socket using an adaptor plug.
• If the power supply cord is damaged, it must
be replaced by a SHARP approved service
facility or a similarly qualified person to avoid
a hazard.
facility or a similarly qualified person to avoid
a hazard.
• When removing the plug from the socket
always grip the plug, never the cord as this
may damage the power supply cord and the
connections inside the plug.
may damage the power supply cord and the
connections inside the plug.
• If the plug fitted to your oven is a rewireable
type and in the event of the socket outlet
in your home not being compatible with the
plug supplied, remove the plug properly
(do not cut off).
in your home not being compatible with the
plug supplied, remove the plug properly
(do not cut off).
• If the plug fitted to your oven is a non-rewirable
type and in the event of the socket outlet in
your home not being compatible with the plug
supplied, cut-off the mains plug.
your home not being compatible with the plug
supplied, cut-off the mains plug.
• Refit with a suitable type, observing the wiring
code given in ‘To replace the mains plug’ on
page 38.
page 38.
19cm
WARNING: THIS APPLIANCE MUST
BE EARTHED
BE EARTHED
To wire an appropriate plug, follow the wiring
code given in `To replace the mains plug’ on
page 38.
code given in `To replace the mains plug’ on
page 38.
IMPORTANT!
• The fuse from the cut-off plug should be removed
• The fuse from the cut-off plug should be removed
and the plug disposed of in a safe manner.
• Under no circumstances should the cut-off plug
be inserted into a socket outlet as a serious
electric shock may occur.
electric shock may occur.
• The plug must not be used without the fuse cover
fitted.
• If you have any doubt about your microwave
oven obtain the help of a qualified electrician.
• When replacing the plug please ensure that
you use a BSI or ASTA approved plug to
BS1363, this should be fitted with a brown
coloured 13 amp fuse approved by BSI or
ASTA to BS1362. If you have any doubt
about electrical connection seek the help of a
qualified electrician.
BS1363, this should be fitted with a brown
coloured 13 amp fuse approved by BSI or
ASTA to BS1362. If you have any doubt
about electrical connection seek the help of a
qualified electrician.
R-890SLM_EN.indd 5
R-890SLM_EN.indd 5
2/24/09 4:06:16 PM
2/24/09 4:06:16 PM

