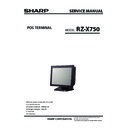
Sharp RZ-X750 (serv.man4) Service Manual ▷ View online
6
THE PACKAGE CONTENTS
Main System
AC Cord
Adaptor
Cable Cover & Screws
Safety Sheet
User Manual
7
FEATURES
Product features
•
The product uses a high visibility (250cd/m
2
luminance) LCD screen with a touch
screen interface for input.
•
The display may be tilted for the best viewing angle. The angle can be adjusted within
140 degrees left/right and 45 degrees up/down .
140 degrees left/right and 45 degrees up/down .
•
The product has no fan and is noiseless by design.
•
Hard disk supports SMART (Self Monitoring, Analysis and Reporting Technology)
function, realizes a stable system configuration through the backup of OS, disk,
partition, and file data, and provides disaster restoration solution by using Drive Clone
software.
function, realizes a stable system configuration through the backup of OS, disk,
partition, and file data, and provides disaster restoration solution by using Drive Clone
software.
•
This product uses Microsoft POS Ready 2009 (or similar operating system) which is
designed for POS system and KIOSK applications.
designed for POS system and KIOSK applications.
•
This product has the wake-on function based on Magic Packet™ technology for
remote booting and control through LAN.
remote booting and control through LAN.
•
The Resume (wake) on LAN function of X750 has the following limitations:
If BIOS function [Resume on LAN] is set to "Enable" the system will wake from “Power
Off” IF the normal Widows® shut down procedure is completed.
- If RZ-X750 is turned off by unnatural means (other than the normal Widows® shut
If BIOS function [Resume on LAN] is set to "Enable" the system will wake from “Power
Off” IF the normal Widows® shut down procedure is completed.
- If RZ-X750 is turned off by unnatural means (other than the normal Widows® shut
down procedure) the Resume on LAN will NOT “wake” the terminal.Examples of
unnatural “Power Off” include:
unnatural “Power Off” include:
- Press the power button to turn off
- External power loss to the terminal (unplugged, blackout, etc.)
- External power loss to the terminal (unplugged, blackout, etc.)
•
To enable the Resume on LAN function in the event of power loss set BIOS function
Power Management setting [Restore on AC Power Loss]” to “Power On” state.
Power Management setting [Restore on AC Power Loss]” to “Power On” state.
•
With this setting, if power is lost, the unit will turn on when power is restored and will
re-enable the [Resume on LAN] function.
re-enable the [Resume on LAN] function.
•
This product provides Several ports (USB, Serial, Parallel, LAN, and etc.) for facilitating
the use of various POS peripheral devices.
the use of various POS peripheral devices.
Note:
•
The application software will determine the usage and availability of the interfaces.
•
If the terminal is turned off by Pressing and the power button and a power loss then occurs
the terminal will NOT start automatically.
the terminal will NOT start automatically.
8
Product overview
Front
Operation Display (Touch Panel)
15 inch TFT-LCD screen with touch sensitive screen displays the operational status of
the system and the system can be operated by touch screen.
the system and the system can be operated by touch screen.
1
Power Button
Push the power button to turn terminal "ON" (AC connection required).
Switch the terminal "OFF" by pushing shortly the power button which initiates
shutdown of Windows.
Switch the terminal "OFF" by pushing shortly the power button which initiates
shutdown of Windows.
2
HDD Indicator
LED lights up during hard drive activity.
3
Power Indicator
LED lights up when the system is "ON."
4
LCD Brightness Control
Adjusts the brightness of the screen. (increase / decrease)
5
Magnetic Stripe Reader (optional)
For reading magnetic stripe cards.
6
2
1
4
3
5
6
9
Rear / IO Ports
1 2
3
4
1
6
8
9 10
11
12
5
7
Serial Port 1, 2, 3, 4
Connects serial devices such as a customer display, a barcode scanner, or a receipt
printer that use serial interface to the serial ports.
printer that use serial interface to the serial ports.
1
Note:
•
Default voltage at Pin 9 of COM2 / COM3 is 5V.
USB Connectors
You can connect peripherals such as scanners, printers and keyboard to the USB
(Universal Serial Bus) connectors. USB peripherals are hot swappable enabling plug
and play.
(Universal Serial Bus) connectors. USB peripherals are hot swappable enabling plug
and play.
4
DC Inlet Jack (AC/DC adaptor)
To supply power to the system, please connect here the supplied AC/DC power
adaptor (24V/7.5A).
adaptor (24V/7.5A).
2
VGA Connector
Connects VGA cable from a 2nd monitor.
3
LAN Connector (RJ 45)
Connect RJ-45 cable for 10/100/1000 Base Ethernet connection to this port.
5
Click on the first or last page to see other RZ-X750 (serv.man4) service manuals if exist.

