Sharp SD-PX15H (serv.man3) User Manual / Operation Manual ▷ View online
E-15
SD-PX15H_SEEG_E.fm
04/2/9
ENGLISH
TINSZA052AWZZ
SD-PX15H
Pr
epara
tion f
o
r Us
e
- TV
c
o
n
n
e
c
tion -
TV connection (continued)
"
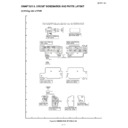
Connecting to a TV with a video input
socket
socket
Notes:
!
Change the TV input in accordance with the connected socket.
!
Do not connect other equipment between the TV and this unit. If they are con-
nected via a VCR, pictures may be distorted.
nected via a VCR, pictures may be distorted.
!
Using the audio cable, you can listen to the TV sound with this unit.
"
Connecting to a TV with an S-video input
socket
socket
If your TV is equipped with an S-video input socket, purchase an appropriate cable to
enjoy higher quality images.
enjoy higher quality images.
Notes:
!
Change the TV input in accordance with the connected socket.
!
Do not connect other equipment between the TV and this unit. If they are con-
nected via a VCR, pictures may be distorted.
nected via a VCR, pictures may be distorted.
!
Using the audio cable, you can listen to the TV sound with this unit.
!
Use a SCART cable, video cable or S-video cable to connect the unit to a TV.
TV
Video cable (commercially available)
To video
input socket
input socket
TV
To S-video
input socket
input socket
S-video cable
(commercially available)
(commercially available)
1
SHARP TI
NSZ
A
0
5
2
A
WZ
Z
E-16
SD-PX15H_SEEG_E.fm
04/2/9
ENGLISH
TINSZA052AWZZ
F
S
V
I
N
P
E
D
SD-PX15H
Pr
epara
tion f
o
r Us
e
- Re
mot
e
c
ontr
o
l /
A
C
po
we
r c
onne
c
tion -
Remote control
"
Battery installation
Precautions for battery use:
!
Replace all old batteries with new ones at the same time.
!
Do not mix old and new batteries.
!
Remove the batteries if the unit is not to be used for long periods of time. This will
prevent potential damage due to battery leakage.
prevent potential damage due to battery leakage.
Caution:
!
Do not use rechargeable batteries (nickel-cadmium battery, etc.).
!
Installing the batteries incorrectly may cause the unit to malfunction.
Notes concerning use:
!
Replace the batteries if the operating distance is reduced or if the operation
becomes erratic. Purchase 2 "AA" size batteries (UM/SUM-3, R6, HP-7 or similar).
becomes erratic. Purchase 2 "AA" size batteries (UM/SUM-3, R6, HP-7 or similar).
!
Periodically clean the transmitter on the remote control and the sensor on the unit
with a soft cloth.
with a soft cloth.
!
Exposing the sensor on the unit to strong light may interfere with operation.
Change the lighting or the direction of the unit.
Change the lighting or the direction of the unit.
!
Keep the remote control away from moisture, heat, shock, and vibrations.
"
Test of the remote control
AC power connection
"
Connecting the AC power lead
After checking all the connections have been made correctly, plug the AC power lead
of this unit into the AC socket.
of this unit into the AC socket.
Note:
Unplug the AC power lead from the wall socket if the unit will not be in use for a pro-
longed period of time.
longed period of time.
"
To turn the power on
Press the ON/STAND-BY button.
If the power does not turn on, check if the power leads are plugged in properly.
To set the unit to stand-by mode:
Press the ON/STAND-BY button again.
Notes:
!
After the unit enters the power stand-by mode, wait a few seconds to turn on
again.
again.
!
You can also use the ON/STAND-BY button on the remote control.
1 Open the battery cover.
2 Insert the supplied batteries
2 Insert the supplied batteries
according to the direction in-
dicated in the battery com-
partment.
dicated in the battery com-
partment.
When inserting or removing the bat-
teries, push them towards the bat-
tery terminals.
teries, push them towards the bat-
tery terminals.
3 Close the cover.
Point the remote control directly at the re-
mote sensor on the unit.
mote sensor on the unit.
The remote control can be used
within the range shown on the
right.
within the range shown on the
right.
Press the ON/STAND-BY button. Does
the power turn on? Now, you can enjoy
your system.
the power turn on? Now, you can enjoy
your system.
0.2 m - 6 m
(8" - 20')
(8" - 20')
Remote sensor
Wall socket
(AC 230 V, 50 Hz)
(AC 230 V, 50 Hz)
2
SHARP TI
NSZ
A
0
5
2
A
WZ
Z
E-17
SD-PX15H_SEEG_E.fm
04/2/9
ENGLISH
TINSZA052AWZZ
SD-PX15H
Pr
epara
tion f
o
r Us
e
- Se
tting the
c
loc
k
-
Setting the clock
By setting the unit to the correct time, you can use it not only as a clock but also for
timer playback.
timer playback.
In this example, the clock is set to 9:30.
To confirm the time display:
[When the unit is in the stand-by mode]
[When the unit is in the stand-by mode]
Set the MODE 1/MODE 2 switch to MODE 1 and press the DISPLAY button.
The time display will appear for about 5 seconds.
The time display will appear for about 5 seconds.
[When the power is on]
Set the MODE 1/MODE 2 switch to MODE 2 and press the TIMER/SLEEP button.
Within 10 seconds, press the or button to select "CLOCK".
The time display will appear for about 10 seconds.
Within 10 seconds, press the or button to select "CLOCK".
The time display will appear for about 10 seconds.
To readjust the clock:
Perform "Setting the clock" from the beginning.
!
In step 2, the time will be displayed.
!
Follow steps 3 - 4.
Note:
Unplugging the unit or power failure will clear the clock setting.
Readjust the clock.
Readjust the clock.
1
Turn on the power, set the MODE 1/MODE 2 switch to MODE 2 and
press the TIMER/SLEEP button.
press the TIMER/SLEEP button.
2
Within 10 seconds, press the or
button to select "CLOCK ADJUST",
and then press the ENTER button.
button to select "CLOCK ADJUST",
and then press the ENTER button.
3
Press the or button to adjust the
hour and then press the ENTER but-
ton.
hour and then press the ENTER but-
ton.
!
Press the or button once to advance the time by 1 hour. Hold it down to
advance continuously.
advance continuously.
!
The 24-hour display will appear.
4
Press the or button to adjust the
minutes and then press the ENTER
button.
minutes and then press the ENTER
button.
!
Press the or button once to advance the time by 1 minute. Hold it down
to advance continuously.
to advance continuously.
!
The hour will not advance even if minutes advance from "59" to "00".
!
The clock starts from "0" second (seconds are not displayed).
!
The time disappears after approx. 2 seconds.
E-18
SD-PX15H_SEEG_E.fm
04/2/9
ENGLISH
TINSZA052AWZZ
F
S
V
I
N
P
E
D
SD-PX15H
Pr
epara
tion f
o
r Us
e
- Ge
ne
ra
l c
o
ntr
o
l -
General control
"
Volume control
"
Muting
"
To change the display brightness (2 levels)
Set the MODE 1/MODE 2 switch to MODE 1 and hold down the DISPLAY button for 3
seconds or more.
Each time you press, brightness changes.
seconds or more.
Each time you press, brightness changes.
Note:
The blue light on the right side of the volume control goes out when the display dims
with "DIM ON" or "DIM AUTO".
with "DIM ON" or "DIM AUTO".
Main unit operation:
When the VOLUME control is turned clockwise,
the volume will increase. When it is turned anti-
clockwise, the volume will decrease.
the volume will increase. When it is turned anti-
clockwise, the volume will decrease.
Remote control operation:
Press the VOL + button to increase the volume
and the VOL - button for decreasing.
and the VOL - button for decreasing.
The volume is muted temporarily when pressing
the MUTE button on the remote control.
the MUTE button on the remote control.
!
Press again to restore the volume.
!
The mute status is cancelled when you adjust
the volume.
the volume.
Dimmed
(*)
Brightened
(*) After approx. 5 seconds of DVD-Video playback, the display dims and the original
brightness returns when you stop playback. The brightness remains unchanged
during playback of other media.
during playback of other media.
0 1 2
.....
38 39 40
Display

