Sharp SD-PX15H (serv.man13) Service Manual ▷ View online
SD-PX15H
2 – 1
Audio
SD-PX15H
Service Manual
SD-PX15H
Market
E
CHAPTER 2.
ADJUSTMENTS
[1] 1-bit section
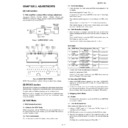
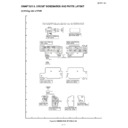
1. 1-bit amplifier’s output offset voltage adjustment
Adjustment VRA101, VRA102, VRA201, VRA202, VRA301 and
VRA302 so that the DC voltage between speaker terminals (SO603) +
and - is set to 0
VRA302 so that the DC voltage between speaker terminals (SO603) +
and - is set to 0
± 5 mV at AC 230 V.
NOTE: Remove the front cabinet of the set to adjust these voltages.
[2] DVD/CD section
Since this DVD/CD system incorporates the following automatic adjust-
ment functions, readjustment is not needed when replacing the pickup.
ment functions, readjustment is not needed when replacing the pickup.
Therefore, different PWBs and pickups can be combined freely.
Each time a disc is changed, these adjustments are preformed auto-
matically. Therefore, playback of each disc can be preformed under
optimum conditions.
matically. Therefore, playback of each disc can be preformed under
optimum conditions.
[3] TEST Mode
1. TEST Mode Functions
1.1. Entering the TEST Mode
While holding down both the POWER button and the EJECT button of
the main unit from the power-off state, press the FUNCTION button to
enter the Test Menu Mode.
the main unit from the power-off state, press the FUNCTION button to
enter the Test Menu Mode.
1.2. Test mode process
Turn on the power to set the FL display to the stand-by mode.
1.3. Test mode display
• In the test mode, the model name and ROM version appear on the
FL display.
Model name (upper 5 x 7 dots): “PX*_
”
(* appears as “s” when input AUDITION is low and “a” when high,
both in lower case.)
both in lower case.)
The destination symbol appears in according to the AREA termi-
nal.
nal.
Version (lower 5 x 7 dots): “Ver.****” (**** is the version number.)
(The numeric keypad on the remote control allows you to enter
each test mode directly for saving time.)
each test mode directly for saving time.)
1.4. TEST Mode Menu Display
• While the version is displayed, press the SKIP and the UP/DOWN
buttons (including the buttons of the remote control) to display the
menu.
menu.
Press the SKIP button to select the TEST Mode and then press the
PLAY button to enter the mode.
PLAY button to enter the mode.
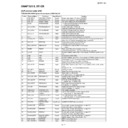
The SKIP UP/DOWN buttons display menu No. 1 - No. 5.
TEST MODE
* In each TEST Mode, the followings are displayed:
Upper 5 x 7 dot section: TEST_
Lower 5 x 7 dot section: Letters for each TEST Mode which are
shown in "Display" of the above table
shown in "Display" of the above table
1.5. Canceling TEST Mode
1. When the POWER button is pressed in a test mode. “COMPLETE”
appears on the lower area of 5 x 7 dots for 1 second. Start reset
(clear the RAM).
(clear the RAM).
2. In each TEST Mode, cancel the TEST Mode by power failure detec-
tion and execute shutdown. (To reset when recovering from power
failure next time, write improper data on the data for RAM check.)
failure next time, write improper data on the data for RAM check.)
2. Shipping TEST Mode
2.1. Outline
• ID command for initialization is sent to the DVD unit and EEPROM
in the unit is initialized.
2.2. TEST Mode Operation
When entering the Shipping TEST Mode:
1. Indicators “TEST” (upper 5 x 7 dots) and “INITIAL” (lower 5 x 7
dots) flash on the FL display.
2. DVD+B is set to on and communication with the DVD unit starts.
3. The DVD unit requests a model ID. The model ID is sent in the
same way as when the power is turned on, but with the following
flag set.
flag set.
b7 of Byte No. 2 and Sub Command 1: Reset Bit = “1”
Figure 1 OUTPUT OFFSET LEVEL
Figure 2 ADJUSTMENT POINTS
Electronic
Voltage
SO603
AC 230 V
Set
Output :
Speaker Terminal
+
-
VR : 0
Input : AUX
Input : AUX
VRA301
L-CH OUTPUT
OFFSET
ADJUSTMENT
VRA302
R-CH OUTPUT
OFFSET
ADJUSTMENT
VRA101
L-CH OUTPUT
OFFSET
ADJUSTMENT
VRA102
R-CH OUTPUT
OFFSET
ADJUSTMENT
VRA201
L-CH OUTPUT
OFFSET
ADJUSTMENT
VRA202
R-CH OUTPUT
OFFSET
ADJUSTMENT
No. TEST Mode
Direct Designation
Button
Display
Use
1
SHIPPING
TEST
TEST
“1” key on the
numeric keypad
numeric keypad
INITIAL
For production
2
KEY TEST
“2” key on the
numeric keypad
numeric keypad
KEY
For production
3
AMP TEST
“3” key on the
numeric keypad
numeric keypad
AMP
For production
4
TUNER
TEST
TEST
“4” key on the
numeric keypad
numeric keypad
TUNER
For production
6
DVD TEST
“6” key on the
numeric keypad
numeric keypad
DVD
SD-PX15H
2 – 2
4. Data from the DVD unit is checked. Wait until both of the following
conditions are satisfied (under AND condition).
b5 Decoder Power up Complete of Byte No. 28 = 1
Byte No. 31, CD (P.U.) Mechanism Status = 0x0A
5. Check that “COMPLETE” appears on the FL display under the
above conditions.
Turn off the power manually to exit the test mode.
If the conditions are not met after 20 seconds, DVD+B is set to off.
“INIT ERR” is displayed and the main unit is set to the stand-by
mode until the POWER button is pressed.
“INIT ERR” is displayed and the main unit is set to the stand-by
mode until the POWER button is pressed.
2.3. Supplementary Note
1. When entering this TEST Mode, it is prohibited to press any button
until the above processing is completed.
2. When performing the processing shown in step 5 above only the
Power button input is accepted.
3. KEY TEST Mode
3.1. Outline
In the KEY TEST Mode, it is checked that the system’s microcomputer
normally recognizes the main unit’s keys.
normally recognizes the main unit’s keys.
3.2. TEST Mode Operation
In this mode, power is on and the FL display is in the stand-by mode
(nothing is displayed). Then, a corresponding segment (see the follow-
ing table) for the key recognized by the system microcomputer
appears on the 8-digit display section. When the power button is
pressed, the entire display lights up for 2 seconds then the power turns
off, and the test mode is canceled.
4. AMP TEST Mode
4.1. Outline
In the AMP TEST Mode, the system is controlled in the exact same
way as in the normal power-on except for volume control. Functions
can be switched, DVD played, and multichannel including AC3 and
DTS controlled normally.
way as in the normal power-on except for volume control. Functions
can be switched, DVD played, and multichannel including AC3 and
DTS controlled normally.
Differently from the normal operation, volume is turned up/down only
by 4 steps (0-1-25-40).
by 4 steps (0-1-25-40).
4.2. TEST Mode Operation
1. When entering this TEST Mode, turn on the power normally to start
up from VTR (VTR1).
2. Startup volume level: 25 (-16 dB); Surround Mode: STEREO.
3. Volume level turned up/down only by 4 steps (0-1-25-40).
Press the volume control key to turn up/down the volume.
4. “AMP TEST” is constantly displayed in 8-digit display section of the
FL display (lower 5 x 7 dots). The display changes for 3 seconds
only for the following operations. Other than the 8-digit section is
displayed in the same way as usual.
only for the following operations. Other than the 8-digit section is
displayed in the same way as usual.
On the other FL display sections, normal operation displays are
shown.
shown.
• Volume level displayed when the volume is turned up/down.
• Frequency displayed when the mode is changed to the TUNER
Function.
• DVD PLAY/PAUSE displayed for 3 sec. after this operation
starts.
• When errors occur, the error display continuously shown until
error recovery.
* Elapsed time is not displayed during DVD/CD playback.
5. TUNER TEST Mode
5.1. Outline
Normally turn on the power to start the TUNER TEST Mode from the
TUNER Function. Operation and display after start-up are exactly the
same as in the normal operation except that frequency is already set in
the Tuner Preset from the start as shown in the table below.
TUNER Function. Operation and display after start-up are exactly the
same as in the normal operation except that frequency is already set in
the Tuner Preset from the start as shown in the table below.
5.2. TEST Mode Operation
1. When entering this TEST Mode, normally turn on the power to start
up from the preset station No.1 of the TUNER Function. (Make sure
the following frequencies are preset.)
the following frequencies are preset.)
2. After startup, operate normally.
3. When pressing the Power button, improper data is written on the
data for RAM checking to reset. Thus memory failure is detected
during reset processing and the microcomputer’s setting is initial-
ized.
during reset processing and the microcomputer’s setting is initial-
ized.
6. DVD TEST Mode
6.1. Outline
• To send key codes of the TEST Mode 1 to the DVD unit to start the
TEST Mode.
• Thereafter the system’s microcomputer only sends key codes to
the DVD unit.
• The main unit operation is started in the same way as the normal
startup of the DVD/CD Function.
• Only monitor (video) output is normally controlled. “MUTE ON”
remained.
• During this TEST Mode, “DVD TEST” is shown on the FL display.
All other segments light off.
(Display is shown by OSD. Main unit display not available.)
6.2. TEST Mode Operation
1. The TEST Mode is started in the same way as the normal startup of
the DVD/CD Function. Then the DVD unit is normally started. Dur-
ing the TEST Mode, “DVD_TEST” is continuously displayed. All
other segments light off.
ing the TEST Mode, “DVD_TEST” is continuously displayed. All
other segments light off.
In this TEST Mode the followings are displayed on the FL display
Upper 5 x 7 dots: TEST_
Lower 5 x 7 dots: DVD_XXXX”
KEY
Segment
KEY
Segment
EJECT
KEY_1A_ _
VOL UP
JOG_UP_ _
TUN
KEY_1B_ _
VOL DOWN
JOG_DOWN
FUNC
KEY_1C_ _
SKIP UP
KEY_1D_ _
SKIP DOWN
KEY_1E_ _
STOP
KEY_1F_ _
PLAY
KEY_1G_ _
M1
76.0M
M2
108.0M
M3
77.0M
M4
106.0M
M5
89.0M
M6
83.0M
M7
522k
M8
1629k
M9
603k
M10
1404k
M11
990k
SD-PX15H
2 – 3
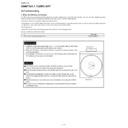
2. DVD TEST Mode
1. Press the "6" key of the remote control from the TEST Mode
initial condition to enter "DVD MENU".
"NO DISC"
(Press the "1" key of the remote control.)
(TEST Mode initial screen)
Press the "PLAY" key of the remote control 8 times.
TEST MODE
TEST Mode initial screen returns.
Model name (MODEL)
CPRM key code
(CPRM)
(CPRM)
CPPM key code
(CPPM)
(CPPM)
Microcode
version (UCODE)
version (UCODE)
Servo program version
(SODCV)
Source code
version (CSTMV)
version (CSTMV)
RO*: Region No.
CPRM Serial No.
(S/N)
(S/N)
Program version/
Creation date
Creation date
F 0 0 0 0 0 0 0
0 0 0 0 0 0 0 0
1. Press the "6" key of the remote control from the TEST Mode initial
condition to enter "DVD MENU".
LASER TEST Mode
Start from the "NO DISC" condition (The tray closed)
The screen display as shown on the left.
The screen display as shown on the left.
The spin rotates
approx. 1 sec.
The pick slightly moves
in the circumference
direction.
approx. 1 sec.
The pick slightly moves
in the circumference
direction.
D Y N A M I C T E S T
L A S E R
T E S T
D V D
L D O N
DVD laser lights off and
CD laser lights on.
CD laser lights on.
The spin rotates approx.
1 sec.
The pick slightly moves in
the circumference direction.
1 sec.
The pick slightly moves in
the circumference direction.
L A S E R
T E S T
C D
L D O N
M E N U : S P I N O F F S E T A D J U S T
1 : L A S E R T E S T
2 : S T E P T E S T
3 : P L A Y T E S T
3 : P L A Y T E S T N O T R A Y
Press the (3) key.
F 0 0 0 0 0 0 0
0 0 0 0 0 0 0 0
Press the (1) key.
Press the (1) key.
Press the (1) key.
Laser lights off.
The spin rotates approx.
1 sec.
The pick slightly moves in
the circumference direction.
1 sec.
The pick slightly moves in
the circumference direction.
L A S E R
T E S T
L D O F F
Press the (1) key to shift to "DVD LD ON".
Press the "STOP" key to return to the "DYNAMIC TEST" screen.
Press the "STOP" key to return to the "DYNAMIC TEST" screen.
SD-PX15H
2 – 4
1. Press the "6" key of the remote control from the TEST Mode initial condition to enter "DVD MENU".
Start from "NO DISC" (the tray closed).
The screen display as shown on the left.
Step Execute Mode
F 0 0 0 0 0 0 0
0 0 0 0 0 0 0 0
The screen display as shown on the left.
D Y N A M I C T E S T
M E N U : S P I N O F F S E T A D J U S T
1 : L A S E R T E S T
2 : S T E P T E S T
3 : P L A Y T E S T
9 : P L A Y T E S T N O T R A Y
Press the (3) key.
The tray opens. Put the disc on the tray.
S T E P
T E S T
T R A Y O P E N
Press the (2) key.
Focus On.
Tracking On.
"
": 4-digit alphanumeric also
displayed for DVD double deck disc.
S T E P T E S T
F O C U S O N
Press the "PLAY" key.
DVD
CD
S T E P T E S T
T R A C K I N G O N
0 0 0 0
0 0 0 0
0 0 0 0
0 0 0 0
4-digit alphanumeric
4-digit alphanumeric
A S A G C
T E A G C
4-digit alphanumeric
A S A G C
T E A G C
T B A L 1
F B A L 1
4-digit alphanumeric
4-digit alphanumeric
4-digit alphanumeric
4-digit alphanumeric
4-digit alphanumeric
4-digit alphanumeric
4-digit alphanumeric
4-digit alphanumeric
0 0 0 0
A S M A X
F E P P
F E P P
0 0 0 0
0 0 0 0
0 0 0 0
4-digit alphanumeric
4-digit alphanumeric
4-digit alphanumeric
4-digit alphanumeric
4-digit alphanumeric
4-digit alphanumeric
A S M A X
F E P P
F E P P
A S A G C
T E A G C
T E A G C
T B A L 0
F B A L 0
Press the "PLAY" key.
Focus balance adjustment values displayed.
"
": 4-digit alphanumeric also displayed for
DVD double deck disc.
S T E P T E S T
F B A L S T U D Y
0 0 0 0
0 0 0 0
0 0 0 0
4-digit alphanumeric
4-digit alphanumeric
A S A G C
T E A G C
4-digit alphanumeric
A S A G C
T E A G C
T B A L 1
F B A L 1
4-digit alphanumeric
4-digit alphanumeric
4-digit alphanumeric
4-digit alphanumeric
4-digit alphanumeric
4-digit alphanumeric
4-digit alphanumeric
4-digit alphanumeric
4-digit alphanumeric
A S M A X
F E P P
A S A G C
T E A G C
F E P P
A S A G C
T E A G C
T B A L 0
F B A L 0
Press the "PLAY" key.
Focus tracking gain adjustment values displayed.
4-digit alphanumeric also displayed for "****"
in the case of DVD double deck disc.
in the case of DVD double deck disc.
S T E P T E S T
G A I N S T U D Y
0 0 0 0
0 0 0 0
0 0 0 0
4-digit alphanumeric
4-digit alphanumeric
A S A G C
T E A G C
4-digit alphanumeric
A S A G C
T E A G C
T K G A 1
F C G A 1
4-digit alphanumeric
4-digit alphanumeric
4-digit alphanumeric
4-digit alphanumeric
4-digit alphanumeric
4-digit alphanumeric
4-digit alphanumeric
4-digit alphanumeric
4-digit alphanumeric
A S M A X
F E P P
A S A G C
T E A G C
F E P P
A S A G C
T E A G C
T K G A 0
F C G A 0
T B A L 1
F B A L 1
4-digit alphanumeric
4-digit alphanumeric
T B A L 0
F B A L 0
Press the "PLAY" key.
Equalizer adjustment values and Off-track Level
adjustment values displayed. 8-digit numeric of
DVD ID grows.
adjustment values displayed. 8-digit numeric of
DVD ID grows.
"
": 4-digit alphanumeric also displayed
for DVD double deck disc.
S T E P T E S T
D V D I D
8-digit numeric
0 0 0 0
0 0 0 0
0 0 0 0
4-digit alphanumeric
4-digit alphanumeric
A S A G C
T E A G C
4-digit alphanumeric
A S A G C
T E A G C
O F T R 1
F C B T 1
4-digit alphanumeric
4-digit alphanumeric
4-digit alphanumeric
4-digit alphanumeric
4-digit alphanumeric
4-digit alphanumeric
4-digit alphanumeric
4-digit alphanumeric
4-digit alphanumeric
A S M A X
F E P P
A S A G C
T E A G C
F E P P
A S A G C
T E A G C
O F T R 0
F C B T 0
T K G A 1
F C G A 1
4-digit alphanumeric
4-digit alphanumeric
T K G A 0
F C G A 0
T B A L 1
F B A L 1
4-digit alphanumeric
4-digit alphanumeric
T B A L 0
F B A L 0
Press the "PLAY" key.
Press the "STOP" key to return to the DYNAMIC TEST screen.
Turn the power from off to on to clear the Step Execute Mode.
Turn the power from off to on to clear the Step Execute Mode.
Tracking On.
"0000": 4-digit alphanumeric
also displayed for CD-RW.
also displayed for CD-RW.
"0000": 4-digit alphanumeric
also displayed for CD-RW.
also displayed for CD-RW.
S T E P T E S T
T R A C K I N G O N
0 0 0 0
0 0 0 0
0 0 0 0
4-digit alphanumeric
4-digit alphanumeric
A S A G C
T E A G C
4-digit alphanumeric
A S A G C
T E A G C
T B A L 1
F B A L 1
4-digit alphanumeric
4-digit alphanumeric
4-digit alphanumeric
4-digit alphanumeric
4-digit alphanumeric
4-digit alphanumeric
4-digit alphanumeric
4-digit alphanumeric
0 0 0 0
A S M A X
F E P P
A S A G C
T E A G C
F E P P
A S A G C
T E A G C
T B A L 0
F B A L 0
Press the "PLAY" key.
"0000": 4-digit alphanumeric
also displayed for CD-RW.
also displayed for CD-RW.
"0000": 4-digit alphanumeric
also displayed for CD-RW.
also displayed for CD-RW.
Focus balance adjustment
values displayed.
values displayed.
S T E P T E S T
F B A L S T U D Y
0 0 0 0
0 0 0 0
0 0 0 0
4-digit alphanumeric
4-digit alphanumeric
A S A G C
T E A G C
4-digit alphanumeric
A S A G C
T E A G C
T B A L 1
F B A L 1
4-digit alphanumeric
4-digit alphanumeric
4-digit alphanumeric
4-digit alphanumeric
4-digit alphanumeric
4-digit alphanumeric
4-digit alphanumeric
4-digit alphanumeric
4-digit alphanumeric
A S M A X
F E P P
A S A G C
T E A G C
F E P P
A S A G C
T E A G C
T B A L 0
F B A L 0
Press the "PLAY" key.
Focus tracking gain adjustment
values displayed.
values displayed.
S T E P T E S T
G A I N S T U D Y
0 0 0 0
0 0 0 0
0 0 0 0
4-digit alphanumeric
4-digit alphanumeric
A S A G C
T E A G C
4-digit alphanumeric
A S A G C
T E A G C
T K G A 1
F C G A 1
4-digit alphanumeric
4-digit alphanumeric
4-digit alphanumeric
4-digit alphanumeric
4-digit alphanumeric
4-digit alphanumeric
4-digit alphanumeric
4-digit alphanumeric
4-digit alphanumeric
A S M A X
F E P P
A S A G C
T E A G C
F E P P
A S A G C
T E A G C
T K G A 0
F C G A 0
T B A L 1
F B A L 1
4-digit alphanumeric
4-digit alphanumeric
T B A L 0
F B A L 0
Press the "PLAY" key.
Equalizer adjustment value and
TES signal offset displayed.
6-digit numeric of the TIME counter grows.
TES signal offset displayed.
6-digit numeric of the TIME counter grows.
S T E P T E S T
C D
N O 2-digit numeric
T I M E
6-digit numeric
0 0 0 0
0 0 0 0
0 0 0 0
4-digit alphanumeric
4-digit alphanumeric
4-digit alphanumeric
A S A G C
T E A G C
4-digit alphanumeric
A S A G C
T E A G C
T E O F S
F C B T 1
4-digit alphanumeric
4-digit alphanumeric
4-digit alphanumeric
4-digit alphanumeric
4-digit alphanumeric
4-digit alphanumeric
4-digit alphanumeric
4-digit alphanumeric
4-digit alphanumeric
A S M A X
F E P P
A S A G C
T E A G C
F E P P
A S A G C
T E A G C
T E O F S
F C B T 0
T K G A 1
F C G A 1
4-digit alphanumeric
4-digit alphanumeric
T K G A 0
F C G A 0
T B A L 1
F B A L 1
4-digit alphanumeric
4-digit alphanumeric
T B A L 0
F B A L 0
Press the "PLAY" key.
Press the "STOP" key to return to the DYNAMIC TEST screen.
Turn power from off to on to clear the Step Execute Mode.
Turn power from off to on to clear the Step Execute Mode.

