LG LS-P0960HL Service Manual ▷ View online
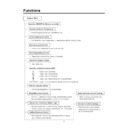
Display Function
• Cooling, Soft Dry, Heating
• Timer Mode
• Sleep Mode
• Hot-start, Deice
Self-diagnosis Function
1. Protection of the evaporator pipe from frosting
If the temperature of the indoor pipe is below 0°C after 7 mins from starting the compressor, the compressor
and the outdoor fan is stopped, and then after 3 mins delay of the compressor and the temperature of the
indoor pipe is over 7°C, the compressor and the outdoor fan is reoperated.
and the outdoor fan is stopped, and then after 3 mins delay of the compressor and the temperature of the
indoor pipe is over 7°C, the compressor and the outdoor fan is reoperated.
2. Thermistor Cut Off or Short
Cut Off/Short : Blinks on and off the operation mode LED. (0.5 sec ON/3 sec OFF)
Operation Indicator
Timer Indicator
Sleep Timer Indicator
Deice Indicator
: Heating Model only
Compressor On Indicator
: Cooling Model only
OUTDOOR
20
Installation
1) Selection of the best location
1. Indoor unit.
• There should not be any heat source or steam near
• There should not be any heat source or steam near
the unit.
• There should not be any obstacles to prevent the air
circulation.
• A place where air circulation in the room will be
good.
• A place where drainage can be easily obtained.
• A place where noise prevention is taken into consid-
• A place where noise prevention is taken into consid-
eration.
• Do not install the unit near the door way.
• Ensure the spaces indicated by arrows from the
• Ensure the spaces indicated by arrows from the
wall, ceiling, fence, or other obstacles.
2. Outdoor unit.
• If an awning is built over the unit to prevent direct
• If an awning is built over the unit to prevent direct
sunlight or rain exposure, be careful that heat radia-
tion from the condenser is not restricted.
tion from the condenser is not restricted.
• There should not be any animals or plants which
could affected by hot air discharged.
• Ensure the spaces indicated by arrows from the
wall, ceiling, fence, or other obstacles.
3. Piping length and the elevation.
Ringt
Rear right
Down right
Rear left
left
Front
Pipe size
Max. piping
Max.
GAS LIQUID
A(m)
B(m)
3/8"
1/4"
7
5
1/2"
1/4"
7
5
More than
5cm
5cm
More than 5cm
More than eye-level
More than
5cm
5cm
More than
10cm
10cm
More than
70cm
70cm
More than 10cm
A
B
Indoor unit
Outdoor unit
1. Installation of indoor, Outdoor unit
21
LS-P0760CL/P0760HL
LS-P0960CL/P0960HL
LS-S0960CL/S0960HL
LS-S1260CL/S1260HL
length
elevation
30
5. Bend the tubing as shown in the figure and
bind the pipings, the connecting cables and the
drain hose altogether.
drain hose altogether.
• Make a small loop for easy connection later.
6. Wrap the tubing, the drain hose and the con-
necting cable
7. Indoor unit installation
• Hook the indoor unit onto the upper position of instal-
lation plate. (Engage the two hooks of the rear top of
the indoor unit with the upper edge of the installation
plate.)
Insure the hooks are properly seated on the installa-
tion plate by moving it in left and right.
the indoor unit with the upper edge of the installation
plate.)
Insure the hooks are properly seated on the installa-
tion plate by moving it in left and right.
CAUTION : Take care to arrange the pipings, drain
hose and cables as the feature 6 page for
inserting it into the indoor unit and mount
the indoor unit on the installation plate.
inserting it into the indoor unit and mount
the indoor unit on the installation plate.
Connecting cable
Drain hose
Press the lower left and right side of the unit
against the Installation Plate until the hooks
engages with their slots (sound click).
against the Installation Plate until the hooks
engages with their slots (sound click).
Gas side piping
Liquid side piping
Drain hose
Connecting
cable
cable
Loop
Tape
Click on the first or last page to see other LS-P0960HL service manuals if exist.

