Sharp LC-65XS1E (serv.man2) Service Manual ▷ View online
LC-52XS1E/RU/LC-65XS1E/RU
2 – 9
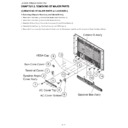
2. Removing of R/C, LED Unit and each shield.
1. Disconnect the RA connector from R/C, LED Unit.
2. Remove the 2 lock screws
and detach the R/C, LED Unit.
3. Remove the 2 lock screws
and 9 lock screws
. Detach the IF Radiator Shield Ass'y.
4. Remove the 1 lock screw
and 7 lock screws
. Detach the A3C Radiator Shield Ass'y.
5. Remove the 1 lock screw
and detach the Barrier Sheet
. Remove the 22 lock screws
and detach the Chassis Tray Shield R.
6. Remove the 1 lock screw
and detach the Barrier Sheet
. Remove the 23 lock screws
and detach Chassis Tray Shield L Ass'y.
1
2
3
4
5
6
7
8
9
10
11
11
Chassis Tray
Shield L Ass'y
Barrier Sheet
9
10
A3C Radiator Shield Ass'y
5
4
[RA]
[RA]
R/C, LED Unit
1
IF Radiator Shield Ass'y
3
2
Chassis Tray
Shield R
Barrier Sheet
8
6
7
LC-52XS1E/RU/LC-65XS1E/RU
2 – 10
3. Removing of connectors
1. Disconnect the following connectors from IF Unit. (LE, PD, PE, LW, FR, LB, KM, US, SP, RA, SD)
2. Disconnect the following connectors from USB Unit. (US)
3. Disconnect the following connectors from SP-T Unit. (SP)
4. Disconnect the following connectors from A3C LCD T-CON Unit. (LW, LB, FR)
5. Disconnect the following connectors from MAIN POWER Unit. (PD, PI, PE, PS1, PS3, ACM, AC3)
6. Disconnect the following connectors from SUB-1 POWER Unit. (PS1, PS2, LA1, AC1, ACM)
7. Disconnect the following connectors from SUB-2 POWER Unit. (PS2, LA2, AC1, AC2)
8. Disconnect the following connectors from SUB-3 POWER Unit. (PS3, LA3, AC3)
9. Disconnect the AC2 connector from AC INLET Unit.
10.Disconnect the KM connector from KEY Unit.
11.Disconnect the AC connector from DC OUTPUT Unit.
[AC3]
[AC3]
[PS3]
[LA3]
[AC1]
[PI] [PE] [PS2]
[LA3]
[LA1]
[AC2]
[LA1]
[ACM] [AC1]
[PI]
[PS3]
[LE]
[US]
[SP]
[LW]
[LB]
[FR]
[AC]
[KM]
[PD]
[LA2]
[LA2]
[PS2]
[PS1]
IF Unit
USB Unit
KEY Unit
SP-T Unit DC
OUTPUT Unit
AC INLET Unit
A3C LCD
T-CON Unit
MAIN POWER Unit
SUB-1 POWER Unit
SUB-2 POWER Unit
SUB-3 POWER Unit
[AC2]
[ACM]
IF Unit
[LB]
[KM]
[LE]
[SD]
[RA]
[US]
[PD] [PE]
[FR]
[LW]
[SP]
LC-52XS1E/RU/LC-65XS1E/RU
2 – 11
4. Removing of MAIN POWER Unit, SUB-1 POWER Unit and SUB-2 POWER Unit
1. Remove the 8 lock screws
.
2. Detach the Power Unit Fix Angle Top Ass'y
, Power Unit Fix Angle Bottom Ass'y
and Power Unit Fix Angle
.
3. Remove the 12 lock screws
. Detach the MAIN POWER Unit, SUB-1 POWER Unit and SUB-2 POWER Unit.
1
2
3
4
5
5
1
2
4
3
MAIN POWER Unit
SUB-1 POWER Unit
SUB-2 POWER Unit
Power Unit
Fix Angle Top Ass'y
Power Unit
Fix Angle Bottom Ass'y
Power Unit
Fix Angle
LC-52XS1E/RU/LC-65XS1E/RU
2 – 12
5. Removing of USB Unit, SUB-3 POWER Unit, SP-T Unit, DC OUTPUT Unit, IF Unit and AC INLET Unit
1. Remove the 1 lock screw
and USB Fix Angle
. Remove the 1 lock screw
and detach the USB Unit from USB Cover Holder.
2. Remove the 4 lock screws
and detach the SUB-3 POWER Unit.
3. Remove the 4 lock screws
and detach the AC INLET Unit.
4. Remove the 2 lock screws
and detach the SP-T Unit.
5. Detach the DC OUTPUT Unit from Jack Cover.
6. Remove the 6 lock screws
and detach the IF Unit.
1
2
3
4
5
6
7
4
7
5
SUB-3 POWER Unit
IF Unit
1
2
3
USB Fix Angle
USB Cover Holder
USB Unit
6
DC OUTPUT Unit
Jack Cover
SP-T Unit
AC INLET Unit
Click on the first or last page to see other LC-65XS1E (serv.man2) service manuals if exist.

