Sharp LC-42XD1EA (serv.man2) Service Manual ▷ View online
LC-42XD1EA/RUA
2 – 5
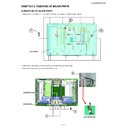
11.Remove the 4 lock screws
and detach the AV Unit, Main Unit and Power Unit.
12.Remove the 1 lock screw
and detach the EMC.
13.Remove all the connectors from PWBs.
13
14
FOR EMC
Power Unit
D-Tuner Unit
Set to Angle this direction.
13
14
Main Unit
AV Unit
Base Line
Base Line
RA:MAIN-RC
Wire "RA" to WH
SP:AV-SP
GASKET
for "SP" wire
Wire "RA" to WH
Wire "SP" to WH
Wire "SP" to WH
for "RA" wire
LC-42XD1EA/RUA
2 – 6
Wire "LA" to WH
Wire "LA" (to LA)
Wire "LA" curve like this
Wire "LB" to WH
Chassis Tray Unit
(with TUNER)
Wire "LV" (to CN1)
Wire "PL" (to CN2)
Wire "LB" (to LB)
Wire "LV","LB" to WH
Wire "LV","LP","LB" to WH
LC-42XD1EA/RUA
2 – 7
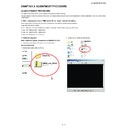
14.Remove the 1 lock screw
and 2 lock screws
and detach the Tuner Unit.
15.Remove the 4 lock screws
and detach the LCD Angle Top and Bottom.
15
16
Chassis Tray Unit
Tuner Unit (with Tuner)
Tuner Unit Sub Ass'y
B to B connector
Wire "LV" (to P2305)
15
16
17
Left
Right
Center
Center
17
LC-42XD1EA/RUA
2 – 8
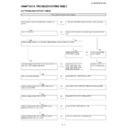
16.Remove the 6 lock screws
, 2 lock screws
and 1 losc screw
and detach the LCD Angle Top-Left/Right, Top-Center and Bottom.
17.emove the 2 lock screws
, 1 lock screw
and detach the 42” Fullhd Panel.
18
19
20
LCD ANG TOP-LR
LCD ANG TOP-C
LCD ANG TOP-LR
LCD ANG BOTTOM
TRAY ANG
Caution
Don't Fix Screw in this step.
Fix with tray chasis later.
Place hole on convex of TRAY ANG
to hexagonal pillar
18
20
19
21
22
FRONT COVER
Base of LCD Panel
positioning
42 FULLHD PANEL
Shorter
Longer
21
22
Display

