Sharp PG-MB60X (serv.man30) User Manual / Operation Manual ▷ View online
-17
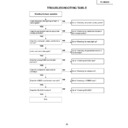
Quic
k Star
t
Page 30
4.
Adjust the angle
5.
Adjust the focus and the zoom
Page 32
7.
Turn the Power off
Page 29
6.
Select the INPUT mode
Page 33
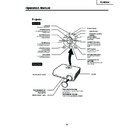
HEIGHT ADJUST button
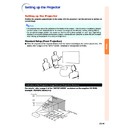
••••• This projector is equipped with an “Auto Keystone
Correction” function that automatically corrects
any trapezoidal distortion within the projected
image. The correction is made automatically
provided the vertical incline or decline is within 12
degrees.
any trapezoidal distortion within the projected
image. The correction is made automatically
provided the vertical incline or decline is within 12
degrees.
2
2
2
2
2
Adjust the projected image size
••••• Adjust the projected image size by adjusting
zoom.
On the remote control
Adjust by pressing the
ZOOM buttons.
On the projector
1
1
1
1
1
Bring the projected image into focus
••••• Bring the projected image into focus by
adjusting the focus.
On the remote control
Adjust by pressing the
FOCUS buttons.
On the projector
Select the “INPUT 1” using the INPUT buttons on the projector or the INPUT1 button on the remote control.
••••• When pressing '
'
'
'
'/"
"
"
"
" on the projector, input mode switches in order of :
INPUT 1
INPUT 2
INPUT 3
INPUT 4
••••• When using the remote control, press
/
/
/
to switch the INPUT mode.
On the remote
control
On the
projector
"
"
"
"
" On-screen Display (RGB)
Press the STANDBY button, then press that button again while the confirmation message is displayed, to put
the projector into standby mode.
the projector into standby mode.
••••• Unplug the power cord from the AC outlet after the cooling fan stops.
On the remote control
On the projector
"
"
"
"
" On-screen Display
1 Press .
2 Adjust by pressing \ or |.
1 Press .
2 Adjust by pressing ' or ".
Adjust the projector angle
••••• Adjust the projector angle using the HEIGHT
••••• Adjust the projector angle using the HEIGHT
ADJUST button.
-18
Storing the Projector
Lens cap
Fixing band
Info
Info
How to Use the
Storage Case
Storage Case
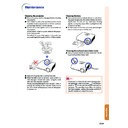
When storing the projector, attach the lens
cap to the lens, and place it in the supplied
storage case.
cap to the lens, and place it in the supplied
storage case.
1
Open the cover of the storage
case.
case.
2
Place the projector into the stor-
age case.
age case.
• Ensure the projector has cooled down
sufficiently before placing it in the case.
• Ensure the lens cap is attached to the
lens for protection.
• Place the projector into the storage
case with the lens facing the
handle.
handle.
• Ensure the projector is held in place
by using the fixing band.
3
Close the cover of the storage
case.
case.
4
Place the accessories in the front
pocket of the storage case.
pocket of the storage case.
• This storage case is only for storing the
projector.

