Sharp PG-F312X (serv.man2) Service Manual ▷ View online
XR-32S/XR-32X/PG-F212X/PG-F312X
2 – 6
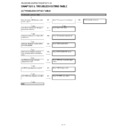
[4] Removing the BALLAST POWER Unit and R/C PWB
1. The lead wire of LFSW is removed from the cut mouth of the insulated seat.
2. Remove the 1 lock screw
and detach the Earth Plate. (XR-32S/32X only)
3. Remove the 4 lock screws
and detach the BALLAST POWER Unit.
4. Remove the R/C PWB.
9
10
Wire of
LFSW
LFSW
Ballast Power Unit
Cut mouth of
insulated seat
insulated seat
Earth Plate
Earth Plate
9
10
10
10
R/C PWB
Wire of
LFSW
LFSW
Ballast Power Unit
Cut mouth of
insulated seat
insulated seat
10
10
10
R/C PWB
(XR-32S/XR-32X)
(PG-F212X/PG-F312X)
XR-32S/XR-32X/PG-F212X/PG-F312X
2 – 7
[5] Removing the BALLAST POWER PWB
1. Remove the 2 lock screws
and detach the Fan and Fan Angle.
2. Remove the 4 lock screws
and detach the Power Shield (Top).
11
Fan
Fan Angle
Ballast Power Unit
11
12
12
12
Ballast Power Unit
Power Shield (Top)
XR-32S/XR-32X/PG-F212X/PG-F312X
2 – 8
3. Remove the 1 lock holder
and detach the Ballast Power PWB.
13
Power Shield (Bottom)
Remove the PWB in the slanting position
opening up the insulating plate.
opening up the insulating plate.
Ballast Power PWB
13
XR-32S/XR-32X/PG-F212X/PG-F312X
2 – 8
3. Remove the 1 lock holder
and detach the Ballast Power PWB.
13
Power Shield (Bottom)
Remove the PWB in the slanting position
opening up the insulating plate.
opening up the insulating plate.
Ballast Power PWB
13
Display

