Sharp MX-6240N / MX-7040N (serv.man29) Service Manual ▷ View online
MX-7040N DISASSEMBLY AND ASSEMBLY 10 – 33
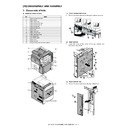
R. PWB section
(1) HL control PWB, High voltage 1TC PWB
1)
Remove the upper cabinet rear cover, and the rear cabinet.
2)
Remove the screw, and open the high voltage MC PWB
mounting plate downward.
mounting plate downward.
3)
Remove the screw, and open the MFP mother mounting unit
upward. Hang the support plate on the machine frame.
upward. Hang the support plate on the machine frame.
4)
Disconnect the connector. Remove the screw, and remove the
HL control PWB.
HL control PWB.
5)
Disconnect the connector. Remove the screw, and remove the
high voltage 1TC PWB.
high voltage 1TC PWB.
No.
Name
1
HL control PWB
2
SCN Mother PWB
3
High voltage 1TC PWB
4
High voltage MC PWB
5
SUB AC POWER PWB
6
SUB DC POWER PWB
7
AC POWER PWB
8
DC POWER PWB
9
PCU PWB
10
Driver PWB
11
High voltage 2TC PWB
12
MFP control PWB
13
HDD
13
12
12
6
10
9
7
11
10
4
3
5
2
1
1
2
1
2
3
1
1
2
2
3
1
1
2
1
2
1
1
2
2
2
2
2
2
1
3
MX-7040N DISASSEMBLY AND ASSEMBLY 10 – 34
(2) SCN Mother PWB
1)
Remove the upper cabinet rear cover, and the rear cabinet.
2)
Remove the screw, and open the high voltage MC PWB
mounting plate downward.
mounting plate downward.
3)
Remove the screw, and open the MFP mother mounting unit
upward. Hang the support plate on the machine frame.
upward. Hang the support plate on the machine frame.
4)
Disconnect the connector, and remove the snap band.
Remove the screw, and remove the PCI support plate.
Remove the screw, and remove the PCI support plate.
5)
Disconnect the connector, and remove the screw. Disconnect
the connector, and remove the SCN Mother PWB.
the connector, and remove the SCN Mother PWB.
CAUTION: Since the MFP control PWB and the SCN Mother PWB
are connected in board to board, be careful when disas-
sembling and assembling.
sembling and assembling.
(3) High voltage MC PWB
1)
Remove the rear cabinet.
2)
Disconnect the connector. Remove the screw, and remove the
high voltage MC PWB.
high voltage MC PWB.
1
2
1
2
3
1
1
3
4
3
1
3
2
2
1
1
1
1
1
1
1
4
2
2
2
2
2
3
2
1
2
2
2
2
2
2
1
1
3
1
1
1
1
MX-7040N DISASSEMBLY AND ASSEMBLY 10 – 35
(4) SUB AC POWER PWB, DC POWER PWB
1)
Remove the rear cabinet.
2)
Disconnect the connector. Remove the screw, and remove the
PCU PWB mounting plate.
PCU PWB mounting plate.
3)
Disconnect the connector. Remove the screw, and remove the
earth terminal. Remove the screw, and remove the AC cord
mounting plate.
earth terminal. Remove the screw, and remove the AC cord
mounting plate.
4)
Disconnect the connector. Remove the screw, and remove the
duct unit.
duct unit.
5)
Disconnect the connector.
6)
Remove the harness from saddle, and remove the snap band.
Remove the screw, and remove the AC PWB mounting plate.
Remove the screw, and remove the AC PWB mounting plate.
2
3
2
2
2
2
1
2
1
2
1
2
1
2
1
2
1
2
1
1
2
2
3
4
4
5
3
1
1
2
2
3
2
2
2
3
2
2
2
2
1
2
1
MX-7040N DISASSEMBLY AND ASSEMBLY 10 – 36
7)
Disconnect the connector. Remove the screw, and remove the
SUB AC POWER PWB.
SUB AC POWER PWB.
8)
Disconnect the connector. Remove the screw, and remove the
DC POWER PWB.
DC POWER PWB.
(5) SUB DC POWER PWB
1)
Remove the rear cabinet.
2)
Disconnect the connector. Remove the screw, and remove the
SUB DC POWER PWB.
SUB DC POWER PWB.
(6) AC POWER PWB
1)
Remove the rear cabinet.
2)
Disconnect the connector. Remove the screw, and remove the
AC POWER PWB.
AC POWER PWB.
(7) PCU PWB
1)
Remove the rear cabinet.
2)
Disconnect the connector, and remove the harness from sad-
dle. Remove the screw, and remove the PCU PWB.
dle. Remove the screw, and remove the PCU PWB.
(8) Driver PWB
1)
Remove the rear cabinet.
2)
Disconnect the connector, and remove the harness from sad-
dle. Remove the screw, and remove the driver PWB.
dle. Remove the screw, and remove the driver PWB.
(9) High voltage 2TC PWB
1)
Remove the upper cabinet rear cover, and the rear cabinet.
2)
Remove the screw, and open the high voltage MC PWB
mounting plate downward.
mounting plate downward.
2
2
1
2
1
2
1
2
2
2
2
2
1
1
2
2
1
2
2
1
1
2
1
2
2
2
1
2
2
3
2
ޓ
2
ޓ
2
3
2
2
2
1
1
2
1
1
1
2
1
1
1
1
1
3
3
3
3
3
4
3
3
3
2
1
1
1
1
1
1
3
3
3
3
1
3
3
4
2
1
1
1
2
1
Click on the first or last page to see other MX-6240N / MX-7040N (serv.man29) service manuals if exist.

